Sometimes you just want to be able to listen to some music straight from your WordPress website. Or, maybe you are trying to share files for others to enjoy. Either way, having an MP3 music player on your website definitely has some advantages.
Why Add an MP3 Player to Your Website?
Adding an MP3 music player to your site will allow you to listen to all of the music you want without having to go to another source. It also allows you to stream music from others, and let your site users enjoy the music you have posted while they browse your site.
Furthermore, if you have a music-related website, then you probably have the need to embed or add several different MP3 music players for varying reasons.
If you have been wondering how to add a WordPress MP3 player to your website but have not been sure where to start, then you are in the right place.
Today I am going to show you how you can use a great WordPress plugin to add an MP3 music player to your website. The process isn’t that difficult, you just need to know what to use and how to set it up.
Let’s take a look at the plugin and see what it has to offer.
MP3 Music Player by Sonaar
MP3 Music Player by Sonaar is a powerful, yet lightweight audio player for WordPress. It is one of the best MP3 plugins out there, and gives you a lot of functionality and features.
Once the plugin has been installed and configured, you will have the ability to add an unlimited number of playlists to your site. You can add albums and audio tracks to any post or page using a number of different techniques.
Post your WordPress MP3 music player using the built-in Gutenberg block, the Elementor widget (for those of you that use Elementor), or by using standard shortcodes that come with the plugin.
The MP3 Music Player by Sonaar plugin is very flexible and compatible with almost every theme and plugin. It also comes with a ton of built-in features. Some of the best ones include:
- Ability to create unlimited audio albums & playlists
- Upload unlimited MP3 and M4A files
- Support MP3, audio, and radio streaming
- Embed audio players numerous ways
- Compatible with all themes and plugins
- Tons of color and configuration options
- Add buy now and download now links
- WooCommerce support
- Google Font support
- Real-time Dynamic Soundwave FX (Waveform by wavesurfer.js) or Synthetic Soundwave for faster loading speeds
- Call to action buttons
- Social Icons
- HTML5 player that is fully responsive
Basically, the Sonaar plugin goes you all the tools you need and more to add as many MP3 music players to a site as you want.
Let’s take a look at how to get the plugin installed and configured, and then go over all the steps to get it working together.
Note: There is a pro version of this plugin. it does give you more options and functionality. However, this tutorial is based on the free version. It has all you need and more to add a music player.
1. Install and Activate the Plugin
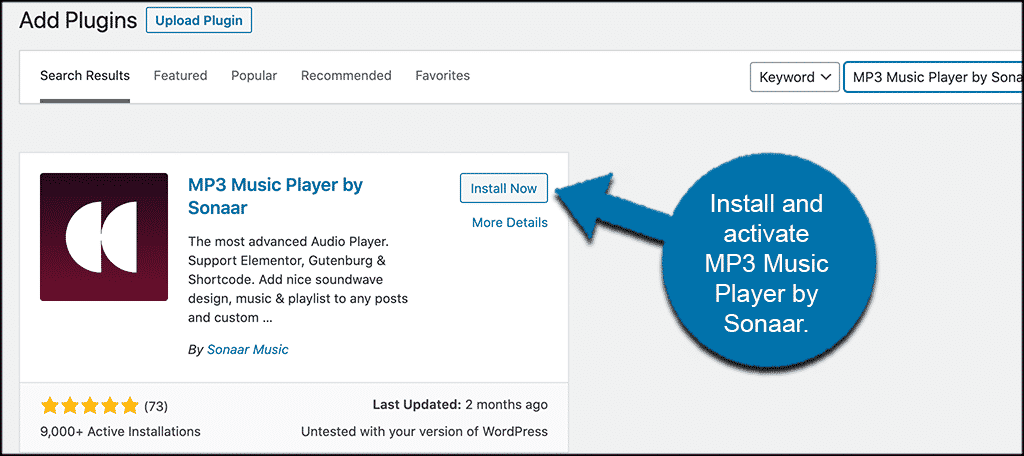
In order to add an MP3 music player to your website, you first need to install and activate the plugin. You can do this by heading over to the Plugins page of your WordPress admin dashboard.
Once there, just search the plugin by name using the search field and install and activate it directly from there.
Now that the plugin has been installed and activated, you want to go ahead and access the main settings and configuration page. To do this, click on MP3 Player > Settings.
You will see this is now an option in the left menu area of the dashboard after you activate the plugin.
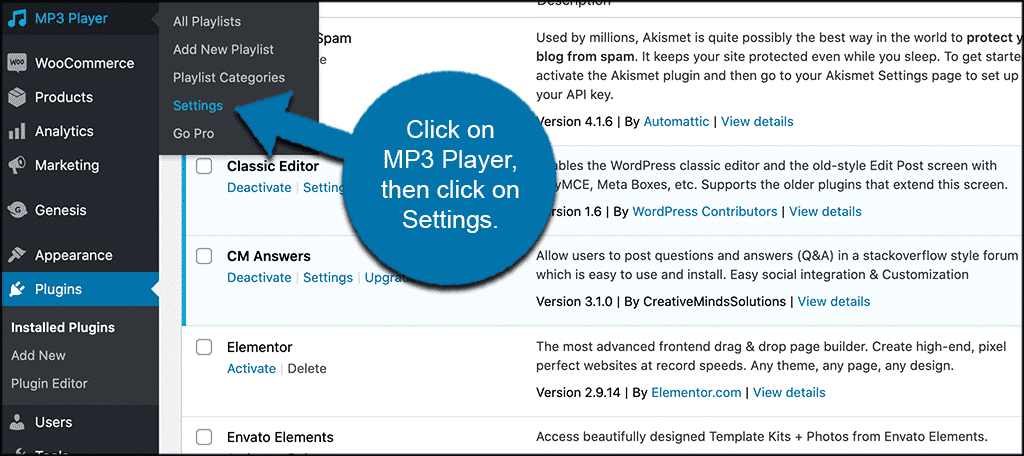
This takes you to the area where you can configure the MP3 music player to your specific standards and get it set up.
2. Configure the MP3 Player
At this point, you should be looking at all the settings for the plugin. There is only one page that features a few different sections to go over and set up how you see fit.
The top of the page features the general settings for the audio player. Go ahead and select the Waveform Type you want, and enable the player on the post types of your choice.
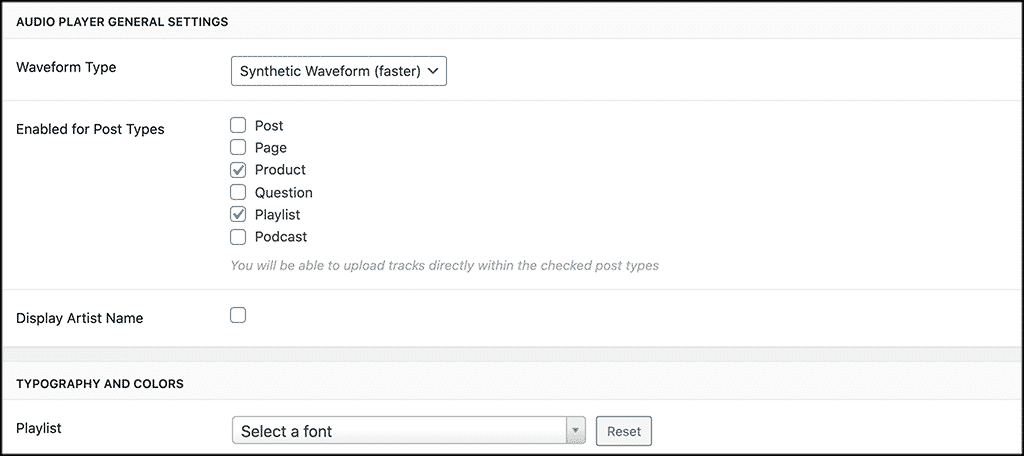
Now scroll down a little and make all the selections you want for typography and colors. These will be font and color selections for your playlists, album titles, button colors, and other layout styles.
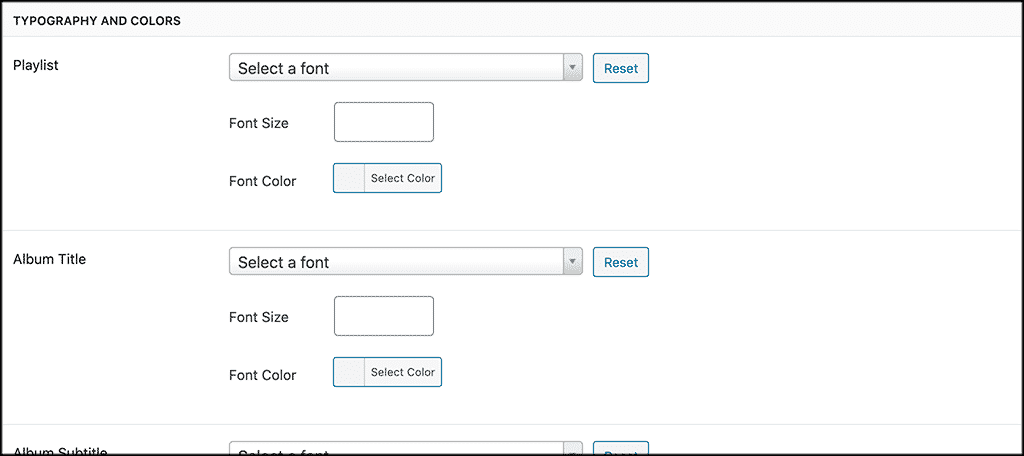
At the very bottom, you see all the button color options, as well as the option to choose album cover image sizes. Make the selections according to what you prefer.
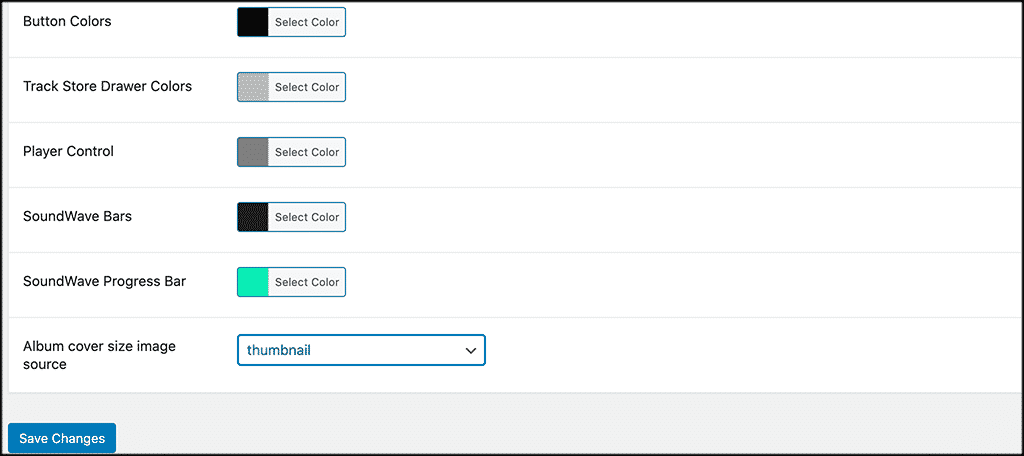
Click on the “Save Changes” button when you are done making selections and you are all set. You have successfully configured the Sonaar plugin.
Let’s add an MP3 music player to a page so you can see how it works.
3. Add New Playlist
In order to get an MP3 player on your site, you need to create a playlist. Again, you can put the playlist on any post or page you want, based on how you configured your setup options.
In this case, we are going to add the playlist, and then put it on a page.
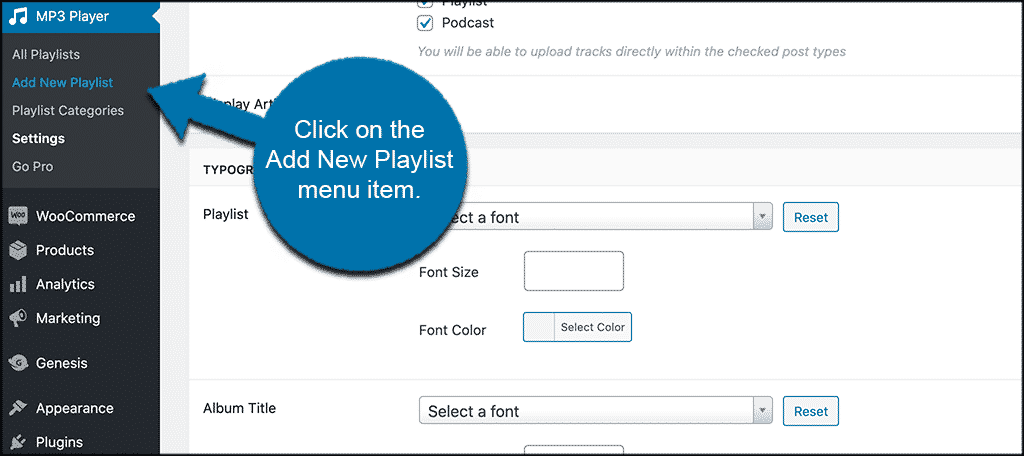
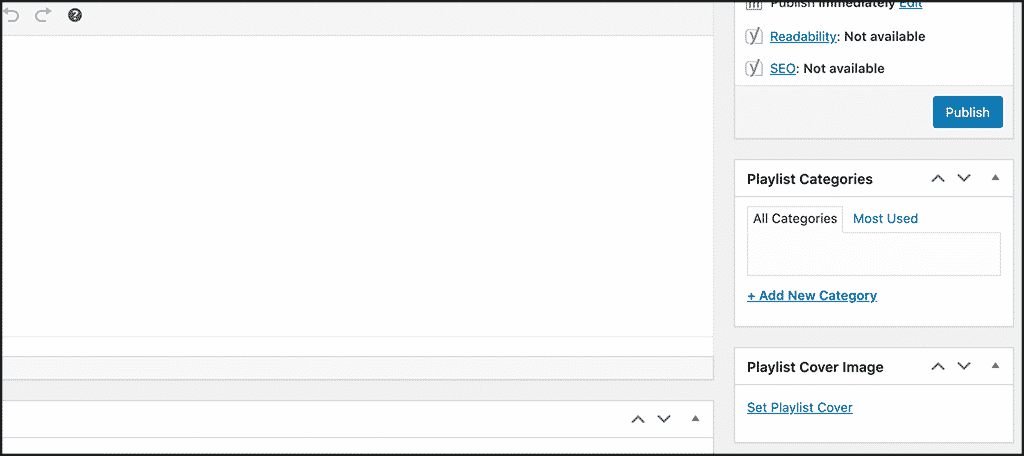
Click on the “Add New Playlist” tab that is located in the left menu area. You will see it under the main MP3 Player tab.
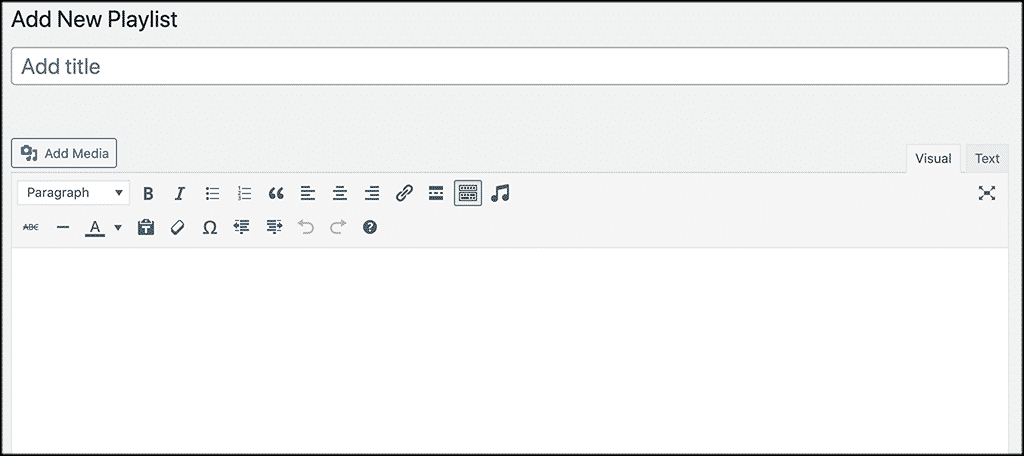
This opens up the WordPress editor, where you can add a new playlist. Go ahead and put your title and some playlist info in first.
If you have a playlist category, or a cover image, add that in as well. You will see those selections on the right side.
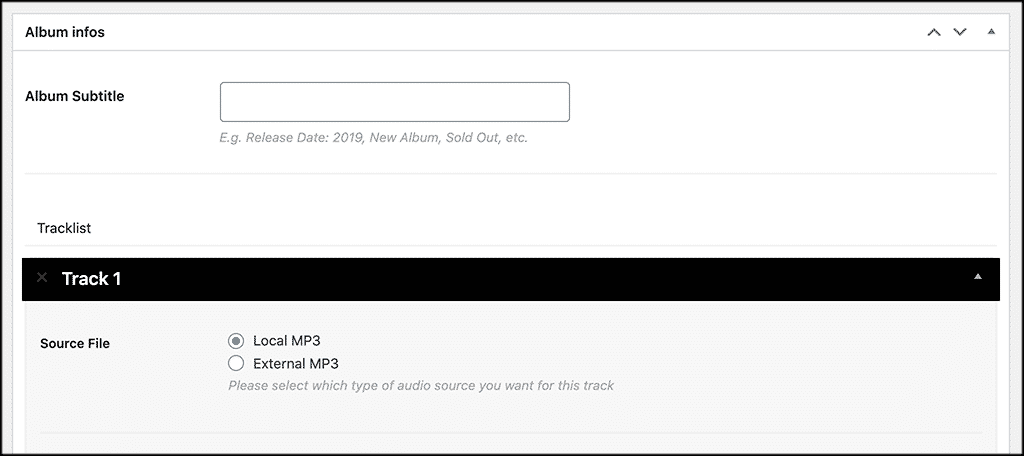
Now, scroll down the page some until you see the “Album Info” section. Here you can add a subtitle if needed, and then you can add the track info that is going to be included on the playlist.
Below that, you can enter the MP3 options, along with information on where to buy and/or download the track.
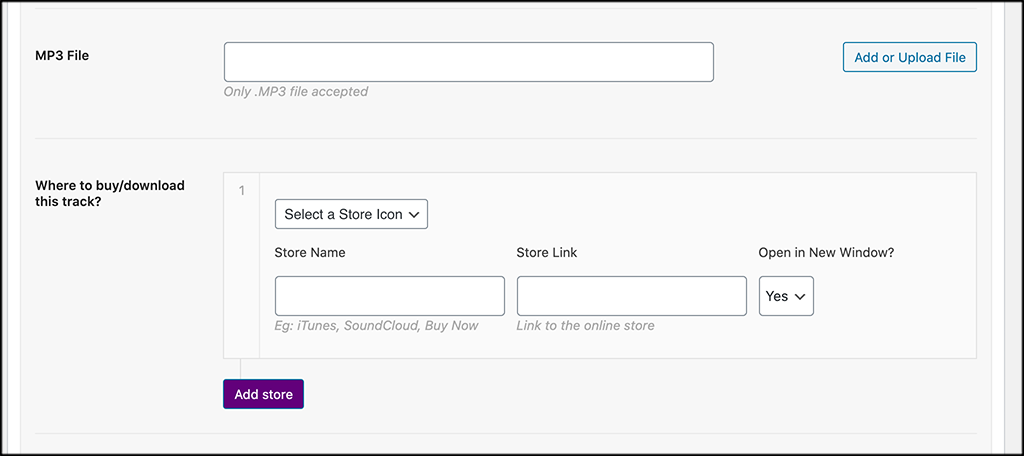
Note: if you are adding an actual full album, then the bottom of the page has a setting asking where someone can buy the full album.
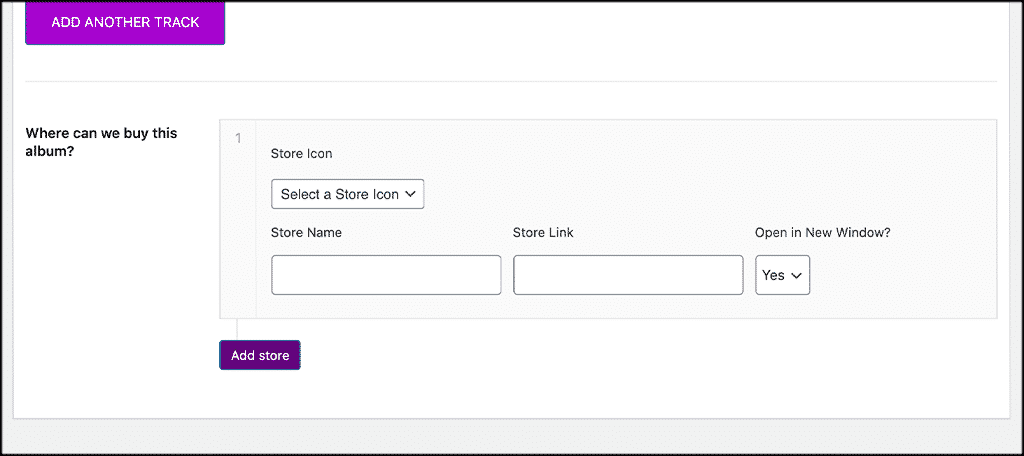
If you want to keep adding tracks to the playlist, then click on the “Add Another Track” button and simply repeat the process from above.
When you have entered the album info or completed entering all the tracks you want, click on the “Publish” button and that will publish the playlist and make it available to put on a post or page.
4. Add MP3 to Page or Post
Now that you have your first playlist in place, it is time to add it to the page you want. Go to the Pages section of your website.
Remember, you can add the playlist using a selection of methods. There is a built-in block for the Gutenberg editor, and Elementor widget for those of you using that page builder, or a standard shortcode.
For this example, let’s use the classic editor, as this is the simplest way to do it.
Open up the page where you want to add the playlist. On the top of the editor, you will see there is now a music icon. Go ahead and click on that.
![]()
When you do this, a popup box will appear. Click on the playlist you want to insert, and fill out any other relevant info in the box. Then click on the “Insert AudioPlayer” button to attach it to the page.
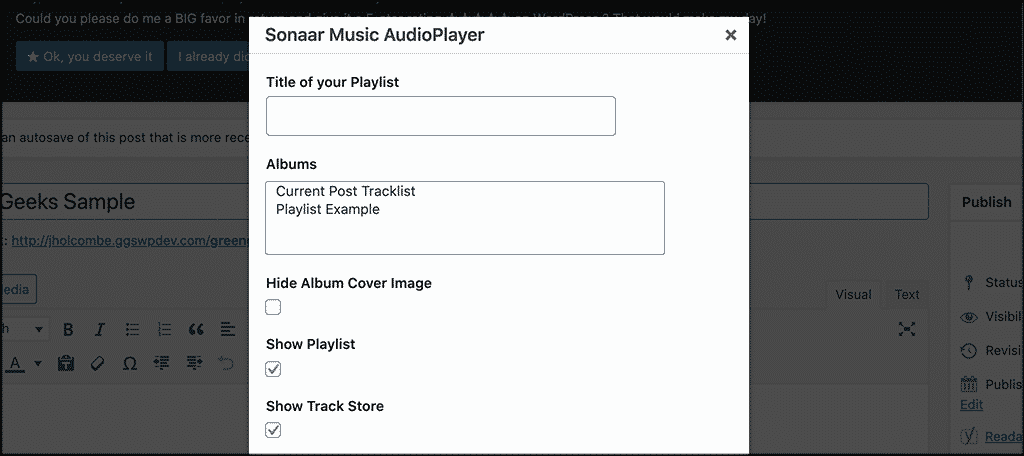
A shortcode is automatically generated and all you have to do from here is publish your page.
Once the page is published, take a look and see how your new playlist MP3 music player looks on the front end of your website.
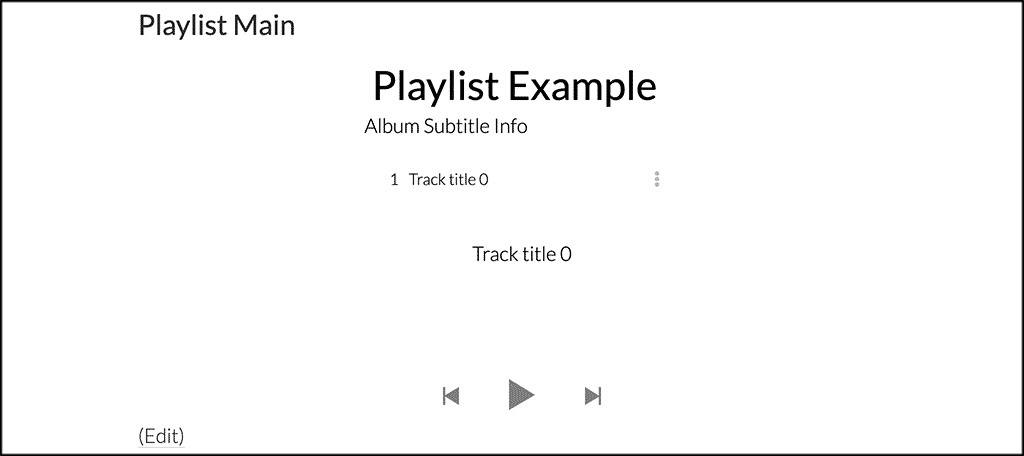
You can see ours is pretty plain. Yours will give off the look of your configuration and settings. So match it with your site colors and integrate it well.
That’s it! You can repeat this process as many times as you want.
Final Thoughts
Adding an MP3 music player to your website does not have to be a difficult task. Quite opposite actually, as you will have a lot of fun adding all the albums and tracks you want.
Now you have a good starting point and a solid plugin to use to complete this process. I hope this tutorial was able to show you how easy it really is to add an MP3 music player into your WordPress website.
Have you been using an older embed style to add different music players to your site? Did you find this plugin to be much easier to configure and use?
I really love this plugin, I tried it on the wordpress classic theme and it is fine. However I cannot find a way, very simply to add a nice background, Not a template, Not a theme. Just to make it a bit more nice. I am new to wordpress, but at 66 years, 45 of them working on computers, programming, music compositions, videos etc.. I cannot understand why such a simple background and inserting a picture can be done. Thanks for your wonderful article.
You can do this by using the block editor that WordPress provides.