
As content ages in WordPress, there comes a time when it must be revised due to outdated information, or to match current writing standards. When that happens you may want to schedule the content update to go live at a specific time.
While this is not possible with the default WordPress tools, it is possible with the right plugin. And this can have multiple benefits for your website, just like scheduling when a post goes live on your website.
For instance, you may want to schedule an update to a Christmas decorations blog to go live on December 1st but would probably want to write it in advance. There’s an infinite number of possibilities where this is useful.
Today, I will demonstrate how to schedule when a content update goes live on your WordPress site.
Why Schedule A Content Update In WordPress?
Now you may be thinking to yourself, the reason I am going to update content is that it contains outdated information or something similar, why would I not want to immediately make the update go live?
While in some cases that is the best option, you also want to make sure your update has the most impact.
And that usually means making your content go live when it will be able to garner the most views. This means you’ll want to also set up marketing for it on your social media platforms so users know to check it out.
If you just post it on your website, there’s a good chance no one will see it for quite some time, as older content usually gets brushed aside by users. Thus, greater care needs to be taken when it comes to punching content updates.
Luckily this is easy to do with the PublishPress Revisions plugin.
How to Set WordPress to Schedule a Page Update
Trying to update a piece of content in WordPress is not always the easiest thing to do when a page is live. If you don’t finish making the changes in one go, you can’t save them, or else the page would be updated.
The PublishPress Revisions plugin fixes this by providing a safe place to work on a content update in WordPress. Writers can update the content and then send approval to the editor, who can then schedule the content for release.
Of course, you can make use of this if you run your website by yourself, so don’t worry. Thus, it’s a great option for websites of any size.
Step 1: Install PublishPress Revisions
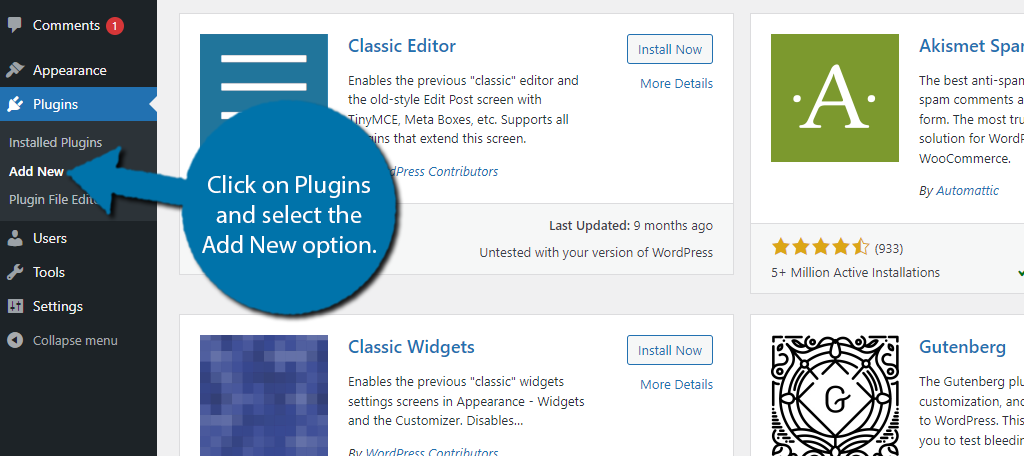
Let’s start by clicking on Plugins and selecting the Add New option on the left-hand admin panel.
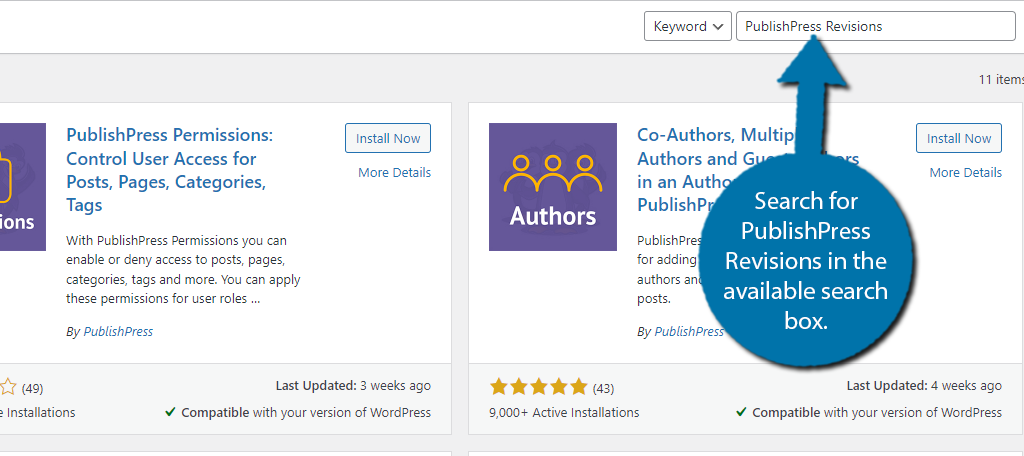
Search for PublishPress Revisions in the available search box. You will immediately notice that there are a ton of plugins from PublishPress, so be sure to install the correct one.
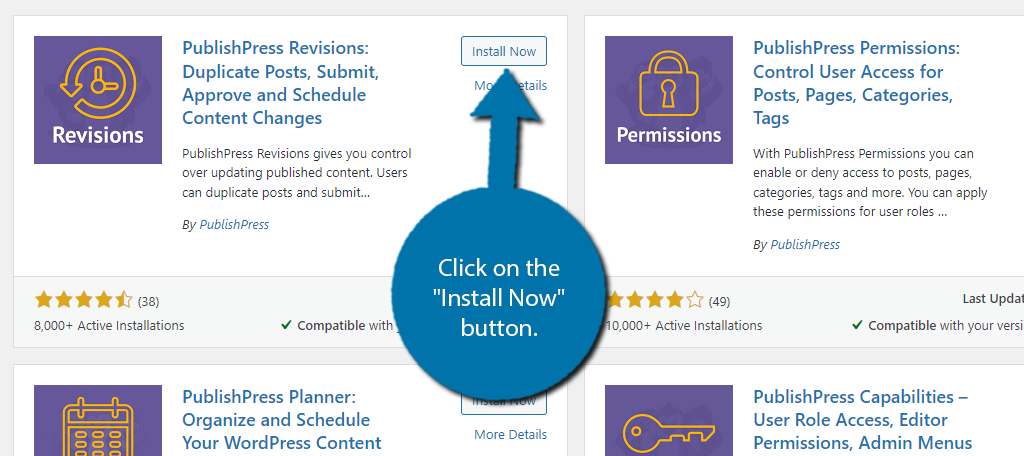
Scroll down until you find the PublishPress Revisions plugin and click on the “Install Now” button and activate the plugin for use.
Step 2: Configure the PublishPress Revision Settings
This plugin has a variety of settings you can configure, but honestly, the default options will work well for most websites. For this reason, you can actually just skip this section, as you don’t need to change settings. However, I do want you to be aware of them.
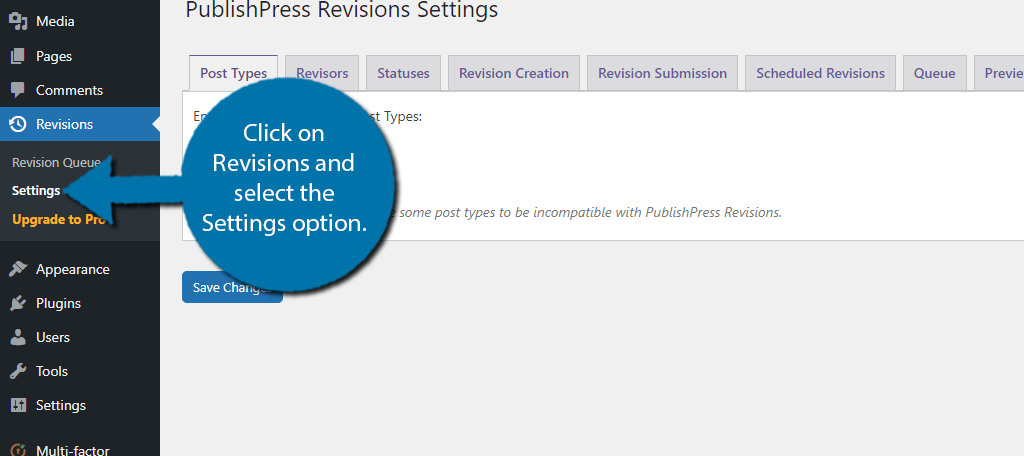
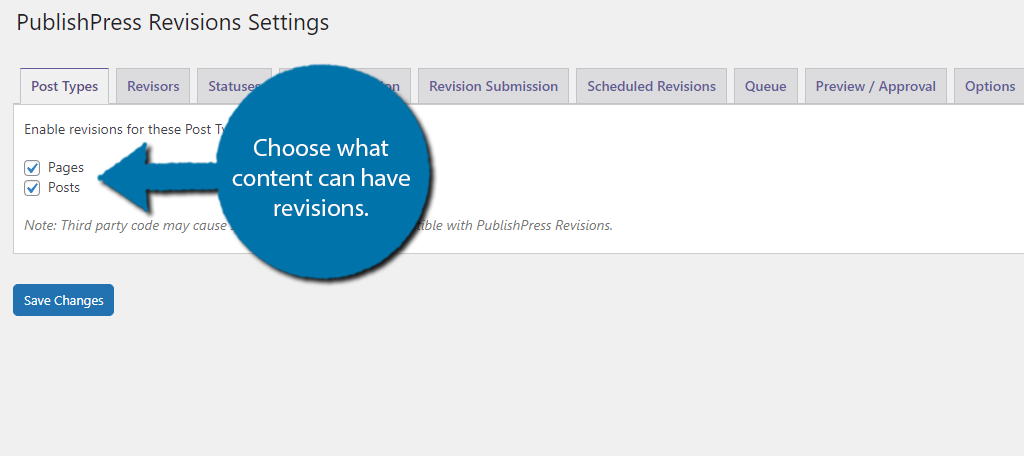
To find them, click on Revisions and select the Settings option.
There are several tabs of settings you can go through that change how revisions are handled, who can make them, and so forth. I will not go over them as they just consist of checking a box. That said, I recommend looking them over.
The most important settings are actually the first ones. These determine what type of content you can create revisions. By default, it is set for both pages and posts, which is most likely what you want.
Make sure the content you want to create revisions for is selected, otherwise, you can’t do it.
Another key setting to consider is the ability to change publish date. This will make it when a piece of content has been revised, the publish date will become the date the revision goes live.
There are more, but the settings are fine the way they are, thus change them at your own discretion.
Step 3: Create A Revision
With that out of the way, you are ready to start creating revisions. To begin open any existing post or page you want to revise. On the right-hand side, you should now see an option to create a new revision.
Click on the “New Revision” button. If you do not see this button, then you do not have revisions active for the content type you are viewing. Go back to the settings to fix this.

Two more buttons will appear. Click on the “Edit Revision” button.
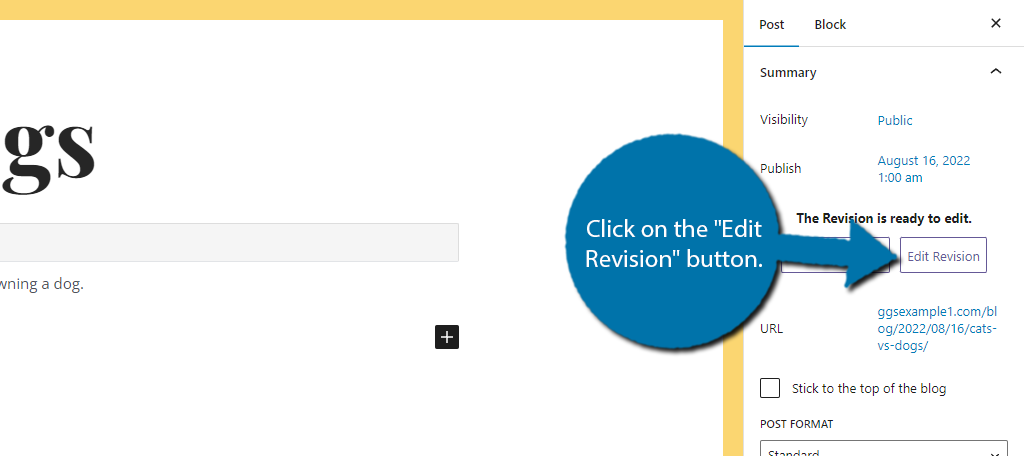
This will open up a new tab that looks like a regular post or page editor in WordPress. And for the most part, it is, but the main difference is this is a revision that can be stored and worked on over time.
Begin revising your content. Once that is done, you can choose what time to publish it. To do so, click on the date.
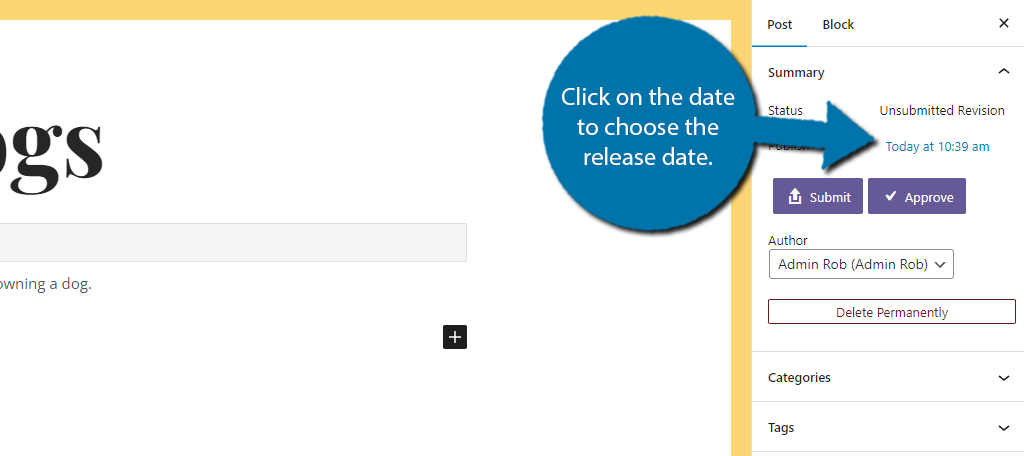
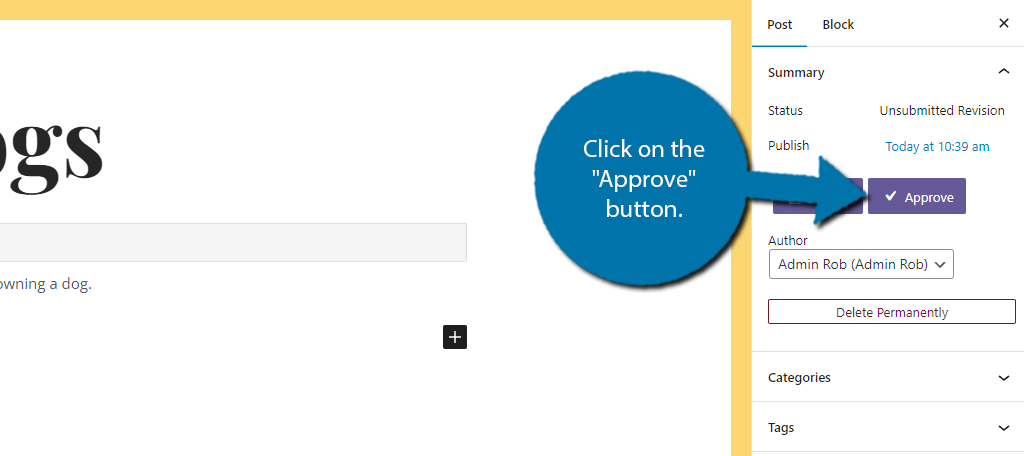
This will pull up a calendar where you can pick the date and time when the content update will automatically go live. Then you just need to click on the “Approve” button to finish.
Note: If you do not have the necessary permission to approve it, you will need to submit it for someone else to do this.
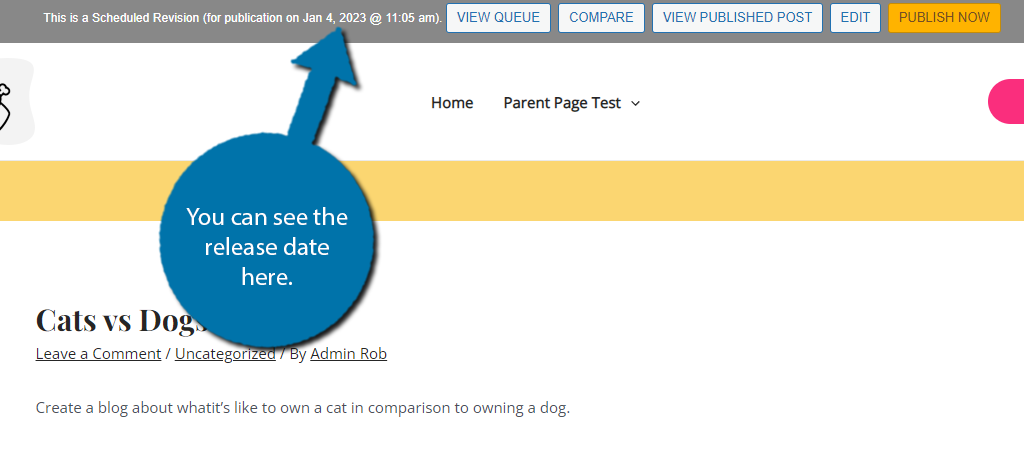
You will then be brought to the post and can see when the revision will go live at the top. If you didn’t schedule the content update, it will go live immediately.
And that’s it, you now know how to schedule automatic content updates in WordPress. Be sure to get the maximum impact out of your content releases.
That said, always prioritize fixing outdated content ASAP, or at least put a disclaimer that it is out of date and you are working on a revision. Not doing so can hurt your reputation.
Can I Schedule Multiple Revisions At Once?
Absolutely!
There are no limits on how many revisions you can schedule, but just be aware that if you schedule a lot of them to release at once, you could run into an issue where some appear later or potentially don’t get released.
This isn’t an issue with the plugin and has more to do with how WordPress handles scheduled content. For more detailed information, you need to look into the Missed Schedule Publishing error.
Keep the Content Fresh and Fluid
Your visitors are not the only ones who appreciate updated and relevant content. In fact, as I mentioned, keeping posts current is part of how Google ranks material in search. By keeping the site fresh and the content fluid, you engage everyone. Bots and humans alike.
And as you can see from this tutorial, it’s actually really easy to create a revision. More importantly, you can actually take your time when updating content for live pages.
It’s far better than having to revise the entire piece in one go.
What tools do you use to keep the site relevant to your target audience? How often do you use scheduling as part of your content marketing strategy?
Plugin will not accept the new date. Just remains blank.
You may have to contact the plugin developer. It works in our testing environment. This means we cannot duplicate your issue. Apologies, and I hope you find a solution.
Thanks for sharing
You’re welcome.
Thanks for Schedule Automatic Update
This plugin is not tested with the recent 3 WordPress versions, I install and try to active but lost my control 🙁
Thank you for bringing this to my attention. It’s difficult to maintain a website with more than a thousand tutorials. I’ll have it updated as soon as possible.