These days, backing up a website is as important as ever. There are several ways to do this, and you may have your favorite way already in place. That being said, one of the best ways to back up WordPress files is to use a plugin. Today, I will show you how to do this using a BackupGuard.
You never want to get caught in a position where you have lost all the hard work you put into a website. However, this is reality, and it can happen. That means that not only do you lose site files, but all the design, code, and updates you personally did as well.
The best web hosting companies will provide you with nightly backups. However, there is also a way to back up site files using a WordPress backup and restore plugin.
Let’s take a look at the plugin in question and see all that it has to offer.
BackupGuard – WordPress Backup and Migrate Plugin
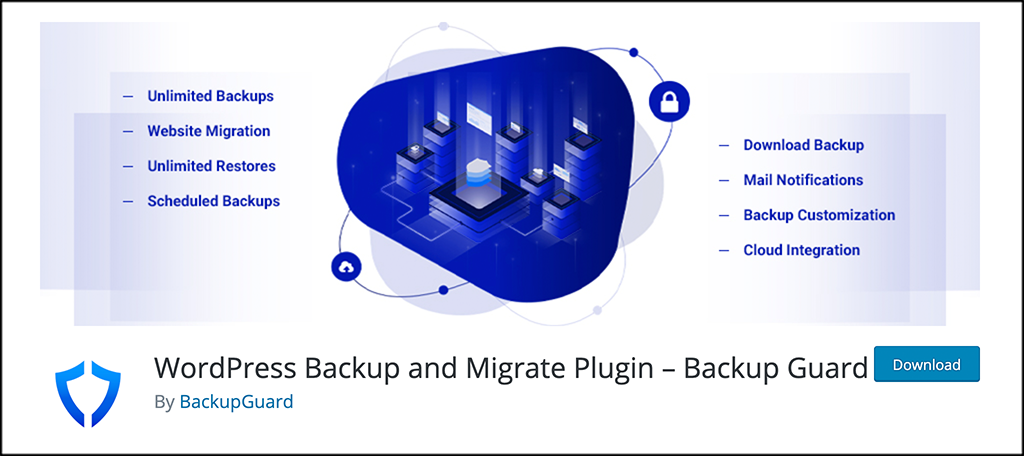
BackupGuard – WordPress Backup and Migrate Plugin is exactly that. A top of the line, complete, WordPress backup plugin that provides you a ton of functionality and features.
Despite being packed full of functionality, the plugin is lightweight, easy to use, and can be a lifesaver if something happens and your site goes down or you lose files. BackupGuard not only offers a smooth and easy way to backup and restore files, but also a way to migrate websites.
Once the plugin is installed, you will be able to easily backup and restore your WordPress files, database, or both. As mentioned above, it comes packed with features, including a cloud backup option to DropBox. Some of the other highlights include:
- Site backup: backup your website as many times as you want
- Backup files, database, or both
- Choose what folders to backup
- Select database folders to backup
- Restore your site file at any time
- Selective file or database restoration
- Download backups to your computer
- Import backups (no FTP required)
- Multisite backups supported
- Cancel the backup process whenever you want
- Explore all backup files and restore log files
- Specify custom exclude paths
- Exclude database tables
- Live progress bar to view when needed
- Dropbox upload available
- Schedule site backups
Basically, the BackupGuard plugin is a one-stop plugin for those of you who want to fully control all your website files and database backups, restorations, and migrations.
Back-Up WordPress Files and Database
Let’s dive headfirst into the process and go through the steps of setting up the plugin so that you can back up WordPress files. Before you know it you will have your site backed up and safe, no matter what happens.
Step 1: Install and Activate Plugin
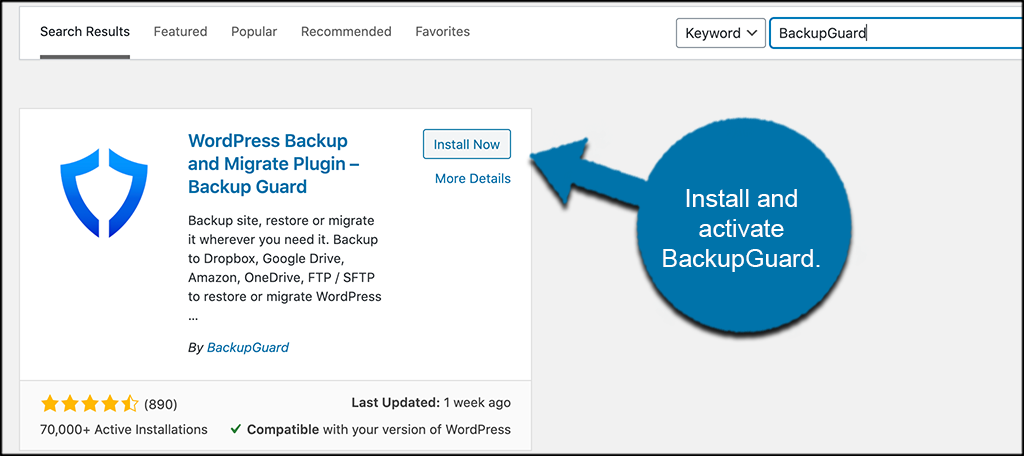
In order to start creating a website file and database backups, you first need to install and activate the BackupGuard plugin. You can do this by heading over to the Plugins page in the WordPress admin dashboard of your website.
Just use the search field to search the plugin by name. When it pops up, install and activate it right from there.
Step 2: Access the Plugin Configuration and Settings
After you install and activate the plugin, you will want to access the main configuration and settings area for it. You can do this by clicking on the “BackupGuard” tab located in the left side menu area of the dashboard.
You see that this is now an available option after you activated the plugin.
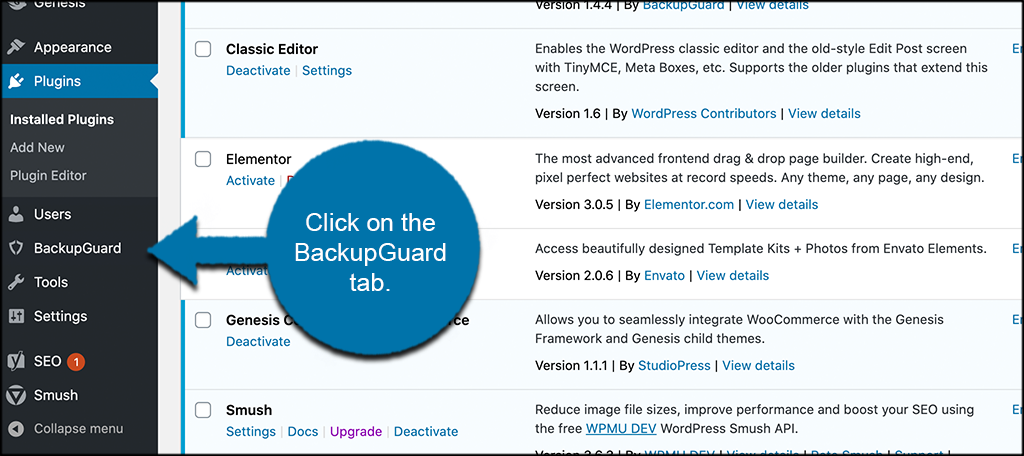
This takes you to the configuration and settings. At this point, you can start to explore everything and see all the tools you have.
Step 3: Add Code to Website (if applicable)
At this point, you are on the main configuration page for the plugin. At the very top, you will see a notice that states the following:
“BackupGuard Warning: Your website is running on a LiteSpeed server. If you are experiencing problems while backing up or restoring, try to add the following code to your .htaccess file:”
RewriteEngine On
RewriteRule .* – [E=noabort:1]
Many sites will get this warning. So, if you are having any issues, go ahead and perform the function above and add that code to the .htaccess file.
Step 4: Review Settings Tab
You see that there are several tab options on the main configuration page. We won’t go through all of them, but let’s touch on a couple. These include:
- Backups
- Cloud
- Schedule
- Settings
- System Info
- Services
- Support
- Why Upgrade
Click on the “Settings” tab and let’s take a look. Go ahead and fill in the plugin settings on how you see fit for your setup. You should do this before you create a backup.
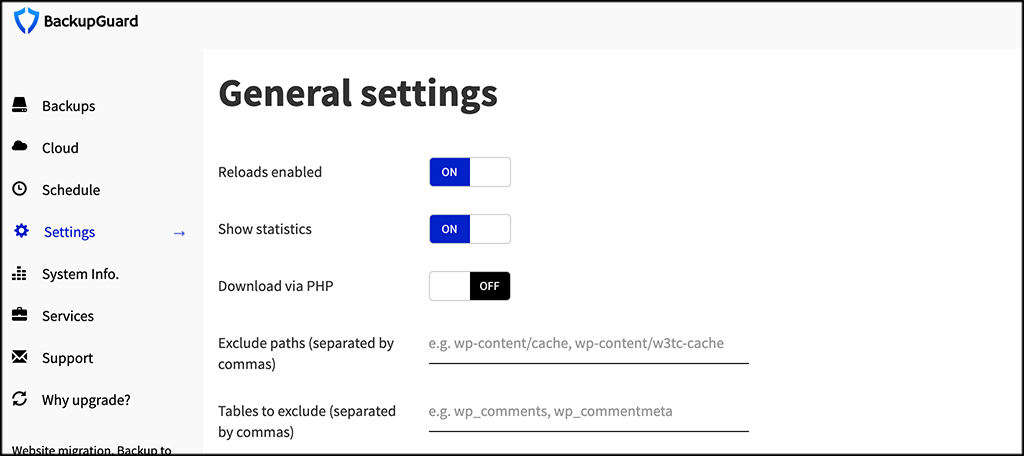
Click the “Save” button when you are finished and let’s move on.
Lastly, before you create your first site backup, feel free to check out the other tabs. They may come in useful at certain points down the road.
For instance, the “Cloud” tab will allow you to save files to Dropbox automatically. The “Schedule” tab allows you to schedule backups according to your own preferences.
There is also a “Support” tab for accessing the plugin developers for questions, as well as a “System Info” tab for viewing the info and how it is performing on your system.
Step 5: Create a Backup
You are now ready to create your first website backup. Click on the “Backups” tab to start.
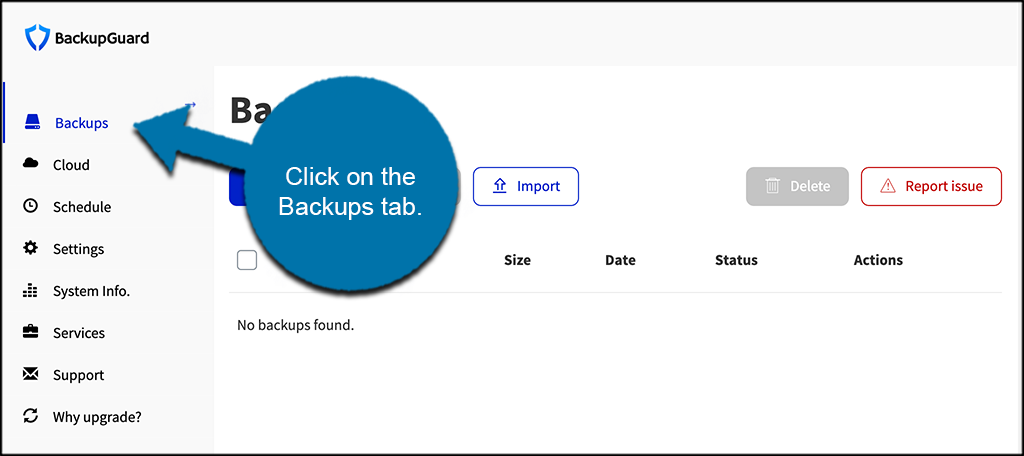
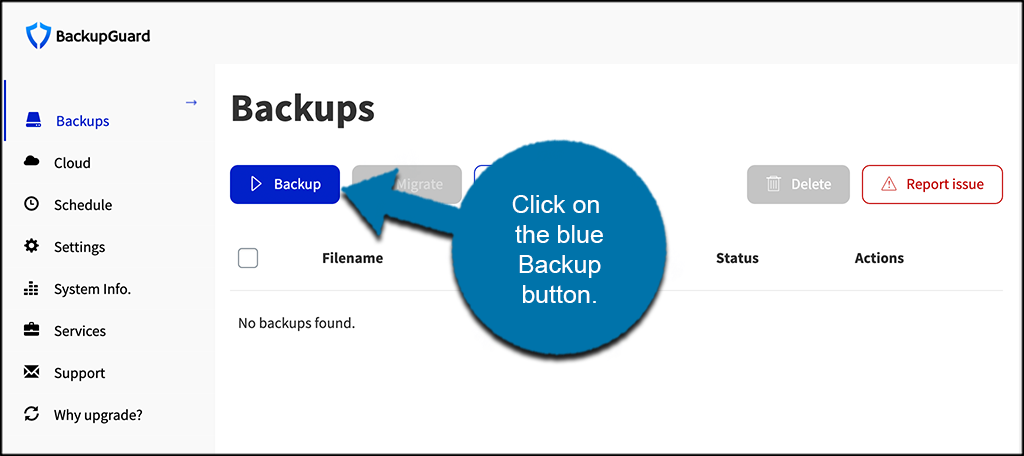
You see there are options for backup, import, etc. There is also a migration button. Let’s touch on that for one second.
Note: BackupGuard free version will help you migrate your website in case there is no change in the domain or the Database prefix. If there is any change in the domain or the DB prefix, BackupGuard Pro will be of use. So it is up to you whether you feel you need the pro version or not for migration.
In this instance, we are creating a backup. Click on the blue “Backup” button to start.
A popup box will appear with a selection of backup options. In this case, we are going to select the “Full backup” option to demonstrate.
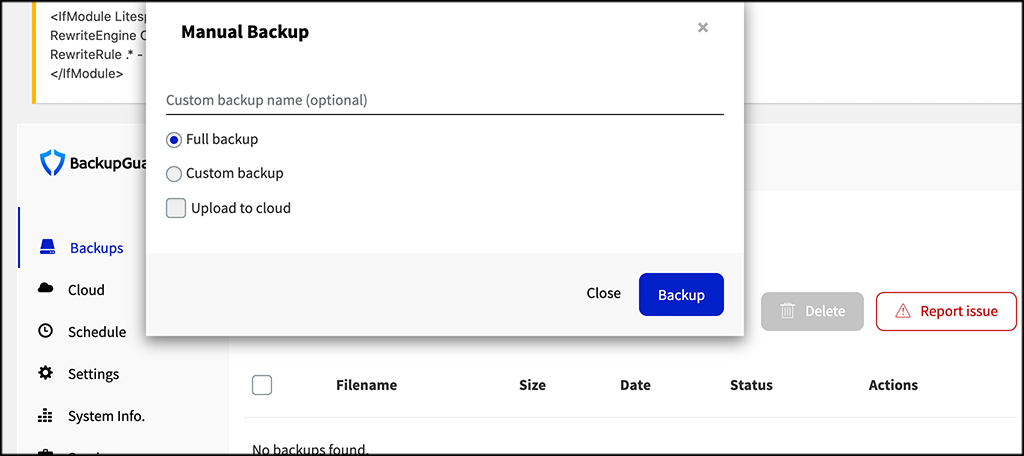
Make that selection and then click on the “Backup” button to start the process.
The backup will start. How long it will take depends on the size of your website. You can see that a file icon was generated and you are able to view the backup progress as it goes.
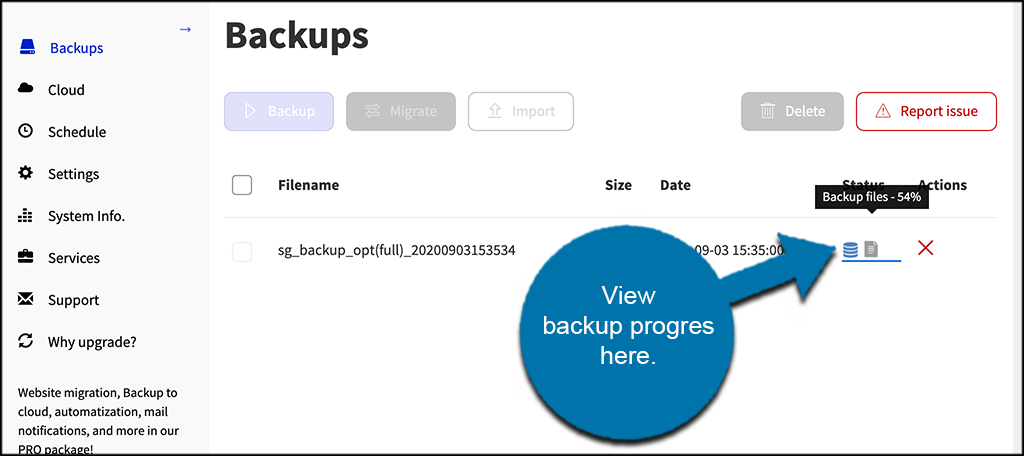
Once the backup is finished, the plugin shows you a “Success” message in green under the Status column.

That’s it! You have successfully created a website backup. You can download it to your machine, use the restore button when needed, or delete it and do another one.
Remember, you can create as many website backups as you want. There is also the option of creating backups of only certain files. Play with it more until you are comfortable, but as of this point, you should be all set.
Final Thoughts
Backing up your website files and databases is a very smart move. Doing this means that you have a backup of your own files at any point in time they are needed. You can use them to restore the site you worked so hard on, should something happen.
There are a few different ways that you can do this, but using BackupGuard is one of the easiest ways, and also one of the safest and quickest. It puts the process in your hands, and allows you to import and export site files without having to use FTP.
I hope this tutorial showed you how easy it is to back up your WordPress site using BackupGuard. Try it out and see what you think.
Have you been creating your own website backup files already? What other plugins or techniques do you use to do this?
