
Have you ever noticed how every theme demo is full of content? This is often dummy content that the developers generated or created themselves to help show off what is possible with that theme or tool.
Without it, themes demos would often be blank, which wouldn’t help show off the theme or plugin, or alternatively, developers would spend significantly longer creating content, which could drive up the price of development.
Luckily, developers won’t need to worry about this because there are several tools you can use to generate dummy content in WordPress.
Today, I will demonstrate how you can create dummy content using four methods.
How Dummy Content Helps Developers
You may think that creating dummy content for a theme or plugin is easy, and honestly, you are correct. But what most people don’t consider is how much time it actually takes.
You need to essentially replicate a full website for users to get an idea of what their content would look like in your theme.
Even if you are loading a site with dummy content, creating a site’s worth of it is going to require a significant time investment. And if the content is too low quality, well, it could reflect badly on your actual theme as users may think that their content will look bad on it.
As such, dummy content is an essential tool for developers because it allows them to showcase what real content will look like on their website. Without it, users cannot get an idea of what a theme or plugin is capable of doing if they don’t have an example of it in action.
Luckily, with these plugins, it has never been easier to create a dummy website in WordPress.
Method 1: Dummy Content with Test Data from GitHub
I’m sure many of you are familiar with GitHub, but in case you aren’t, it is a platform dedicated for developers to store, manage, and share code. And it just so happens that users have actually created and shared dummy content for WordPress.
The aptly named WordPress Theme Test Data contains dummy content you can use on your website. It is intended to be used on a dummy website and not a real one. Importing it on a real website will cause problems and replace your actual content.
So, what is actually in this file? Here is a quick rundown:
- Categories
- Menu Items
- Comments
- Images
- Pages
There is also some HTML dummy content that you can customize like tags. Doing so can help them better match the style of your theme.
Note: While I have tested the files that are in this project, there is a risk of downloading files from online sources. As such, always create a backup before you add foreign files to your site.
Step 1: Download and Extract the File
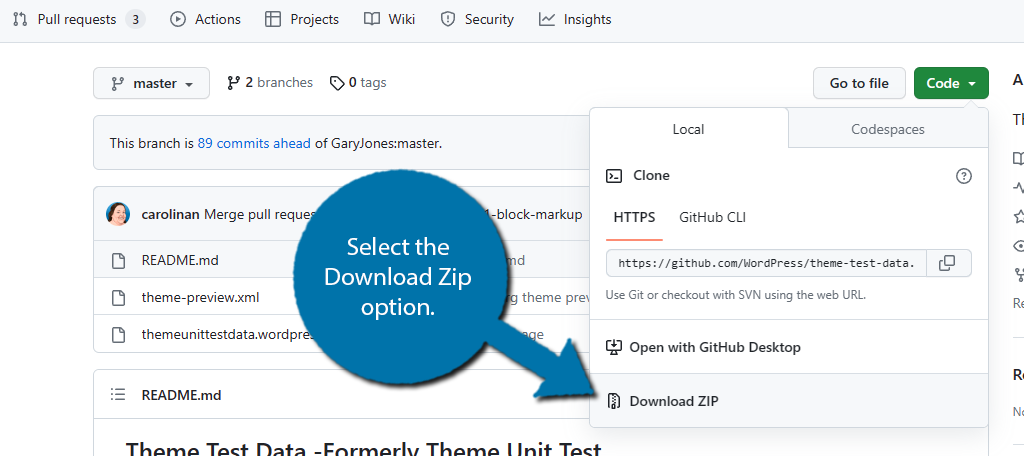
All this really involves is downloading a file from GitHub and uploading it to your theme. It is quite quick and easy to do at any skill level. Go ahead and visit the GitHub page for this project and click on the “Code” button to expand the options.
Select the Download Zip option.
The file will be added to your computer’s Downloads folder. However, since it is a zipped file, you will need to extract it before you can use it. Luckily, extraction is built into both Windows and Mac.
Simply locate the file and choose to unzip the file.
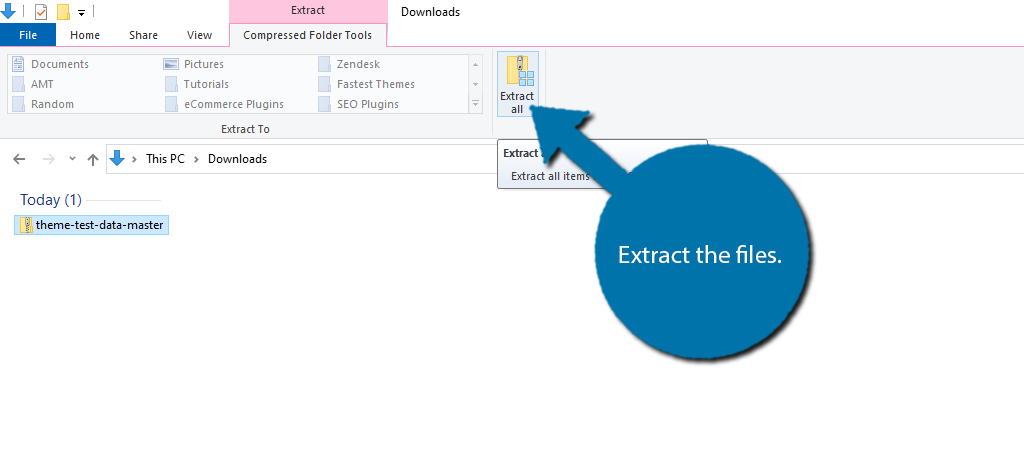
Doing so will create a new folder that contains all of the files inside of the zipped one. Now that we have access to the files, we can import them into WordPress.
Step 2: Import the Files to WordPress
There are several ways to add these files to WordPress. This tutorial will focus on using the WordPress Importing tool as it is probably the easiest to understand as a first-time user. If you know other ways, feel free to use those.
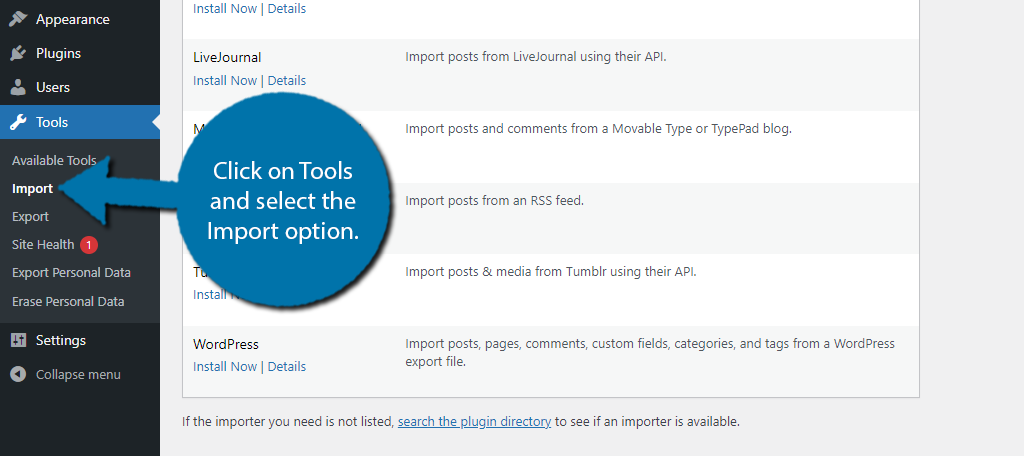
Go to your WordPress site, click on Tools, and select the Import option.
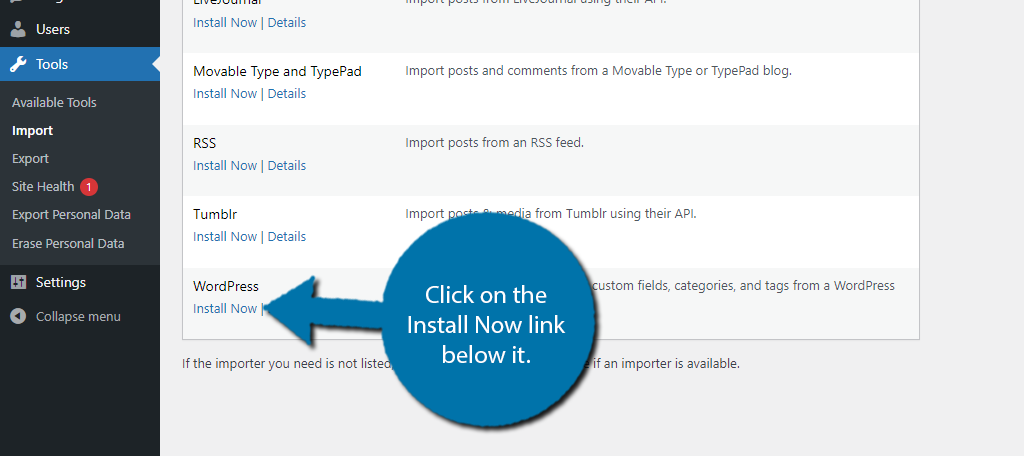
Here, you find a list of all of the import tools you can add to WordPress. In this case, find the WordPress option and click on the Install Now link below it.
WordPress will install it and replace that option with the Run Importer option. Go ahead and click it.

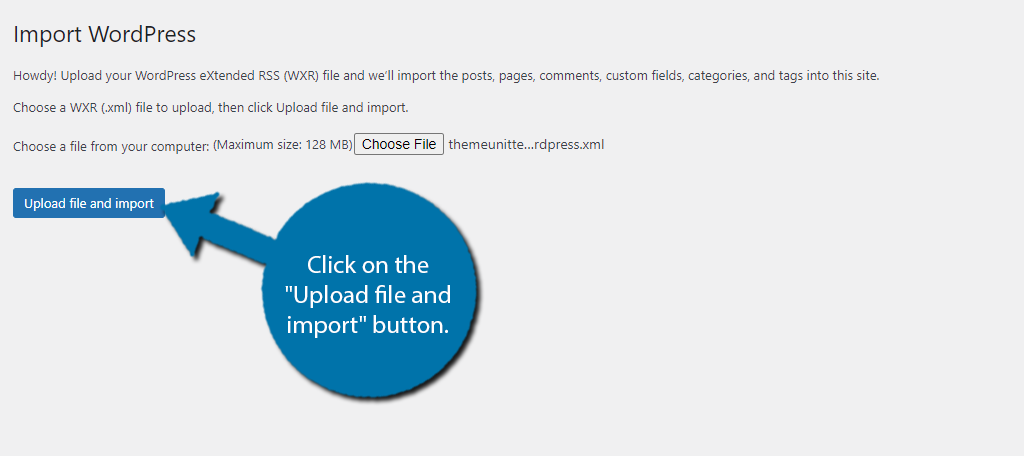
You will now be able to choose files from your computer and import them to WordPress. In this case, we are going to select the themeunittestdata.wordpress file we extracted earlier.
Once selected, click on the “Upload file and import” button.
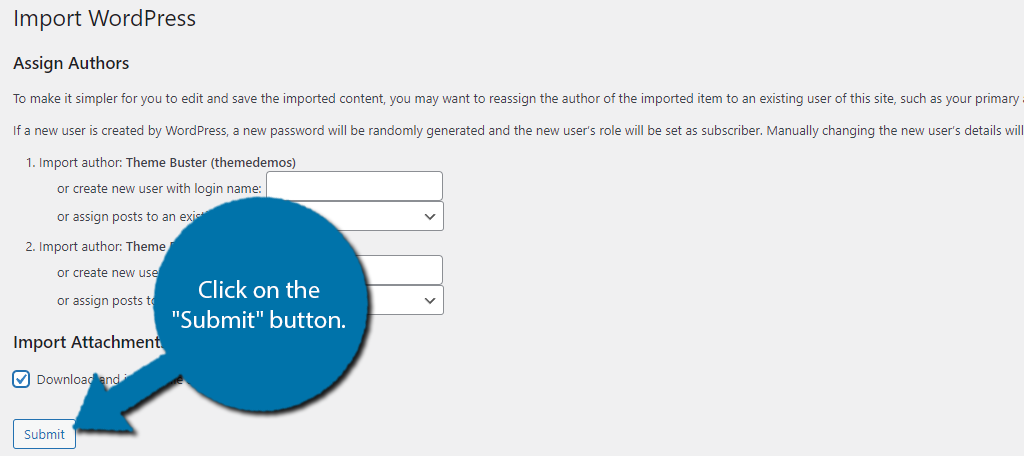
You will be asked if you want to add the content under an existing author or make a new one. Since this is dummy content it doesn’t really matter so do what you wish. Check the box to download and import file attachments and click on the “Submit” button.
After a few moments the import will finish, and you should see a message informing you of such. At this point, you can explore your website to view what dummy content these files have added. Then simply use it to fill your site as needed.
Method 2: Using WP Dummy Content Generator
Now, if you are not a fan of downloading files from strangers and importing them on your website, I completely understand. Luckily, WordPress has a variety of plugins that can generate dummy content for you.
One such tool is the WP Dummy Content Generator plugin.
This plugin allows you to choose what kind of dummy content you want to add and does so. Afterward, you can place it wherever you want. It is also not just limited to raw content like text and images, but also users, WooCommerce products, and more.
As such, it is one of the best options to use when you are trying to show off a dummy site or theme in action.
Step 1: Customize the Settings
As always with plugins, go ahead and install and activate the WP Dummy Content Generator plugin. Once that is done, you can immediately begin adding content, but you should take a moment to configure the settings.
The settings determine how much content you generate and what kind it is. The plugin can generate multiple types of content like users, posts, and WooCommerce products. Each of these has its own settings section to configure.
Note: You must have WooCommerce installed to create dummy products with this plugin.
I will demonstrate the post settings, but they are very similar for each option with a few unique settings in each section. Click on Dummy Content Generator and select the Generate Posts option.

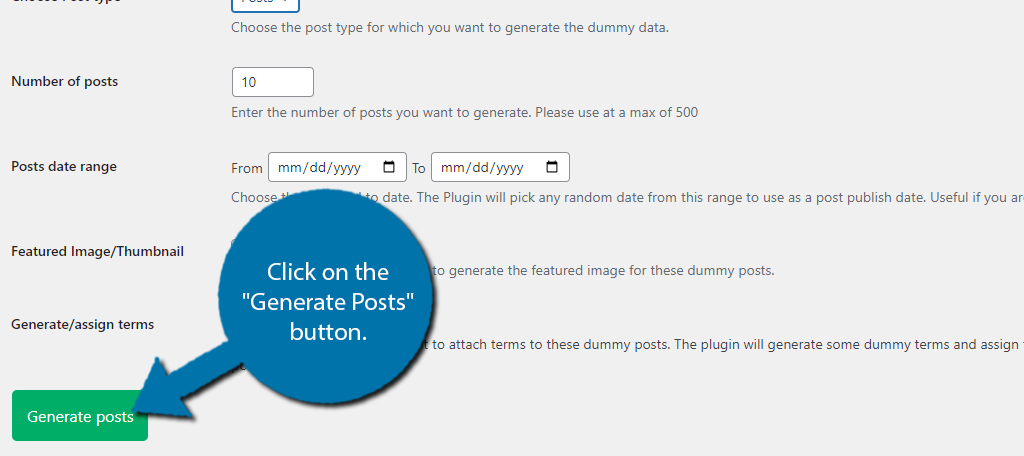
Here, you can select how many posts to generate, a date range that the generator will use, if you want it to create dummy thumbnails, and if it should generate terms for each page. Once you have made your choices, click on the “Generate Posts” button.
And that’s really all there is to it. You can click on the other areas to generate users or WooCommerce products if you desire.
Method 3: Using FakerPress for Dummy Content
If you are looking for a more robust selection of dummy content to generate, then consider using the FakerPress plugin. It allows you to generate all types of content including:
- Posts
- Custom Post Types
- Meta Data
- Featured Image
- Users
- Tags
- Categories
- Comments
- Custom Comment Types
Overall, the plugin is quite easy to use, and it only takes a minute to generate the content you need for your site.
Step 1: Customize the Settings
Go ahead and install and activate the plugin. There isn’t much to using this plugin, so it should only take a minute or so to use. This plugin has settings for each type of content you can generate with it.
Thus, it really boils down to going through the settings and generating the content.
Click on FakerPress and select the Comments, Posts, Terms, or Users option. Whichever one you want to generate.

Each section is tailored to the type of content you are generating. I won’t be going through every section. Instead, I’ll just cover how to create dummy posts for your site, thus I clicked on the Posts option.
This area is broken up into two sections. The first is about the initial generation that decides how many posts will be generated, what dates are used, if it has a parent post, if comments are enabled, and an author.
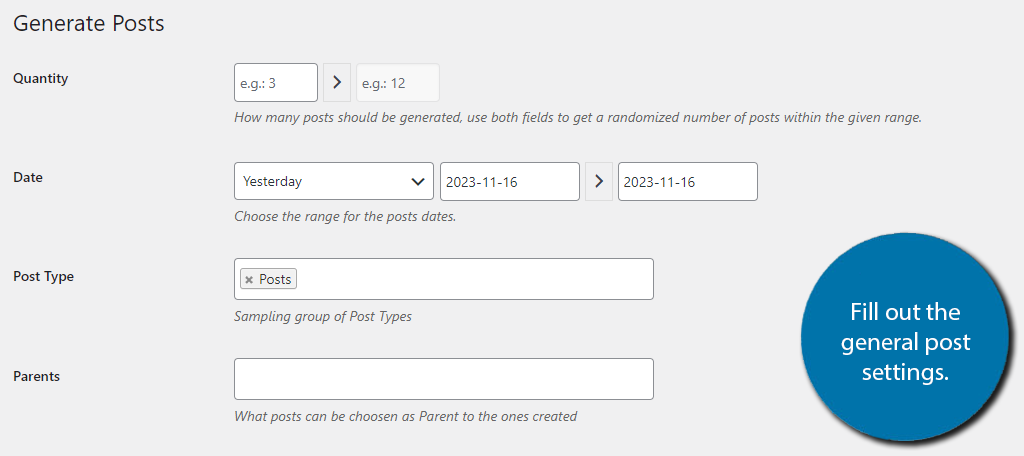
The second section is about customizing the post content you actually generate. Here you can choose how many paragraphs get generated, the header structure and number of headers, which image generators to use, excerpt size, and more.
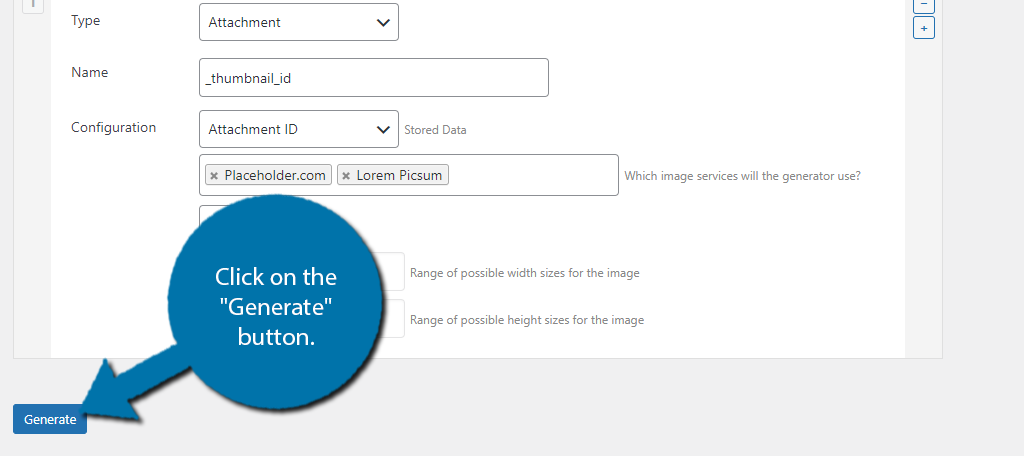
Go through the settings carefully, and when you are satisfied, click on the “Generate” button at the bottom.
And that’s it. The process is similar to the other types of content you can generate, but the settings themselves are unique to the type of content you are generating. Congratulations on learning how to use FakerPress.
Method 4: Creating Your Own Dummy Content
Naturally, it is also possible to create your own dummy content to fill a website. While this takes more time, there are advantages to doing it yourself and not relying on a tool. Creating higher-quality dummy content can make your site look better.
Thus, if you were showing off a theme, it would end up looking better than if you just used generated content.
Obviously, there is no secret trick to creating your dummy content. It is identical to creating content in WordPress like normal, so I won’t be going over that. Instead, I am going to cover the types of content you should consider making to fill a website.
Homepage
What pages your website has depends entirely on the type of dummy site you are trying to create. That said, every website needs a homepage. This page is intended to be a landing page and show off what your site is capable of, and that’s no different on a dummy site.
This page should help users see what is possible on a homepage and also link to other sections of the dummy site. For example, install a slider plugin and display some sample posts that users can explore to see what a post looks like.
You could also create some dummy WooCommerce products to show off what those might look like embedded on a homepage. Think about what your target audience is, and what they would be creating with the theme you are showing off.
In some cases, it is recommended to create multiple homepages to represent different niches you are competing for.
User Comments & Reviews
If you are trying to show users interacting with one another on a dummy site, it actually takes a lot of work to do. You see, you need to actually create the users and assign them the proper User Roles they need.
Only then can you use that user to leave comments or reviews on dummy products on your site.
This is a great way of building a fuller product page or showing off that your theme supports threaded comments. It doesn’t have to be anything fancy, just be sure to show that this is possible with your theme.
Tags and Categories
If you are creating post content for your dummy site, then that content should be correctly tagged and categorized. This allows you to show off how these elements look on your site.
It also gives you the opportunity to show off how organized a site could be. You can create category searches, related posts, and more.
Exporting Your Dummy Content for Future Use
There is a very good chance you may have multiple sites that are in need of dummy content. Instead of creating new content for each of them, you may just want to transfer the dummy content from one site to another.
This is very easy to do in WordPress and there are several ways to go about it.
The simplest way would be to use the Export/Import features in WordPress. This allows you to export content on your site and import it to another. You can find these options in the Tools section the respective Import and Export options.
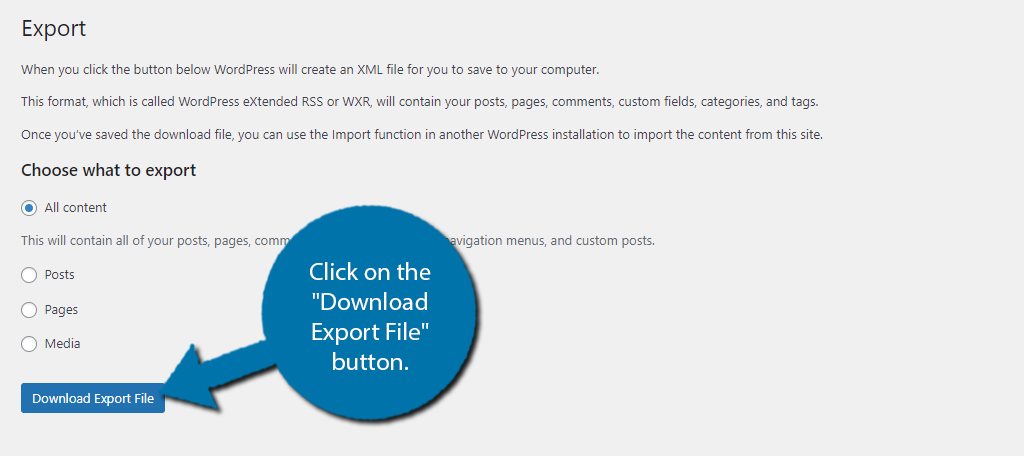
First go to the Export option on the site that you wish to transfer content from. You can choose to export all content or to specify just posts, pages, or media. Simply choose the option you want and click on the “Download Export File” button.
This will add the file you your computer’s Downloads folder. We will now go to the website that you wish to import this content on and go to the Import section under Tools. This is very similar to the GitHub method, so refer to that for more detailed instructions.
Or check out our dedicated tutorial for moving content from one site to another.
For a quick summary, install the WordPress Importer tool, run it, and choose the file you just downloaded. This will transfer its contents to your WordPress site. And that’s really it.
It is worth pointing out that you can transfer the files using an FTP client like FileZilla or using a backup plugin to make a partial backup. WordPress has a lot of options, and it really just comes down to what you find useful.
Make Your Demos Shine
As you can see, WordPress offers a variety of ways for you to create demo content for a theme or plugin. Creating believable content is the best way for users to visualize what their content would look like in its place.
This can help make your site, theme, or plugin more attractive to a regular user viewing it. Thus, increasing the chances of you making a sale. Regardless of what method you choose, you can make your demo content shine in WordPress.
I hope you found this tutorial helpful for creating dummy content in WordPress.
Which method did you use to create a dummy article? Has higher-quality dummy content increased sales or installs?