Security is one of the biggest concerns of any WordPress developer. While the platform itself has no real security issues, its popularity makes it the target of hackers around the world. Learning how to further protect WordPress is an integral part of being a website creator.
Your website login security is one of the most important parts of your overall security structure. A strong login protects user data and prevents bots from creating accounts or hijacking existing profiles. This can also greatly reduce the amount of spam your website receives.
Today, I will demonstrate how to use the Wordfence Login Security plugin to protect WordPress logins.
Login Security Is The Most Important Kind
Between brute force attacks and the terrible password picks by some users, login security has never been more important. In particular, the use of two-factor authentication and reCAPTCHA will keep your website safe from the majority of issues.
Two-factor authentication most commonly requires users to submit a cell phone number. Then every time they log in, a text message is sent with a special login code. Of course, there are also multiple authenticator apps on cell phones to choose from.
This prevents the majority of login hacking. In addition, reCAPTCHA will keep those pesky bots from logging in to spam your website.
This becomes increasingly important on websites that store user information like credit cards, home addresses, and other information that hackers should not have.
Installing Wordfence Login Security
Wordfence Login Security is a great tool to protect WordPress. It takes all of the impressive login features available in the full Wordfence plugin and provides them in this tool.
Note: If you are already using the Wordfence plugin, you do not need to install this one because this particular security feature is already available.
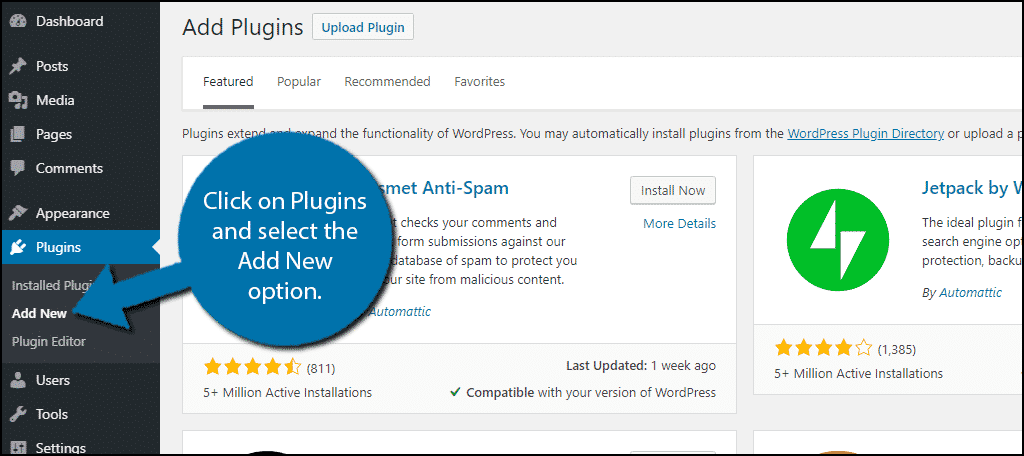
To start, click on Plugins and select the Add New option on the left-hand admin panel.
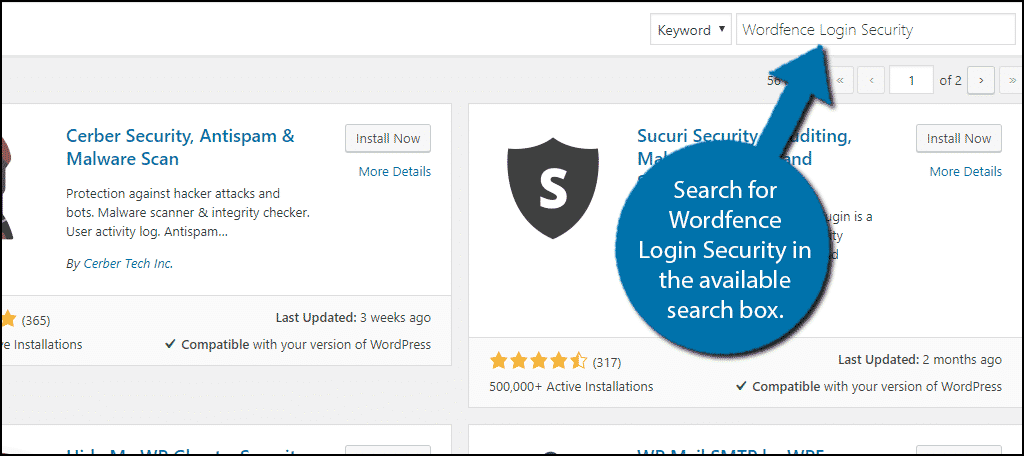
Search for Wordfence Login Security in the available search box. This will pull up additional plugins that you may find helpful.
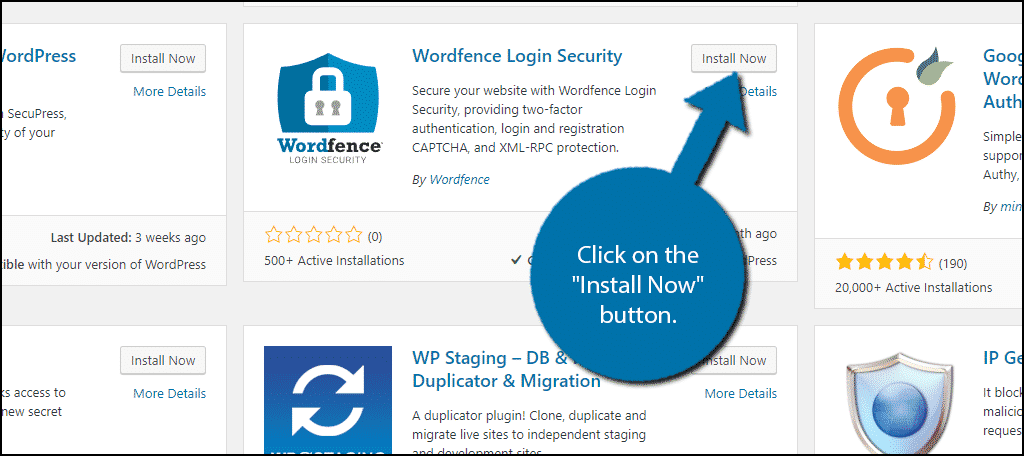
Scroll down until you find the Wordfence Login Security plugin. Click on the “Install Now” button and activate the plugin for use.
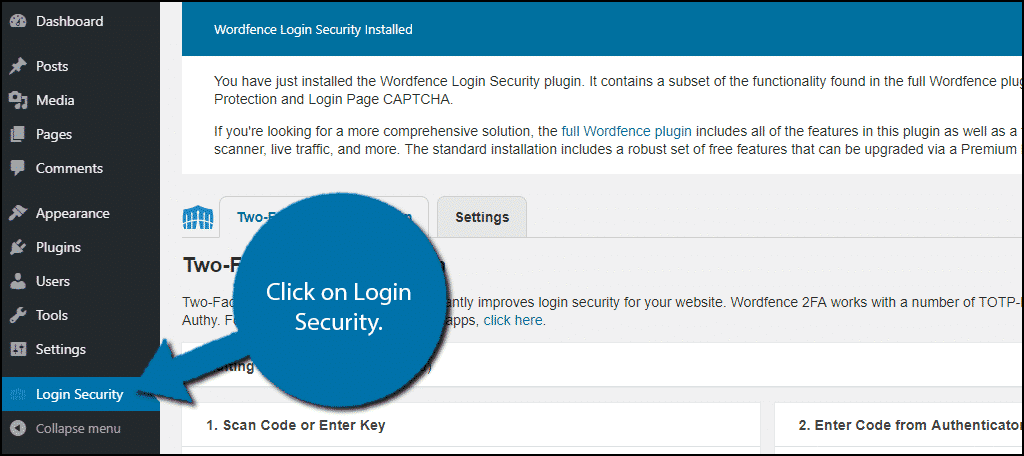
On the left-hand admin panel, click on Login Security. This will pull up the plugin’s settings page.
Linking An Account
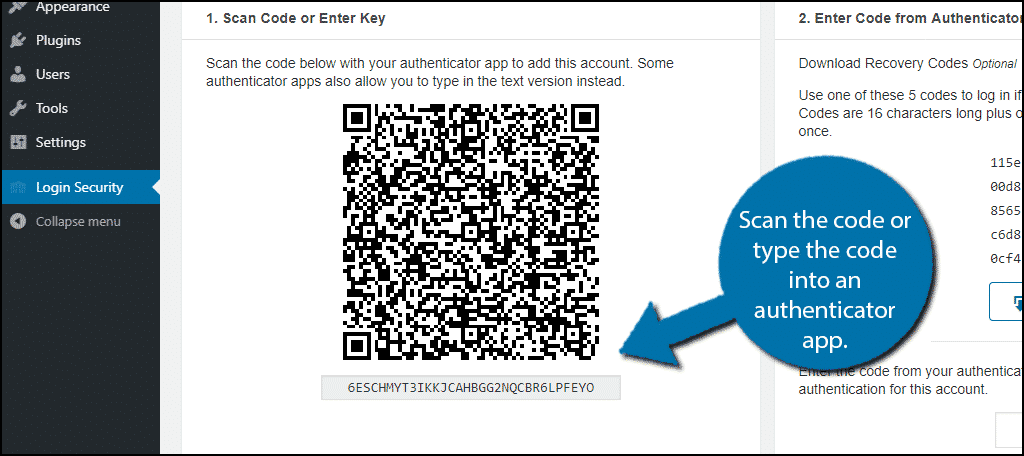
While the plugin may intimidate new users, it is actually really easy to use. You will need a cell phone with a compatible authenticator app installed to complete the setup. Wordfence has a list of compatible authenticator apps to make it easy to find one.
The first step is to either scan or manually enter the code into an authenticator app. These are unique codes, so make sure they are not shared with anyone. Do not scan the one below.
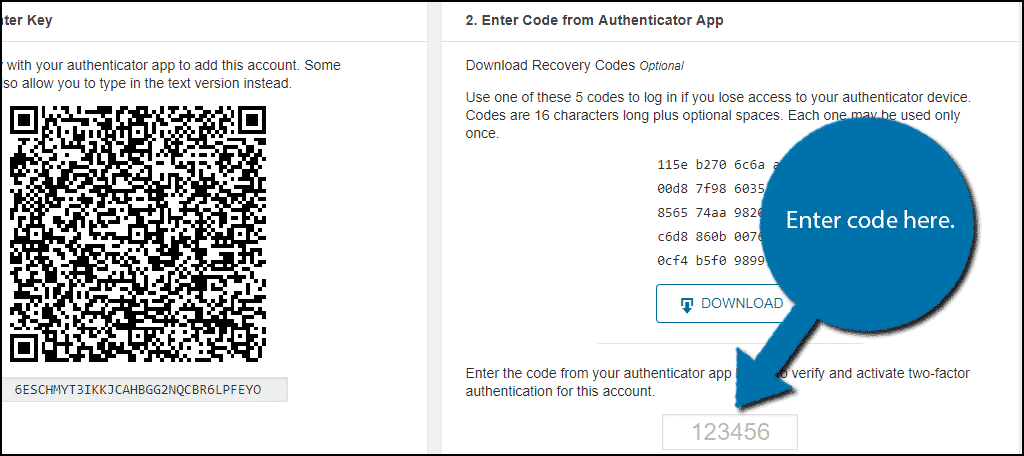
On the authenticator app of your choice, a security token is generated on the app. In this example, I am using Google Authenticator for Android. Simply type this code into the plugin’s page in WordPress.
Click on the “Activate” button.
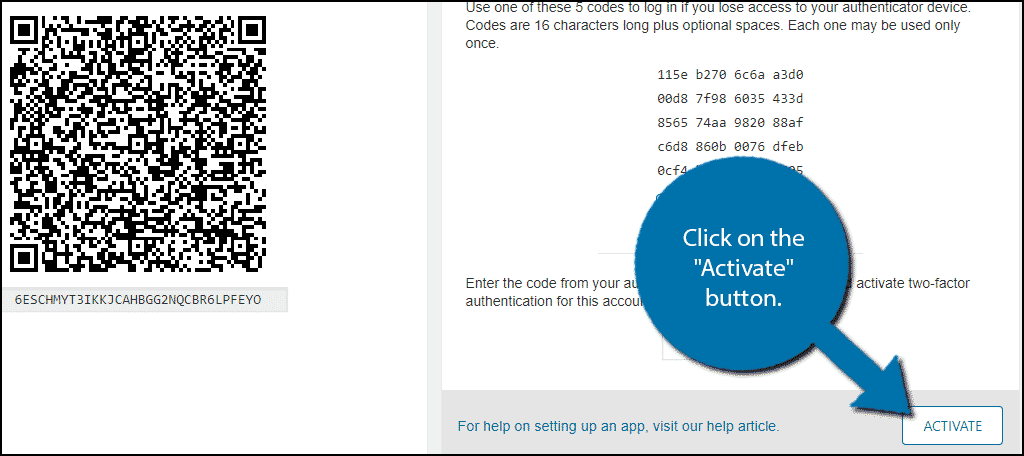
Keep in mind that this code is refreshed every 30 seconds. If the code you entered changed and you click on the “Activate” button, it will not work. Also, remember that you will need to use the same authenticator app every time to log in. Do not delete the app.
The plugin gives you the option to download 5 recovery codes that you can use if you cannot get to your phone. If you choose to download these, make sure they are stored in a safe space. The last thing you want is a hacker locating these codes.
You can deactivate the two-factor authentication and generate new codes by pressing their respective buttons at any time.
Using Wordfence Login Security
Now that your account is linked, it’s time to change the settings. Perhaps one of the most important is choosing which user roles have the option and enabling reCAPTCHA.
Click on the Settings tab.
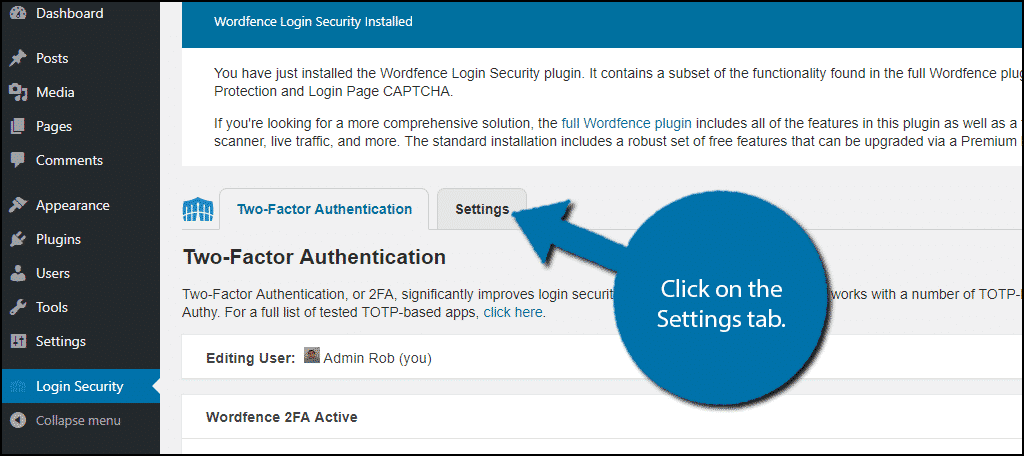
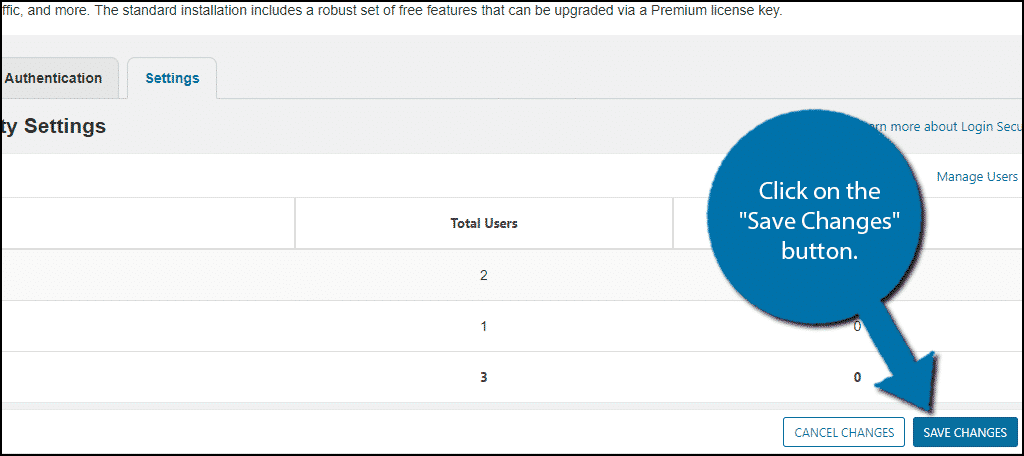
At the top, you will see a useful summary that tells you how many accounts have activated two-factor authentication (2FA). Below that, you can change the various settings.
The first option lets you allow specific user roles to use 2FA on their account.
This is your choice, but I strongly recommend making sure that any account with access to the backend of your website is required to use 2FA.
This is followed by an option that makes admin accounts required to enable 2FA (strongly recommended).
Towards the bottom, you will see the Enable reCAPTCHA section. Simply check the box to enable it.
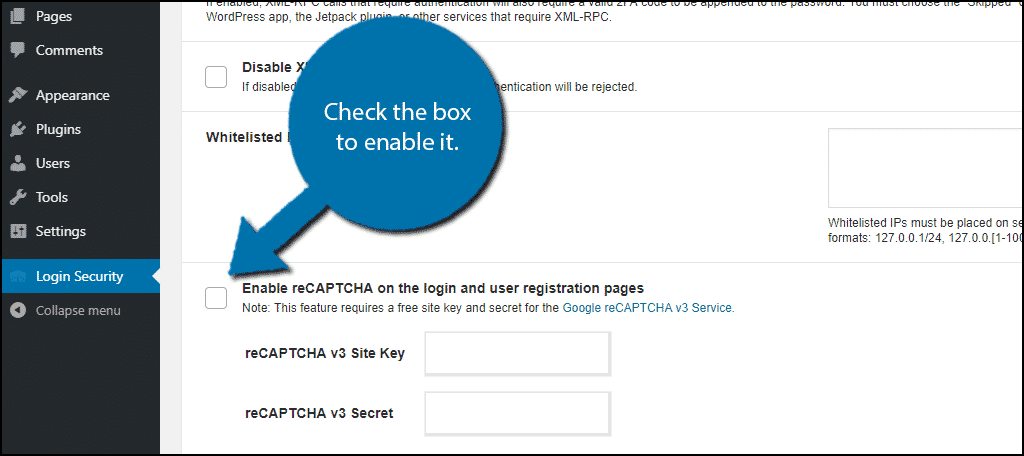
Follow the link the plugin provides to obtain a reCAPTCHA key. Insert the key in the available box.
Once you are done changing the settings, scroll up to the top and click on the “Save Changes” button.
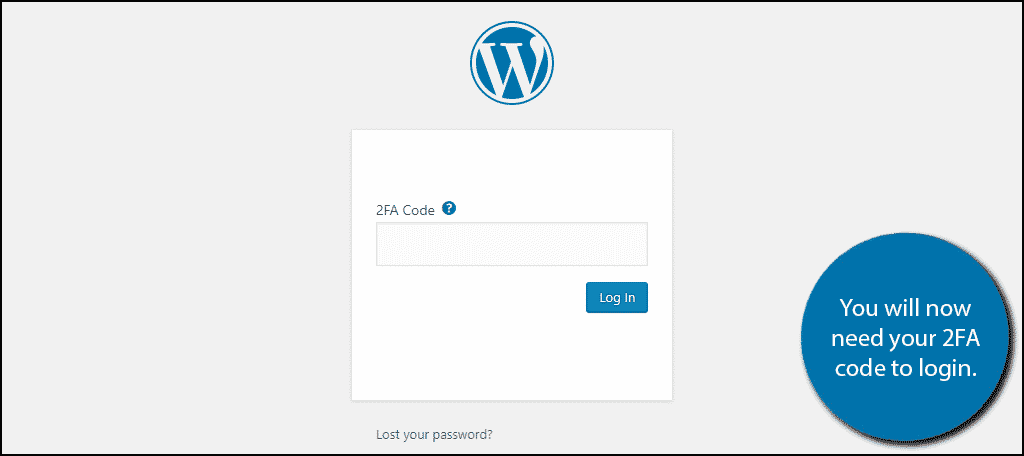
Your login will now require the use of a 2FA on the user roles you selected.
Congratulations, you have successfully set up the Wordfence Login Security plugin to protect WordPress.
Don’t Make It Easy For Hackers
Security is the first thing that most websites will set up, and for good reason. You need your information and visitor information protected. Once accounts get compromised on your watch, visitors will avoid the website.
For this reason, you need to make sure that everything is being done to protect WordPress. The platform may not have vulnerabilities, but the users who use it might.
Poorly chosen passwords, using the same password on every website, forgetting to log out on public computers, and many other bad choices give hackers exactly what they need.
Don’t make it easy for them.
How often have you used 2FA in the past? Would you rather receive confirmations on your phone or through email?