The WordPress editor gives a lot of functionality. Whether you are using the visual editor or the actual text editor, there is a lot you can accomplish without the help of added plugins. However, sometimes line spacing and dividers can be an issue if you don’t have extra help.
Have you ever been writing and designing a post or page in WordPress and wanted the ability to add different WordPress line spacing types? The default editor does not allow for this. You have the ability to single or double space text elements in those particular height increments only.
Single Space: Just as the name suggests. A single line is inserted in the editor when this function is used. To insert a single line space in WordPress, click on Shift+Enter after the end of any line.
Double Space: By default, the WordPress visual editor will provide you with a double space line every time you hit the “Enter” button. This makes it fast and easy to create a new paragraph or move down to add content with proper double spacing.
If you want to add different line spacing heights, you are not able to in the default editor. However, now you can give yourself the ability to change line spacing in WordPress to any specific space heights you want. You can accomplish this with the use of a smooth plugin that we will talk about more below.
Why Change Line Spacing in WordPress?
The formatting and overall layout of your posts and pages always matter. Proper line spacing can give your website users the ability to find certain things within the post or page more easily.
If you learn to manage WordPress line spacing the right way, then you can be better equipped to distinguish paragraphs, and put forth a more stylish and elegant post. This alone will lead to more readers and help push your website view count further up.
The use of short sentences and paragraphs is a must when it comes to readability and SEO structure within a post or page. If you have the ability to easily add line spacing variables in WordPress, then certain spacing formats can be made quickly without having to input CSS code into your site.
In order to be able to accomplish this, you need to use a solid plugin, or the already mentioned CSS style code. However, I have found a tool that will give you the ability to add as many different line spacing inserts as you want using simple WordPress space shortcode.
Let’s take a look at the plugin and see what all it does.
Spacer
Spacer is a plugin that gives you the ability to add different line spacing options to your WordPress editor. You can also enter negative spacing to allow yourself to shift content upwards if you wish.
The Spacer plugin lets you build as many different line spacing options as you want. Once the plugin is activated, it adds a button to your editor. You go create all the line spacing options you want. And then when you want to insert one, you click on the button and pick the one you want.
Note: As of this writing, the plugin does work just fine if you are using the Gutenberg block editor. It adds a button to the “Paragraph” block for you to access. Please check that when you install it.
Create your own unique library of spacers and section breaks. Once you have created them, you always have them at your disposal and can add them at any time with the click of a button.
The plugin is lightweight and is very easy to install and use. It is not hard to configure, and it gives some great functionality including:
- You can create an unlimited amount of spacers, dividers, and section breaks.
- View your spacer as you build using the live preview tool.
- Easily choose the spacer you want to add using the automatically installed editor button.
- Compatible with WordPress Multisite.
- Adds a button to Gutenberg block editor.
The plugin also allows for spacing and line adjustments for mobile. So you can create your spacers and they will look perfect on any device.
Basically, the plugin gives you everything you need and more to add and use an unlimited amount of spacers. Let’s take a look at how to install the plugin and get it going on your website.
Install and Activate Spacer Plugin
In order to add different spacers and adjust line spacing how you see fit, you first need to install and activate the plugin. You can do this by going to the Plugins page of your WordPress admin dashboard and searching for it by name.
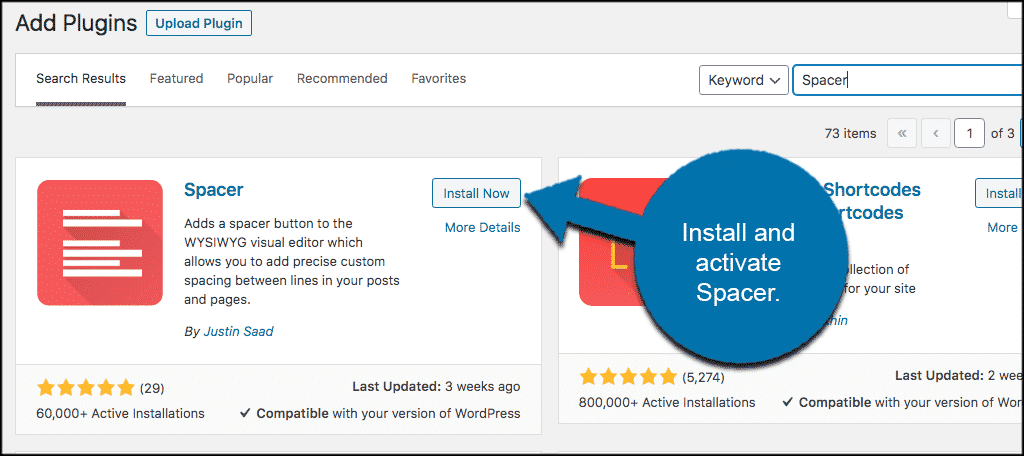
Once the plugin has been installed and activated, click on Settings > Spacer. You will find this in the left side menu of your WordPress admin dashboard.
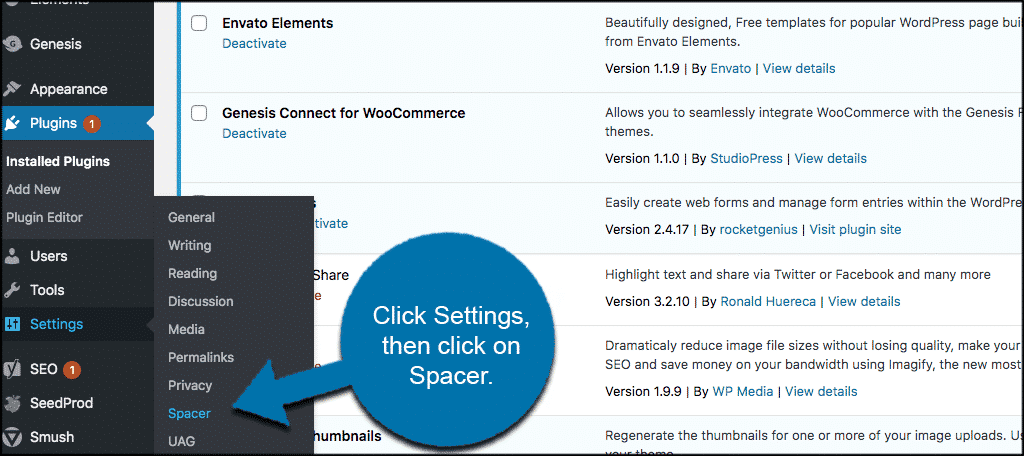
This will take you to the main settings page for the plugin. Here is where you can configure it how you want and add spacers as well. Let’s go over that together.
Configure Spacer Settings and Add a Spacer
At this point, you should be on the settings page for the plugin. You will see the main setup with five tabs. These include:
- Default
- Add Spacers
- Suggestion Box
- Add-Ons
- Licenses
Let’s take a look at the “default” tab.
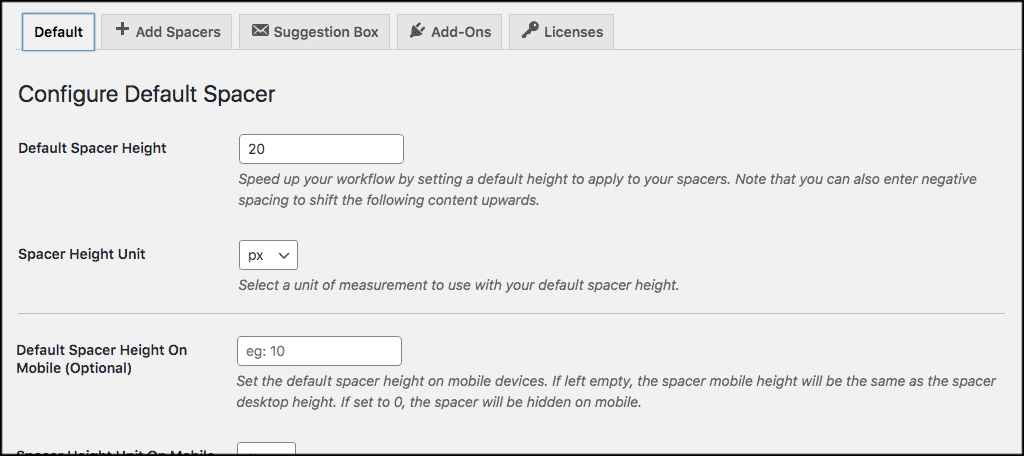
Default
The “Default” tab acts as the main default settings for the included spacer. This means that if you have no other spacers or dividers added, this will be the main and only one available to insert.
Go ahead and configure the main spacer how you see fit.
The suggestion box tab allows you to enter suggestions for the plugin to the developers. The add-ons tab shows you available add-ons you may want to consider. The licenses tab allows you to put in licenses for pro versions of the plugin if needed. You can check all those out of you wish.
Let’s add a spacer together.
Add a Spacer
In order to add a spacer to your library, you want to click on the “Add Spacers” tab. From there, you simply fill out all of the options available to create a spacer the way you want.
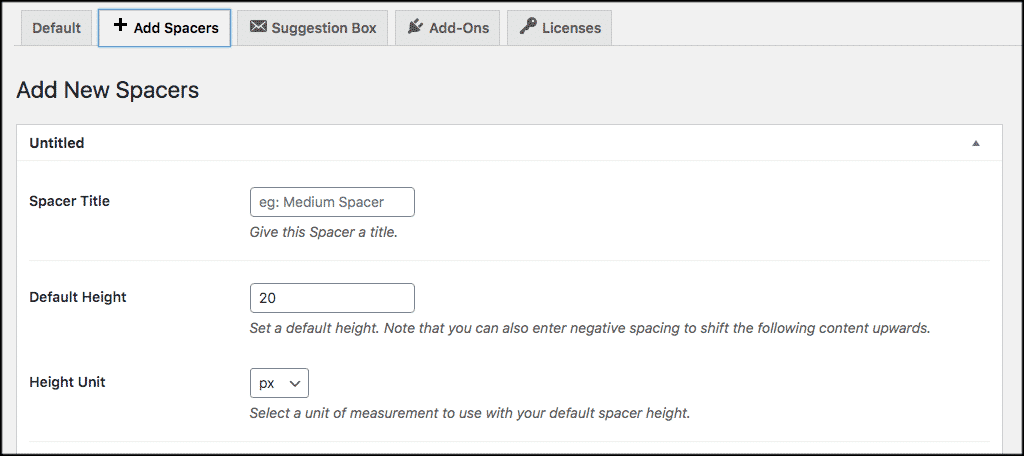
Don’t forget to name your spacer so when you go to add it in a post or page later you know which one you are adding. Once you are done filling out the options for your new spacer, click on the “Save Changes” button at the bottom of the page and your new spacer will be automatically added to your library.
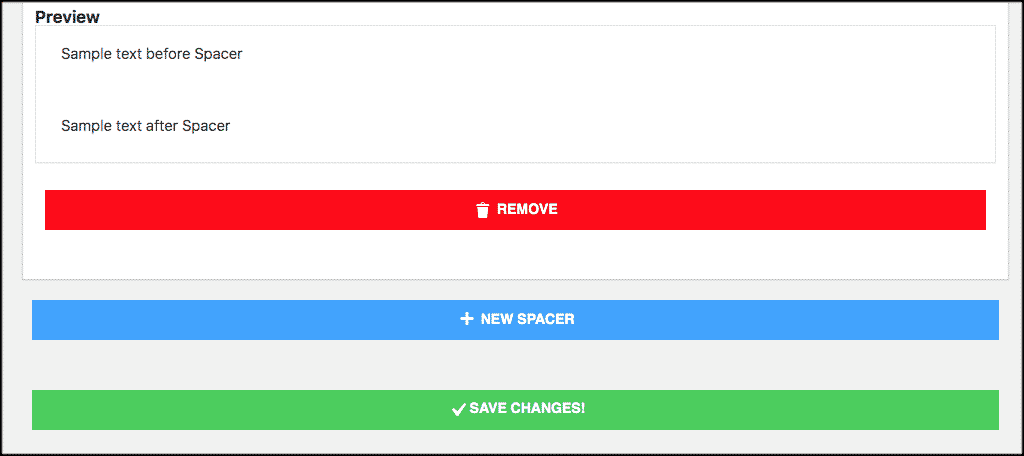
You can repeat this process to add as many spacers as you want.
Add WordPress Line Spacing in Post or Page
The final step to this process is actually adding a spacer within the post or page you are editing. Remember, the process is the same for either and it is very simple.
Go to your post or page section and open up a new one. You will see that a button to add a spacer has now been added to your editor. Whenever you want to add one of the spacers you created, simply click on that button and your library of added spacers will pop up.
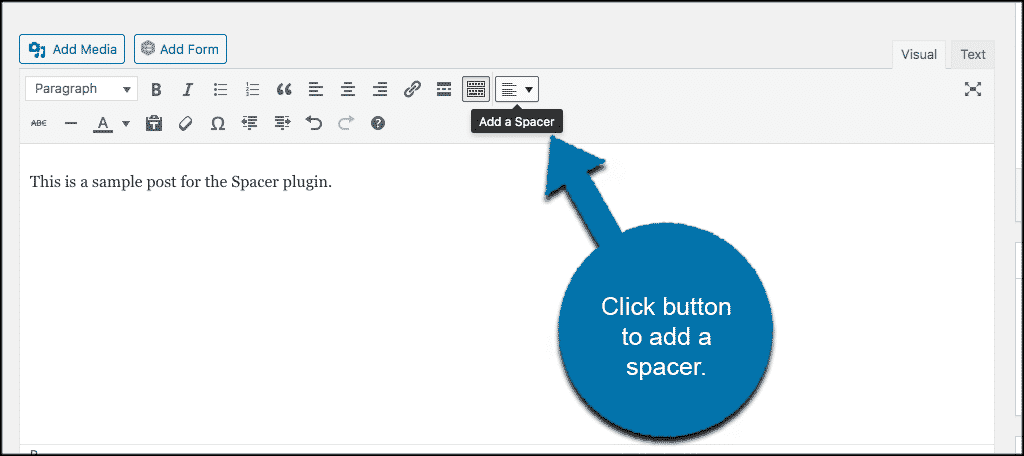
Choose the spacer you want and you are done.
Final Thoughts
Having the ability to add different types of line spacing and dividers on your WordPress site is important. This is especially true if you are trying to open up your content for people to view in different aspects.
While the default WordPress editor does allow for a decent amount of functionality, it only gives you the single and double space line options. Adding the Spacer plugin will give you the ability to add as many different spacers and dividers as you want each with varying pixel heights.
This should allow you to add custom line spacing styles and give you a lot more functionality when it comes to layout and design.
Have you been able to get away with the line spacing options that the WordPress default editor gives? Do you find that the line spacing options you can apply to your posts and pages by using the Spacer plugin give you a lot more freedom?