
While one of the main benefits of using WordPress is that you do not need to code to create a great site, that doesn’t mean you shouldn’t code. There may come a time when editing your wp-config file is the best option.
This can be because you are trying to correct an error on your site, add a new feature, or something else. The truth is that you can do practically anything with knowledge of the PHP language and this file.
Luckily, regardless of why you want to edit the wp-config file, you’ll be pleased to know that it is quite easy to do, and today I am going to demonstrate two different methods to do it.
What Is the WP-Config File Used For?
The wp-config file is responsible for storing database information, storing your SALTS and keys, enabling debug mode, and much more. To sum it up, the file tells WordPress how to behave.
So, what are some things you can do through the wp-config file?
One of the most useful components of this file would be automatic updates. By default, WordPress will update automatically to ensure you are always using the latest version to enhance security and get access to new features.
While this is good on paper, many sites disable this feature because automatic updates can sometimes break a site depending on what has been changed. For this reason, many developers clone their site and test the update in a testing environment.
Another example would be activating the debug mode. This feature can be used to help troubleshoot problems on your site as it provides an error log. And yes, both of these things can be accomplished with a plugin.
Editing the wp-config File for WordPress
There are two main ways to edit your wp-config file in WordPress. The first is to access the file from your cPanel. The second is to use an FTP client like FileZilla. Both methods are easy to do, and the difficulty is about the same.
That said, if you do not already have an FTP client setup, those are extra steps you would need to take.
Note: You may be wondering if you can use the editor tool within WordPress. You cannot. Since the wp-config file can easily break the site, the editor does not allow you to make changes to it. For this reason, you should make a backup before making any edits.
Method 1: Using the cPanel
The cPanel allows you to access any file on your web server by using the File Manager. The login credentials are given to you by your web host. If you have lost them, contact your web host for support.
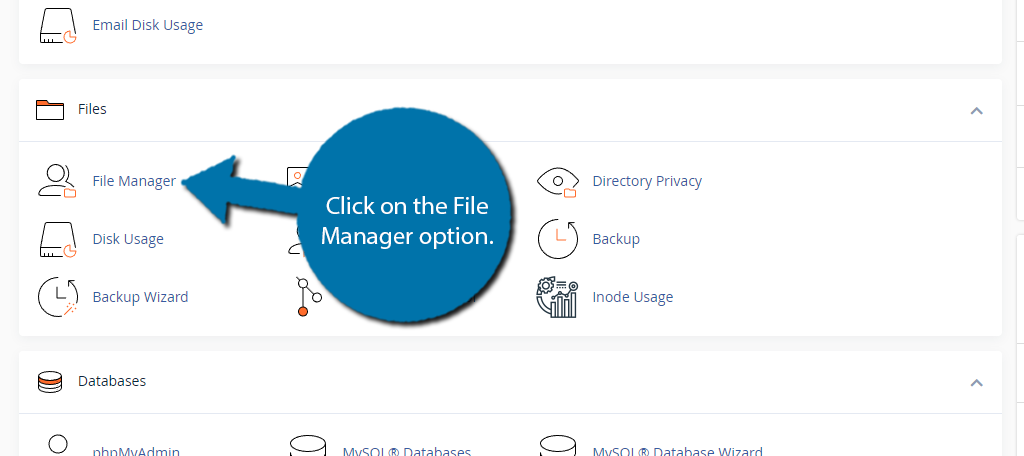
Step 1: Access the File Manager
Start by logging into your cPanel account. Once inside, locate the File section and click on the File Manager option.
Step 2: Locate the wp-config File
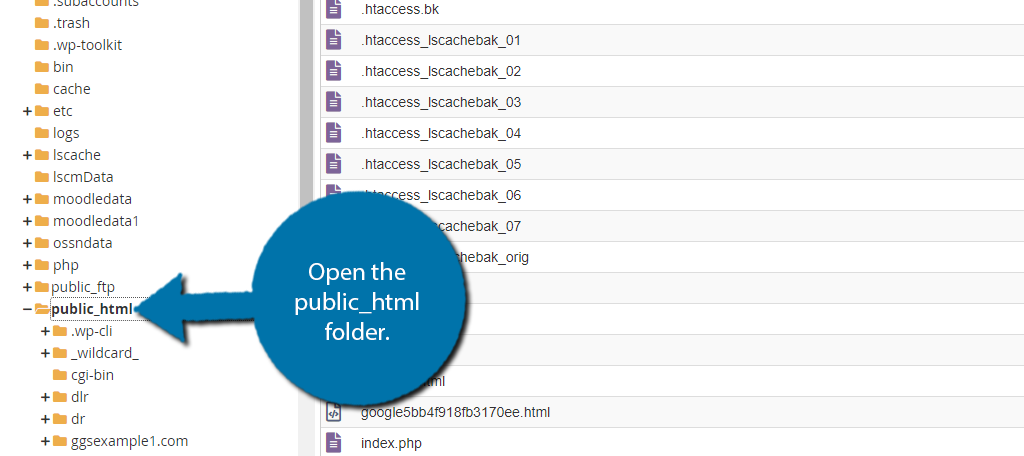
The wp-config file is located in your root directory. In most cases, this is called the public_html directory, but the name can change depending on your web hosting environment.
You’ll find all of the directories on the left-hand side – select the public_html directory.
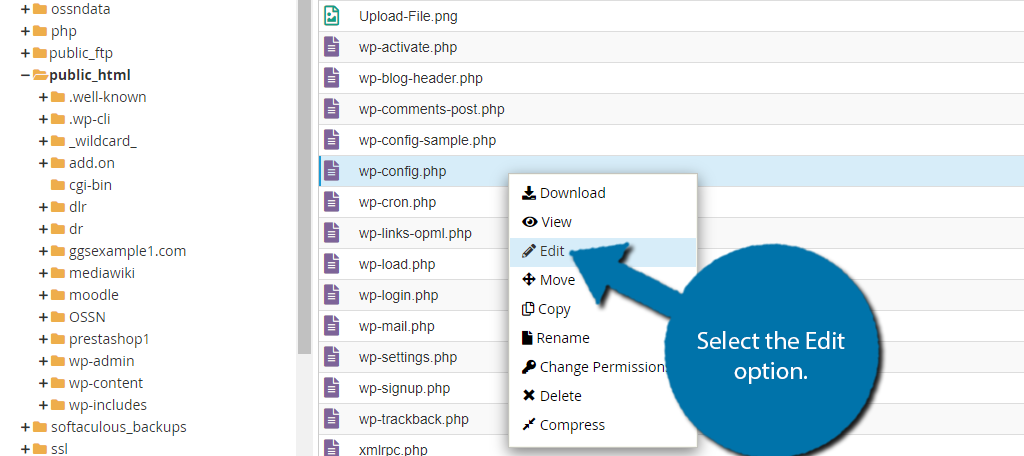
From here, search the directory for the wp-config.php file. Once you locate it, right-click on it and select the Edit option.
A small pop-up window will appear warning that editing code can cause your site to crash. It recommends creating a backup before proceeding. Click on the “Edit” button and you will end up inside the file where you can edit it.

Step 3: Editing the wp-config File
Editing the wp-config file is like editing any other kind of file in WordPress. Simply locate the part of the code you wish to edit and do so. Alternatively, you can add your own code anywhere in the file, although at the bottom is typically the best area.
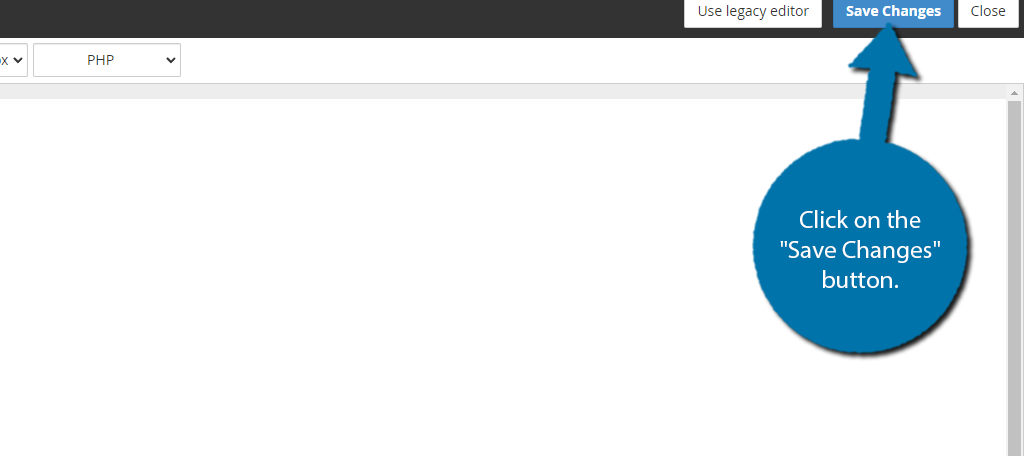
After you make the adjustments, be sure to click on the “Save Changes” button on the top-right
Any modifications you make to wp-config in the File Manager will be instantly live. You can then access the site to make sure everything is working. If so, close out of File Manager and exit cPanel.
If something does go wrong, revert the code changes, or use a backup to restore a working version of your website.
Method 2: Using FileZilla
Any FTP client will work for this method, but I am choosing FileZilla because it is free and one of the most popular options. This tutorial will not cover how to set up FileZilla. If you need help with that, refer to our FileZilla setup guide.
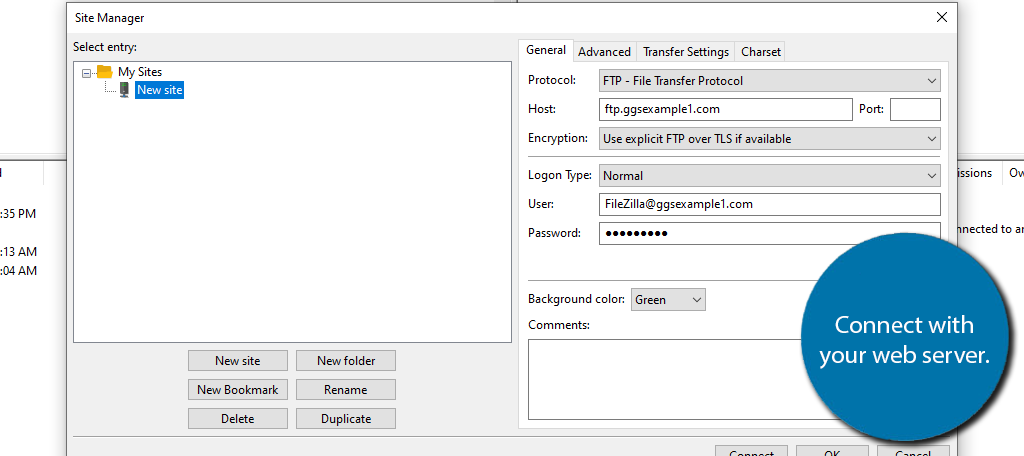
Step 1: Connect With Your Site
The first thing you need to do is connect with your web server. You can either use the Site Manager menu in FileZilla or use the quick connect. You must have already set up an FTP account for your site to do this.
Step 2: Locate the wp-config File
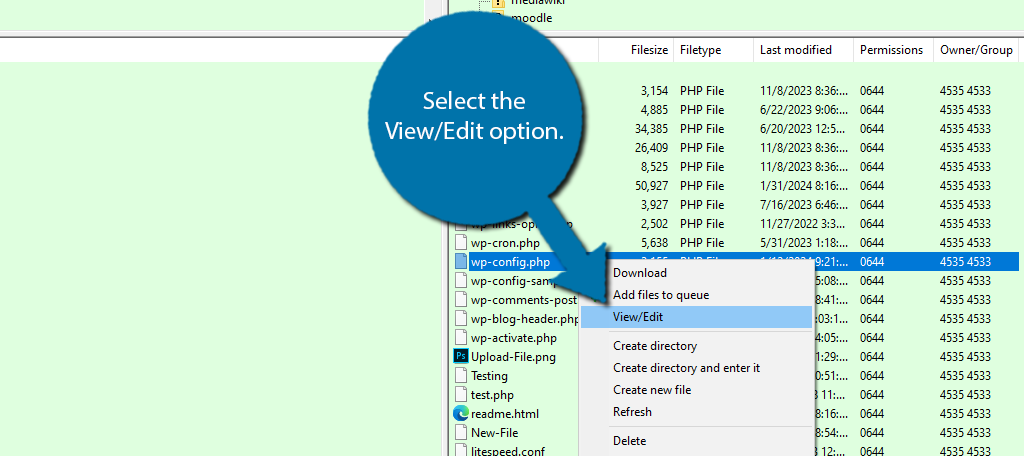
Now that you are connected it is time to locate the wp-config file. In my case, I have my FTP client open from the public_html directory, which just so happens to contain the wp-config file.
Once you find the file, right-click it and select the View/Edit option.
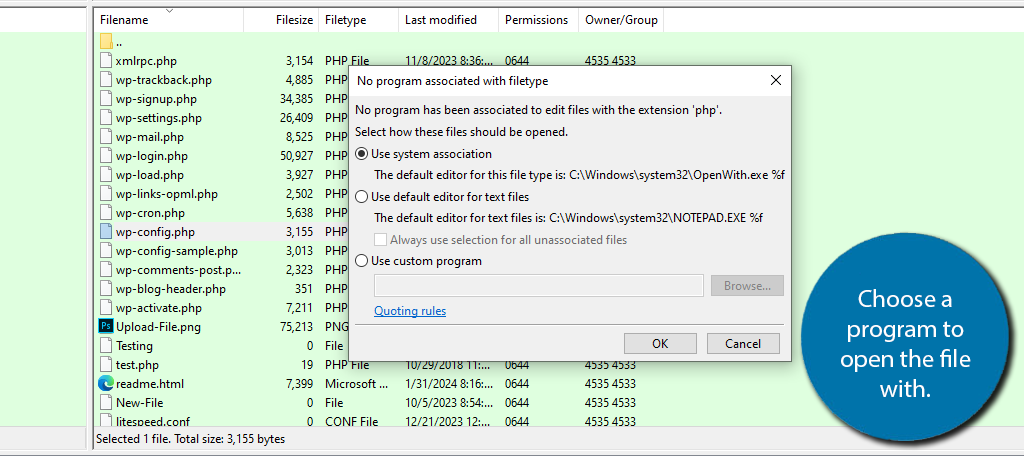
If you have not set up a program yet, FileZilla will ask you which program it should use to open the file. While you can download fancier options that can make writing code easier, the Notepad (for PC) will be more than enough.
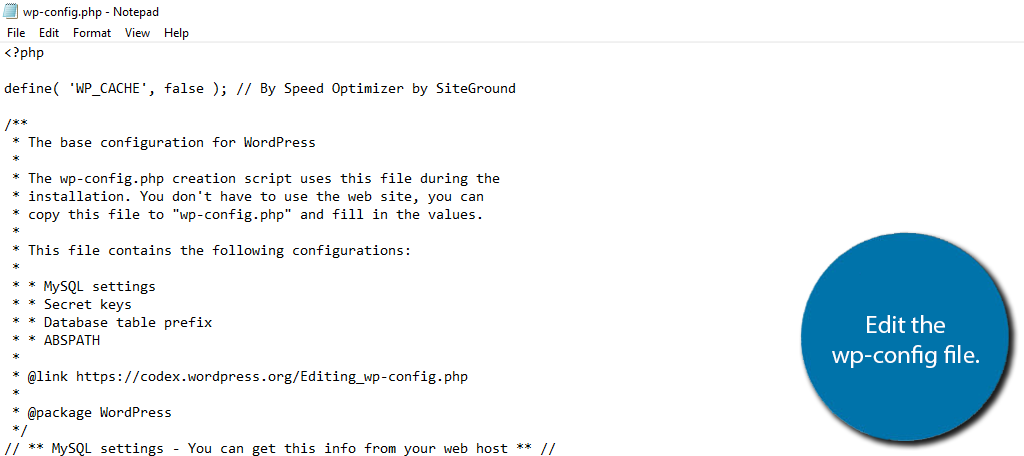
At this point, the wp-config file should be open and ready to edit.
Step 3: Editing the wp-config File
I want to begin by warning you about the difference between editing the wp-config file in Notepad and doing it through the cPanel. The Notepad cannot detect any syntax errors you input. As a result, it is much easier to make a mistake.
If you want a better experience, you should locate a better option than Notepad. Notepad++ is a great choice. Many now include syntax checking. If you do not catch the error, your site will stop working.
In any case, you can freely edit the file. Just be sure to save the changes in whatever file editor you are using before closing it.
And that’s really all there is to editing the wp-config file. If you’re looking for specific coding examples, take a look at the next section for some ideas.
Editing the wp-config File
As I said at the start, there are a lot of things you can do with the wp-config file. What changes you make are completely up to you and how you want your site to behave. However, be warned that it is very easy to break your site by editing this file.
Since the primary purpose of this file is for your WordPress configuration, let’s start with the database.
Editing the Database
The first setting in the wp-config file is the way WordPress accesses the database. In reality, the only time you will want to make changes to this portion is if you transfer the website or you’re using a backup copy for restoration.
Otherwise, changes to the database can cause a variety of issues with the site. For example, your posts will be different or completely gone. The database is seen as:
// ** MySQL settings - You can get this info from your web host ** //
/** The name of the database for WordPress */
define('DB_NAME', 'yourname_wrdp12');

/** MySQL database username */
define('DB_USER', 'yourname_wrdp12');

/** MySQL database password */
define('DB_PASSWORD', '7dFkEoEo1F9CD1d');

/** MySQL hostname */
define('DB_HOST', 'localhost');
Note the name, user, and password will be different from this example. It’s these lines that you would change for a new database.
Perhaps you need to assign a port to the database. Some hosts provide secure ports to database resources, and you may need to change how WordPress finds them. In this case, you would simply change the “localhost” control like so:
define('DB_HOST', 'localhost:1234');
The “1234” will need to be changed to the host’s port they assign to you.
Site Name and Identification
In some instances, you may have to manually change how WordPress defines the website’s URL. This is used when troubleshooting some of the more common errors in WordPress such as the redirecting issue caused by some plugins. This is fixed by adding the code below:
define('WP_HOME','https://yoursite.com');
define('WP_SITEURL','https://yoursite.com');
Be sure to replace the “yoursite.com” with your actual domain name.
Disabling Auto Update
WordPress is capable of updating itself when minor changes are made. However, many people would rather the system not do so until they are sure the website can handle the changes. To stop the system from updating, add the following:
define( 'WP_AUTO_UPDATE_CORE', false);
If you ever wish to reverse this, deleting the line will undo it, or switching the “false” value to “true” will also work.
Make WordPress Work the Way You Want It
Making changes to the wp-config file, or any file for that matter, allows you to control the way your site works. This control can help you add new features, improve performance, and much more.
Of course, you’ll need to know how to code to get the best results, and for those who don’t, there are typically plugins that can do this for you. It is not as efficient, but it is a valid option.
I hope you found this tutorial helpful in learning how to edit the wp-config file in WordPress.
Why did you edit the wp-config file? Did you find editing the wp-config file difficult?