
Email is one of the most popular ways to communicate in the world, but it has a huge problem, spam. Spam emails can clog up your inbox and make it difficult to read important emails and even make you hesitant to check them in the first place.
While this is certainly annoying for all types of emails, it is particularly troublesome for business messages.
For this reason, many email platforms and applications have built-in spam filtering tools that help reduce the flow of junk mail. While these are useful, sometimes they are not enough and you need to go one step further to protect yourself.
Today, I am going to demonstrate how to do this using the anti-spam tools provided in your cPanel.
Is Email Spam Really That Big of A Deal?
If you have been using email for a long time, you may have become immune to the frustrations of spam messages. But that doesn’t change the fact that they are still incredibly annoying, especially for a business.
And unfortunately, your business email will most likely receive far more spam than a typical email because it is widely accessible.
Think about it, do you have a Contact Us page? You probably should, and it should contain your email address. You will be bombarded with requests to collaborate, trade backlinks, and SEO marketing teams looking to reach out.
Not to mention your typical junk mail that every email seems to get.
Why is this so problematic? Well, you can set your email up to receive a variety of notifications. This can range from payment receipts to support questions.
Typically, you need to respond to these as quickly as possible, and having spam mail get in the way is going to slow you down.
How to Protect Your Email Against Spam
Your cPanel provides numerous features that you can take advantage of. Spam filters are one of those and setting them up is reasonably straightforward.
That said, you do need to have created an email address before you can configure it.
Note: For all GreenGeek customers, the SpamAssassin in cPanel is active by default. You cannot disable it.
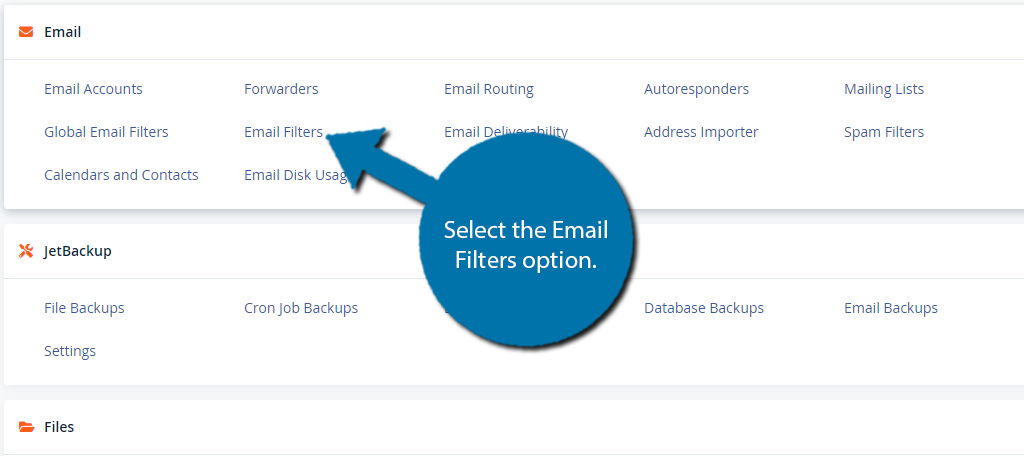
Step 1: Access the Spam Filters in cPanel
Begin by logging into your cPanel account, and locate the Email section at the top. Click on the Spam Filters option.
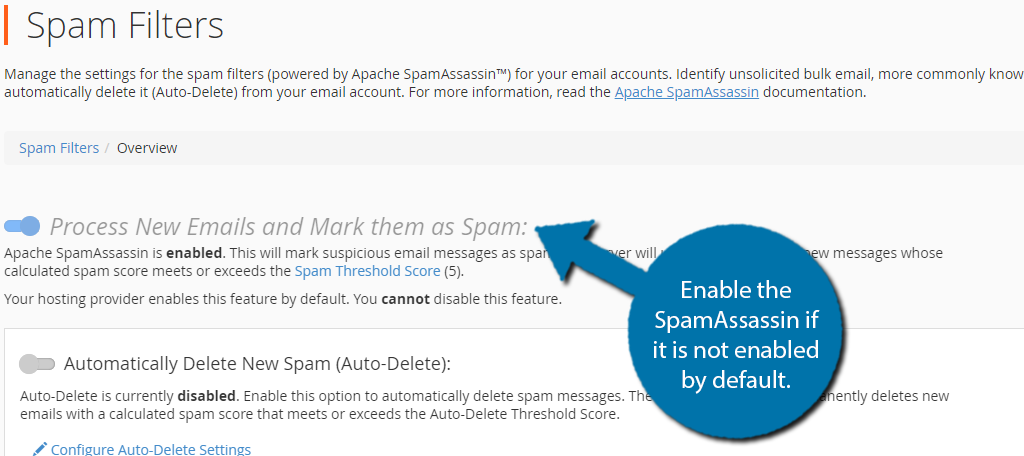
The Spam Filters section allows you to configure the Apache SpamAssassin settings of your account. By default, your web host may enable it so that the SpamAssassin works immediately and processes all new emails for you.
If this feature is not active by default, enable it.
Aside from this, you have two other options to deal with spam. The first is to enable auto-delete and the second is to use blacklisting. These are quite easy to configure but require manual activation, so let’s begin.
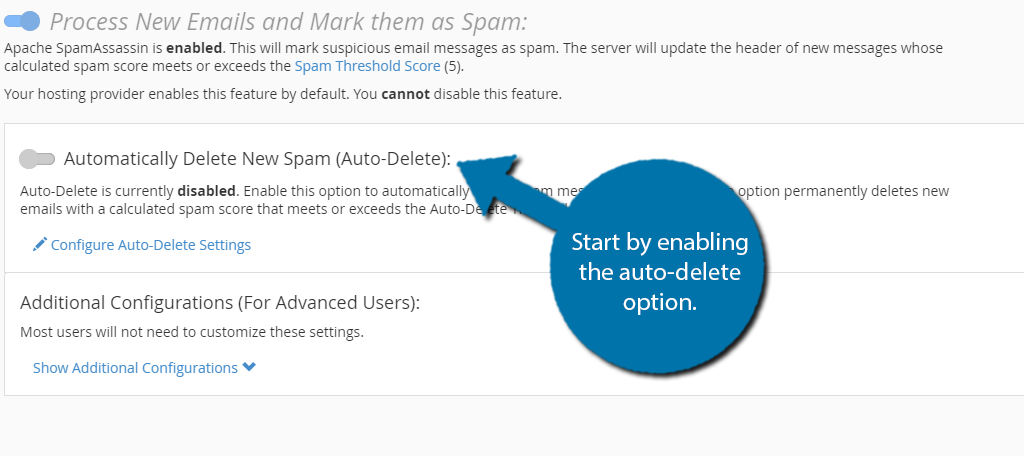
Step 2: Configuring SpamAssassin Auto-Delete
Directly below this is an option to have SpamAssassin automatically delete the emails it marks as spam. Now, this isn’t a simple decision. You see, spam filters are not 100% accurate.
There are many instances where real emails get marked as spam by accident, and having those emails permanently deleted can be a bad thing.
That said, if you do not actively check your spam folder, then they were probably already never going to get seen.
In most cases, activating the feature is harmless and can help reduce the amount of spam you visibly see, but the choice is yours. If you would rather not activate it, skip this step.
Start by enabling the auto-delete option.
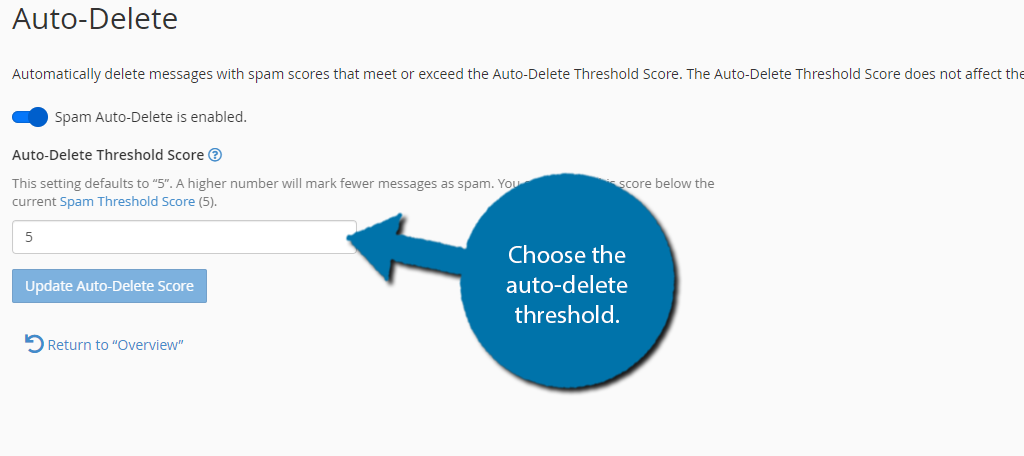
Below this, there is an option to configure the auto-delete settings. Click on this link.
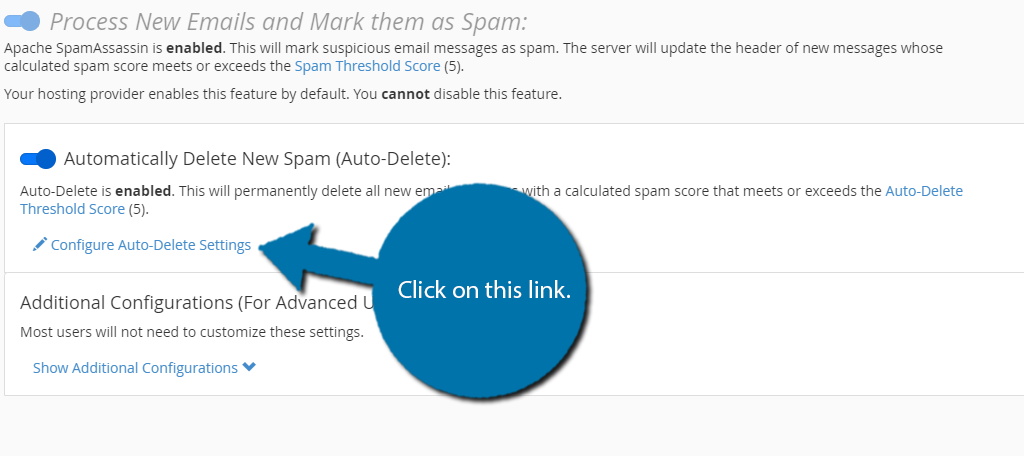
This gives you the opportunity to set how strongly the auto-delete threshold is. This is to help with false positives (messages marked as spam that are not spam). The default value is 5, but you can increase the number to make fewer emails get marked as spam.
Alternatively, you can lower the value to mark more messages as spam. I personally recommend the default value, but the choice is yours.
If you need further help understanding this score, click the “Spam Threshold Score” link.
Step 3: Configuring SpamAssassin Whitelist and Blacklist
A more involved method you can take is to manually blacklist certain email addresses. For instance, if you continuously receive emails from a specific address, you can blacklist it so they can never send you another one…to that particular email address.
That said, they could make a new address and bypass this, so the effectiveness is not really that amazing for those dedicated to spamming you.
On the flip side, you can whitelist certain emails, so they are never considered spam.
This is great for automated messages from your own site of tools, or if you just notice that certain emails are being flagged as spam that shouldn’t be.
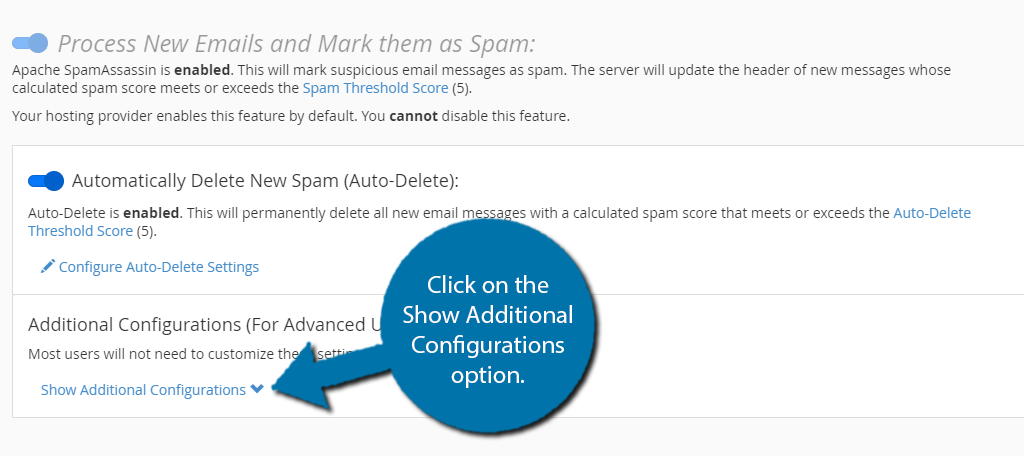
You can find these options at the bottom in the advanced settings section by clicking on the Show Additional Configurations option.
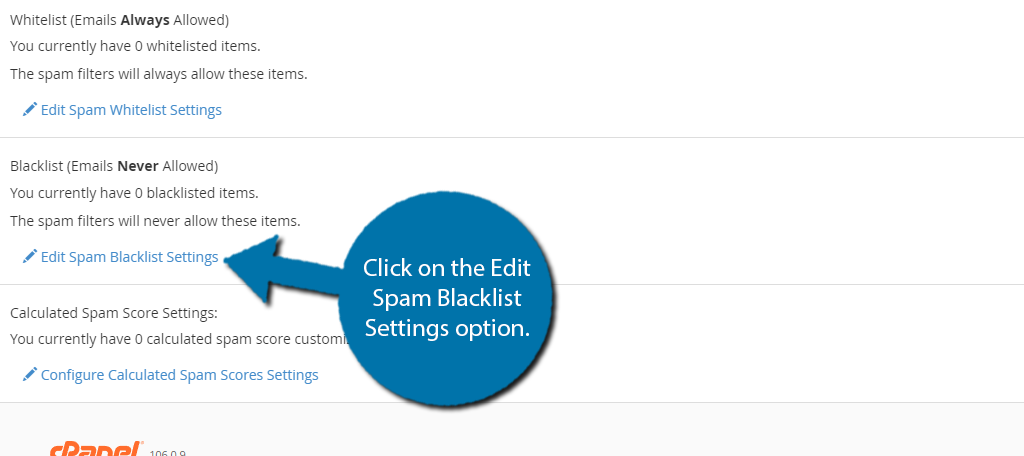
You’ll see two options, one for whitelisting and one for blacklisting. Adding and removing addresses is identical for each one, so I’ll just demonstrate blacklisting. Just be aware the effects are opposite to one another.
Click the Edit Spam Blacklist Settings option.
Click on the Add A New ‘blacklist_from’ Item option. This will make a textbox appear so that you can enter an email address. You actually have two options you can enter.
The first is to add a specific email address to block. For instance, you might want to block [email protected] because they constantly send you spam emails despite requesting to be removed from their list.
This is pretty straightforward but limited in its usefulness. Alternatively, you can block email messages from an entire domain. In this case, you could type “*@ggexample.com” into the box.
Note the asterisk before the “@” symbol.
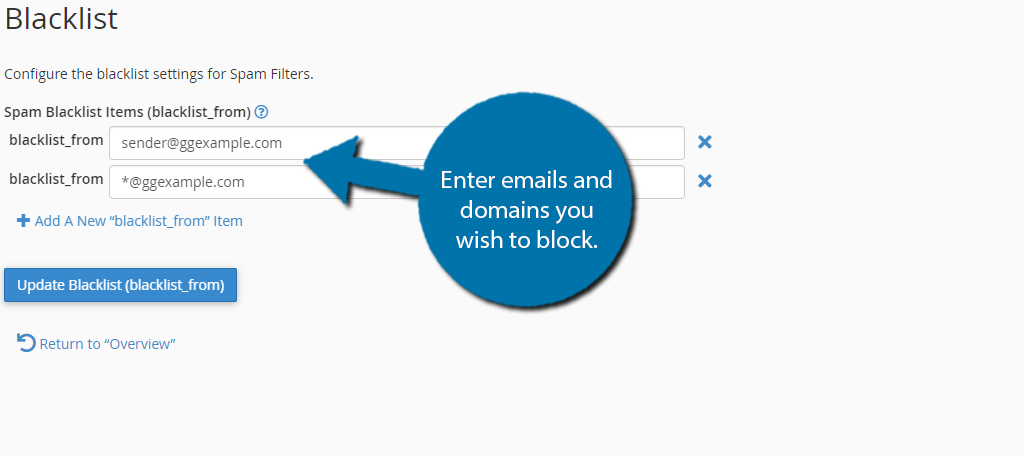
This would block every email that comes from the “ggexample.com” domain. I only recommend doing this for domains that are specifically only sending spam mail to your account.
Do not use it to block popular domains like Gmail, Yahoo, Outlook, etc. as this can block real people from contacting you unless that is your goal.
Click the “Update Whitelist (whitelist_from)” or “Update Blacklist (blacklist_from)” button to save your entries.
Then just click on the “Update Blacklist” button to finish. The process is identical to whitelisting.
By following these steps, you should reduce the amount of spam on your email account. That said, it’s impossible to fully protect any account from spam, as spamming entities find new ways to get around these systems.
It’s a never-ending battle.
Stop Spam From Clogging Up Your Inbox Today
Spam emails are a big business. In fact, it’s so big that nearly half of all emails are actually spam. And that’s because spammers can earn a lot of money. In fact, estimates say they could earn around $7,000 a day.
As you can imagine, many people pursue this in hopes of getting rich quickly. Yet the reality is that it inconveniences just about everyone trying to use email as a communication platform.
For this reason, email platforms invest billions into anti-spam tools to help improve the experience. Don’t waste another day deleting spam yourself. Use the tools at your disposal to reduce spam.
How many spam emails do you get every day? What did you choose as a spam threshold?
