Websites are getting bigger, and that makes it harder for users to find what they are looking for. As such, the navigation menu needs to be great to enhance the user experience. One way to do this is to add icons to your menu in WordPress.
Many icon symbols have become universal and can help users locate site areas even if they do not speak the same language. One of the best examples would be the Home image icon. If you see a house icon next to an item, you just know this takes you to the homepage.
There is evidence to support how logos and icons are more recognizable than actual text. Thus, it is only natural to add them in WordPress. Today, I will demonstrate how to do this with the Menu Image plugin and with CSS.
How to Add Icons to Menus in WordPress
While there are several ways to add icons to your navigation, the two simplest are to use a plugin or use CSS.
The first method will be focusing on the Menu Image plugin. This plugin simply adds a library of icons you can use on your menus and buttons in WordPress. It has hundreds to choose from in the FontAwesome library.
The second method is the more traditional method, which is to add the icons yourself using CSS. While you can get away with mostly copying and pasting code, I’d really only recommend this if you understand CSS.
In either case, let’s begin with the plugin method.
Method 1: Using Menu Image
Menu Image is an icons plugin for WordPress. It simply gives you access to a library of icons you can use for menu items on your website. It is worth pointing out that it can also add them to buttons, but this is locked behind the Pro version.
Overall, this method is the easiest way to add icons in WordPress and only takes a few minutes to complete.
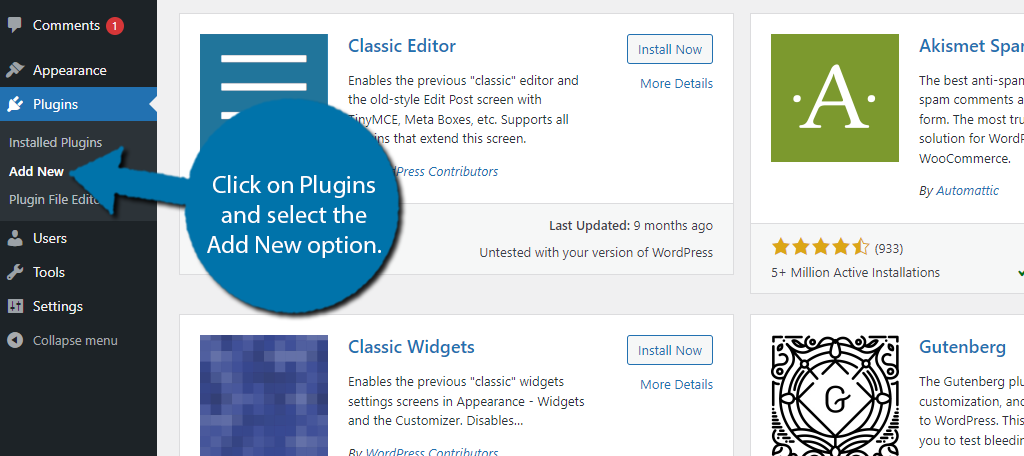
Step 1: Install Menu Image
Click on Plugins and select the Add New option on the left-hand admin panel.
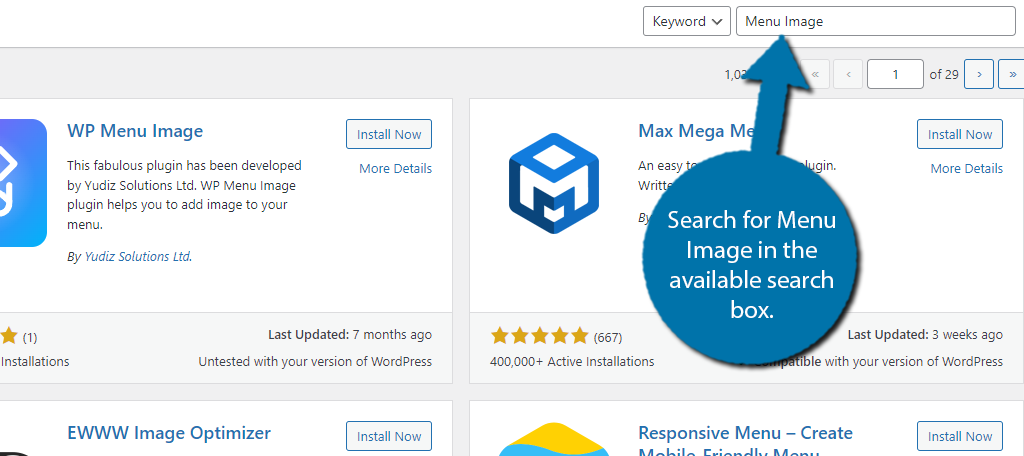
Search for Menu Image in the available search box. This will pull up additional plugins that you may find helpful.
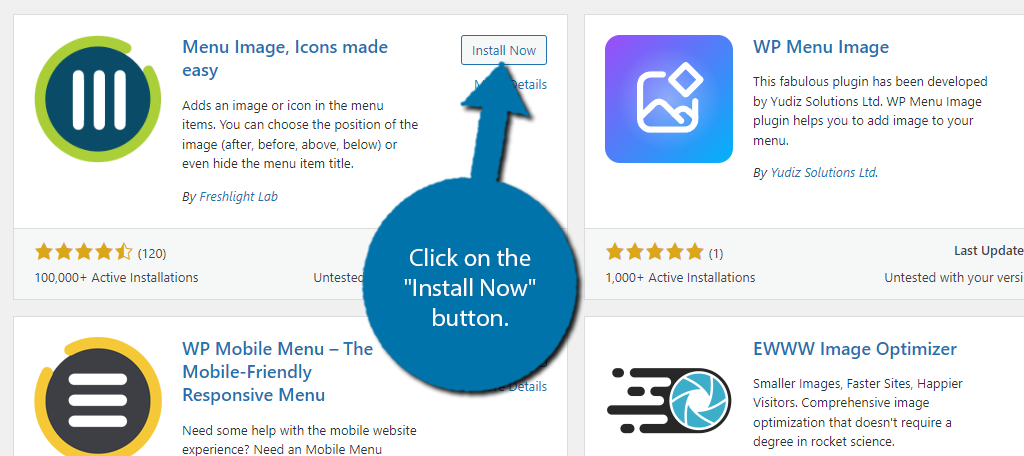
Find the Menu Image plugin and click on the “Install Now” button and activate the plugin for use.
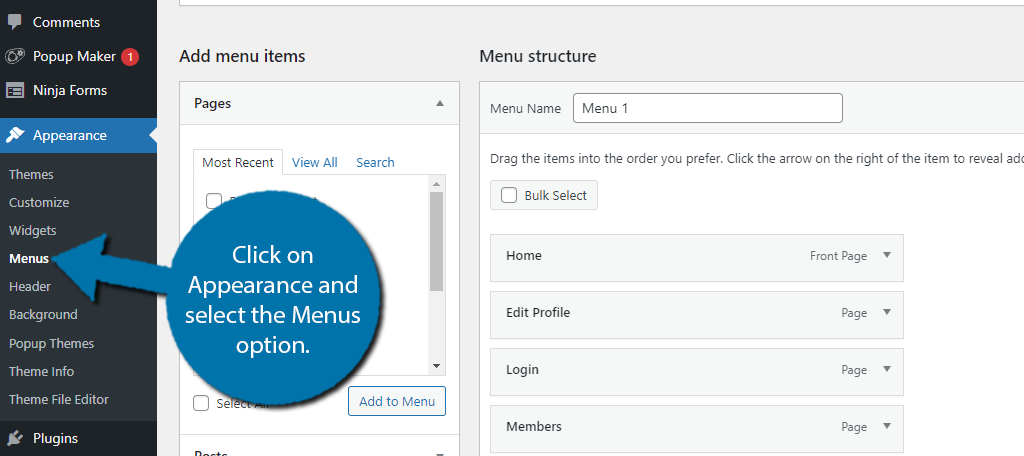
Step 2: Add Icons to Your Menu
The plugin works right after activation. This guide assumes that you have already built a menu and are just looking to add icons to it. If you need help creating a menu from scratch, check out our guide for doing so.
Click on Appearance and select the Menus option.
Hover over a menu item that you would like to add an icon to. You should see a “Menu Image” button appear. Click on it.
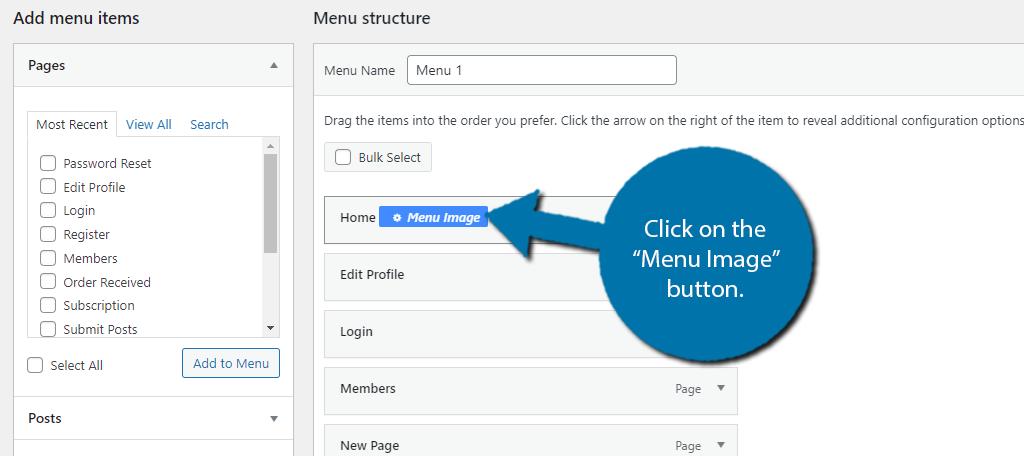
This will open up a popup menu that contains all of the plugin options. You have a choice to upload your own image icon or to just use the ones in its library. We are going to focus on the latter because it is simpler.
Note: To actually set an image as an Icon, just click on the Set Image link and select one from your media library.
The first thing you need to do is tell the plugin you want to use an icon and not an image by selecting the Icon option.
When you select this option, you will see the icon library appear at the bottom. You can choose from the DashIcon or FontAwesome libraries. Simply select the icon you want to use.
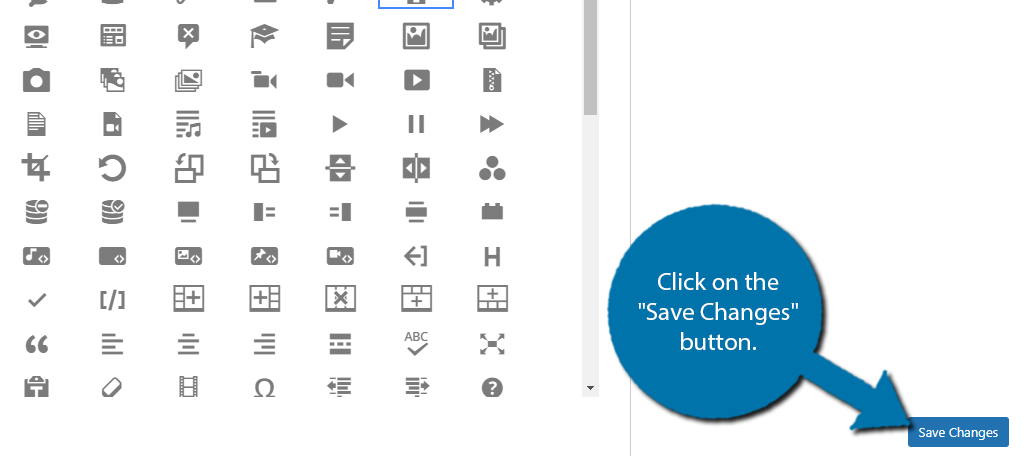
In my case, I am selecting the Home Icon. That’s it. Click on the “Save Changes” button to save the icon to that menu item.
You can then view that menu on your site to see the icons you added.
And that’s all there is to add menu icons in WordPress. Adding a nav picture like a house, can help users make choices at a glance, thus it is very effective. However, this is just one way to do it.
Method 2: Adding Menu Icons in WordPress with CSS
When it comes to designing anything in WordPress, CSS is always involved. Thus, it should come as no surprise to learn you can use it to add icons to your menu items in WordPress. That said, it is more complicated to add icons than just changing a color.
As such, the code you will have to write is a bit more involved. Luckily, it is still pretty simple. All the code in this tutorial does is choose an image you’ve added to your media library and use that as an icon. It is very easy to do.
The only thing you’ll need to do is enter a unique CSS class name if you plan on adding multiple icons and change the image URL in the code to the appropriate URL. I am working under the assumption you already know how to add an image to the media library.
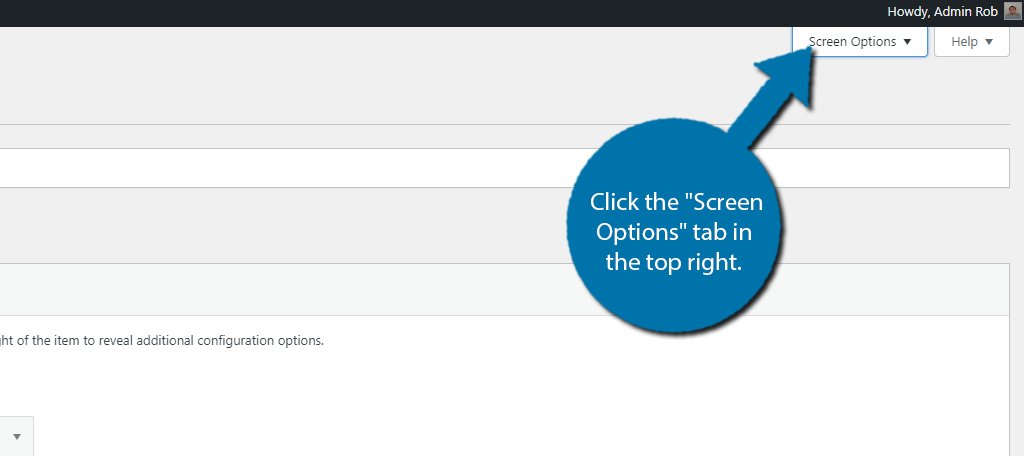
Step 1: Enable CSS Classes
The first thing you have to do is enable the CSS classes. This is what will allow you to create menu icons in the first place. All this involves is checking a simple box.
To do this, go to the menu area and click the “Screen Options” tab in the top right.
Check the “CSS Classes” box. This will automatically add a new function within menu items that you will need to add icons with.
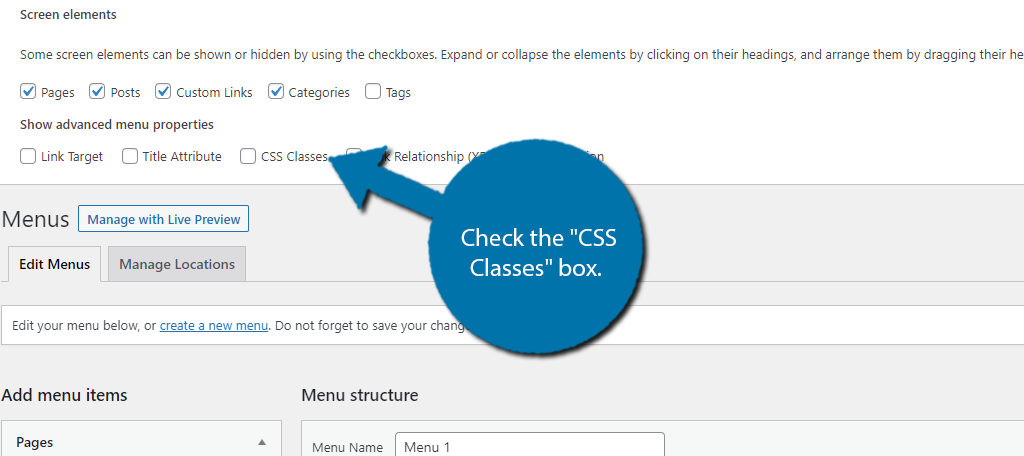
If you now expand a menu item, you will see a new field option for CSS Classes. Since the actual code used to create an icon can be pretty hefty, all we need to do is enter the name of the function. In this case, I will just enter “homebutton” into the box.
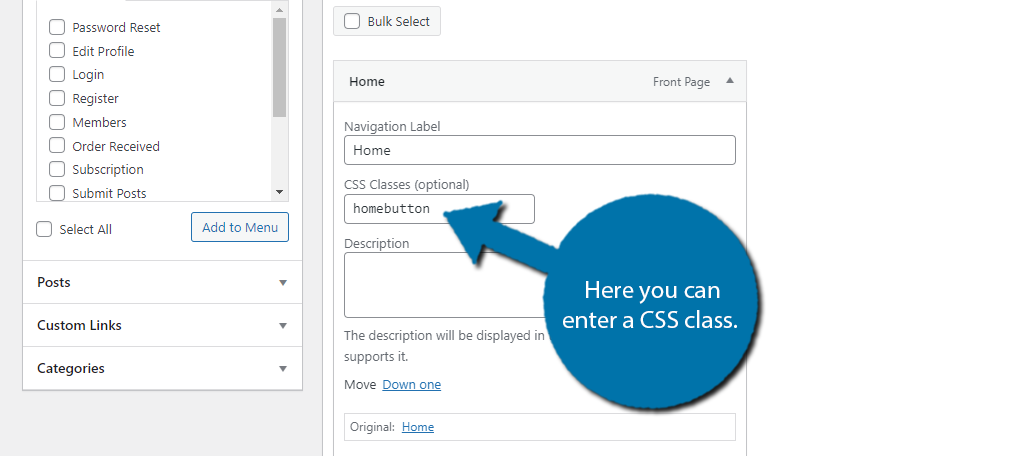
You can leave this blank until you know for sure what you named your CSS class which we will cover in this next step. Be sure to save any changes to the menu you made before continuing.
Step 2: Create A Menu Icon with CSS
Now it is time to actually get into the coding aspect of this tutorial. I’m not going into details of how to write the code, but only where the code should be placed and how to get there. Although there will be some sample code to help you create a home icon.
In this case, you need to create a CSS class in your themes style.css file. You can access this from WordPress, your cPanel, or through an FTP. In this example, I will do it directly from WordPress as it is the quickest way.
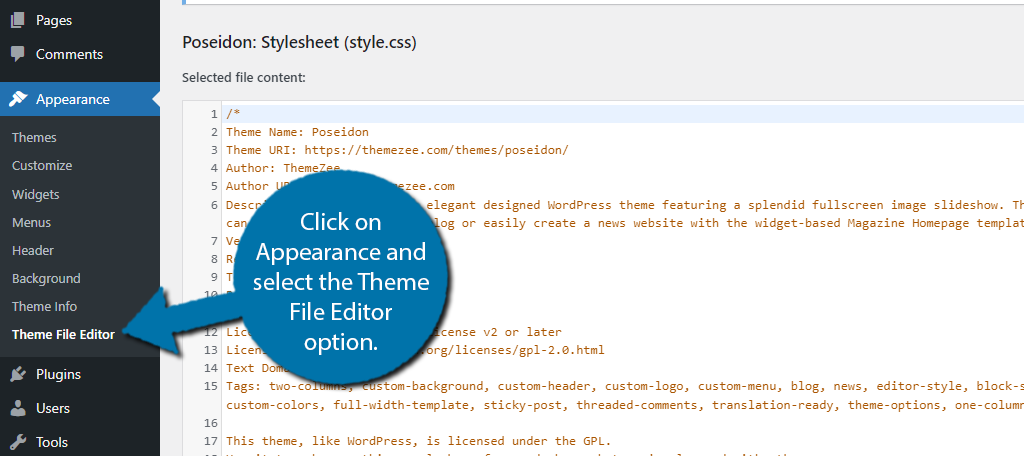
Click on Appearance and select the Theme File Editor option.
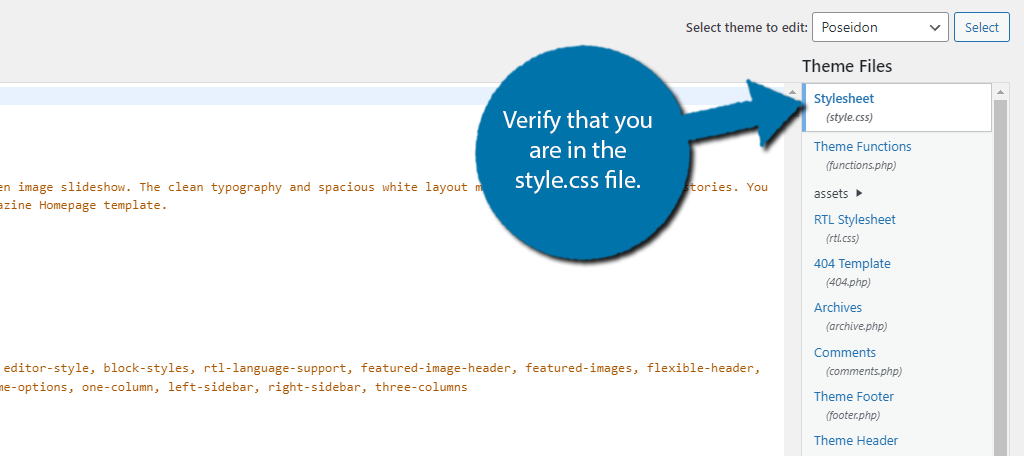
If you access the WordPress editor from the Appearance section, Stylesheet should be the first file that is available by default. To check this, look on the right-hand side and ensure you are in the style.css file.
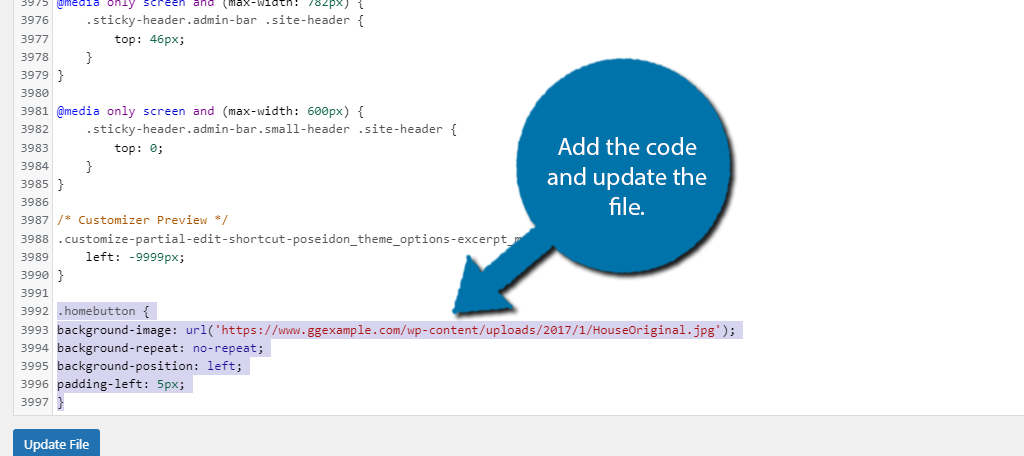
In the case of creating a home icon for your menu, the code looks like this:
.homebutton {
background-image: url('https://www.ggexample.com/wp-content/uploads/2017/1/HouseOriginal.jpg');
background-repeat: no-repeat;
background-position: left;
padding-left: 5px;
}
There are two things that need to be changed in this code.
The first is the “homebutton” name. This is the CSS class that we entered in the CSS class field in the menu earlier. You can change this to be whatever you want. And if you plan on adding multiple icons, you will need a separate function for each one with a unique name.
The second is the icon image URL. This URL is for an image stored in my media library, therefore it is unique to my site. You need to enter your own image URL. This will be different for your site and needs to be changed accordingly.
Simply add this code to the bottom of the style.css file and update the file.
One problem you may run into with the above code is the size of the image, You can either adjust the size of the image itself and reupload it or customize the code to resize it for you. The size is dependent on your site, so it is different for everyone.
If you are new to web design and want to learn more about CSS, W3 Schools is a great site for teaching people how to write CSS.
Add Icons to Your WordPress Menu Today
With the right plugin or a bit of coding knowledge, you can easily add icons to your WordPress menu. Adding an icon or image to your navbar can help users quickly navigate between your main pages.
For many users, it is much easier to look for the house icon than the word “Home” itself. This gives them quick access to what they are looking for and can users who don’t speak the language your site is in.
I hope you found this tutorial helpful for adding menu icons to WordPress.
What types of icons did you add to your navigation menu? Do you think WordPress should have built-in icon options for menus?
Hello,i try with css to replace on hover the image.Is this possible?
Thank you
Yes it is, check out the “Adding Menu Icons with CSS” section of this tutorial.
Menu Image no longer works and adding the code to the CSS file doesn’t work either as of WP 5.2.1 on May 22,2019.
Thanks! We’re in the process of updating our WordPress tutorials to make sure everything works with WordPress 5.x, so this article will be updated soon.