Are you looking for a simple way to add a progress meter in WordPress? If so, you’ll be pleased to know that there is a plugin that can add one, Ultimeter. In a matter of minutes, you can build a fully functional progress meter that you can update 24 hours a day.
Today, I will demonstrate how to use Ultimeter to build a progress meter in WordPress.
What Is A Progress Meter?
A progress meter can be used to indicate the growth or development of any project. They’re commonly used for fundraisers, but you could use one to show the progress of pretty much anything that can be represented by numbers.
For example, chapters written for a book project, days until a product launch (or your baby chicks hatch).
You can also start the meter at 100% and reduce the value every day to serve as a countdown. Use it to show any milestone on a WordPress website. If you can count it, you can visualize it with a progress meter.
And to aid us in that visualization, let’s install the Ultimeter plugin.
How to Create A Progress Meter in WordPress
Step 1: Install the Ultimeter Plugin
Ultimeter is free to install, and there is a paid version that unlocks a few features. We’ll cover the basics of setting up a progress meter using the free version. The only restriction is that you need to be able to quantify what you are tracking progress wise.
This is easy to do when there is a goal in mind, such as a fundraiser goal, but it can be trickier for some topics that are not easy to quantify.
Log in to your WordPress admin panel.
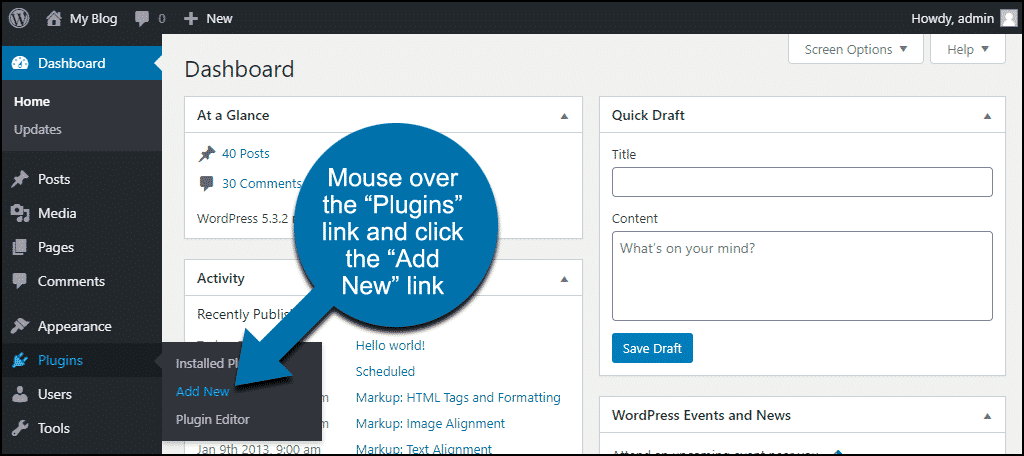
In the left column navigation, mouse over the “Plugins” link and click the “Add New” link.
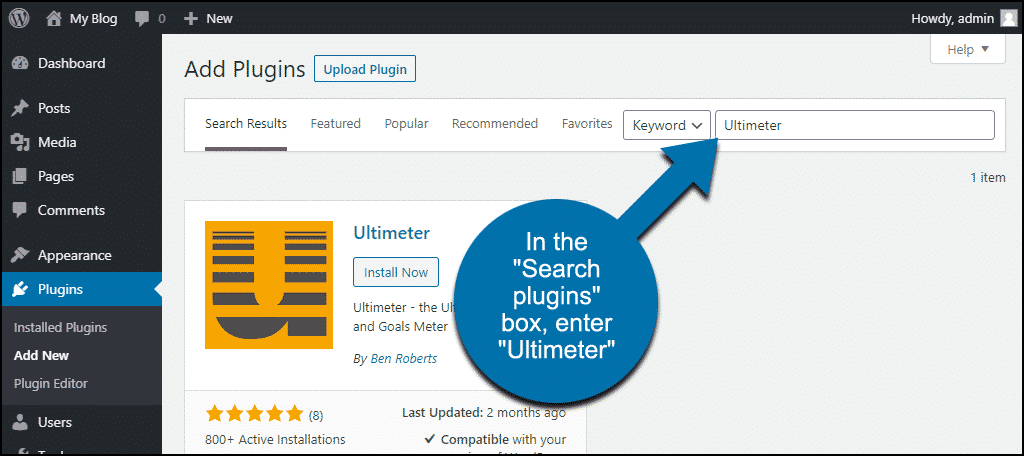
In the available search box, enter “Ultimeter.”
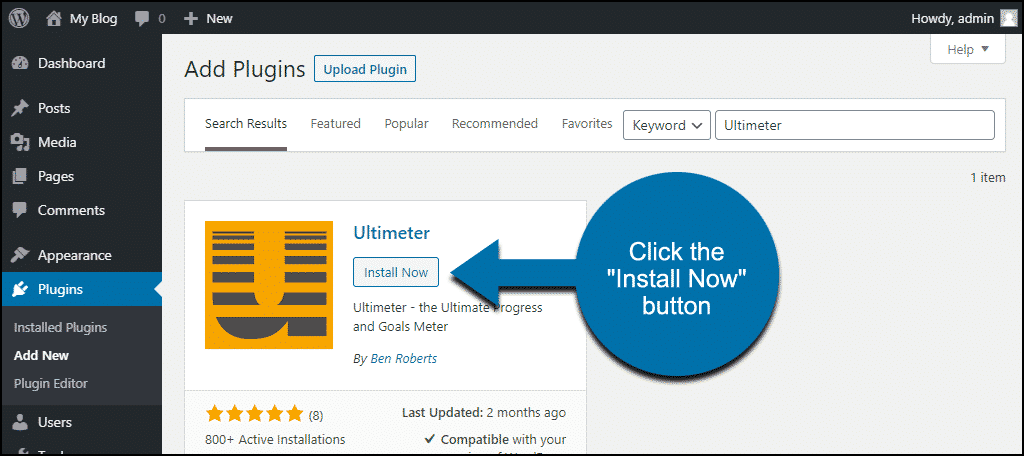
Once you have located the plugin, click the “Install Now” button.
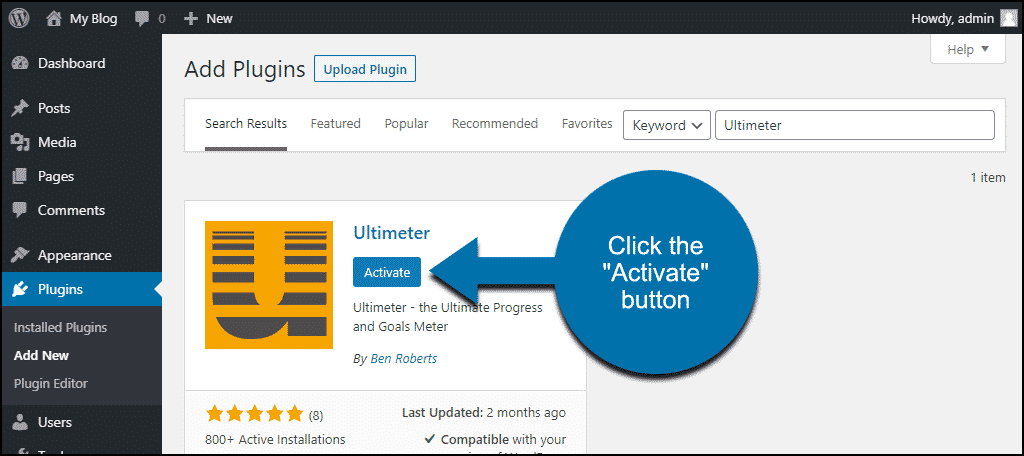
Click the “Activate” button.
Step 2: Setting Up Ultimeter
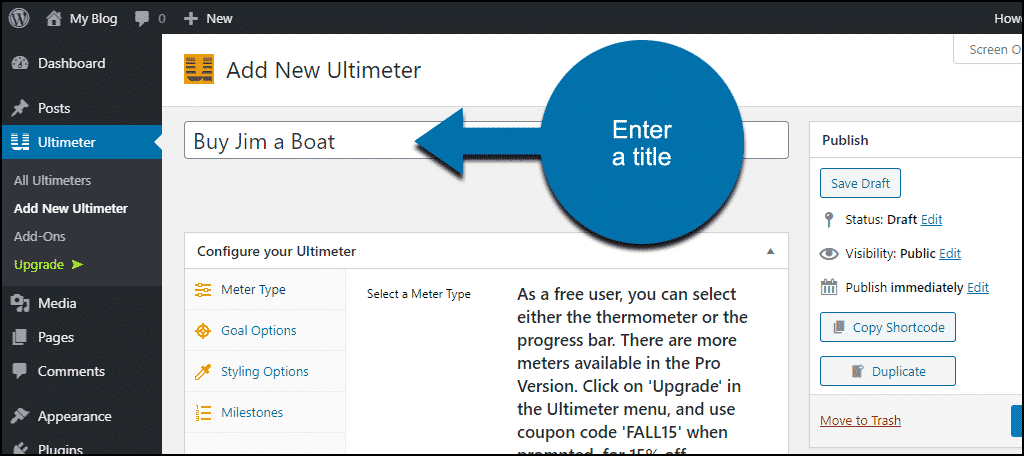
For our example here, we’ll set up a fundraiser to buy Jim a boat. I don’t know anyone named Jim, but if I did, I imagine he’d appreciate a free boat.
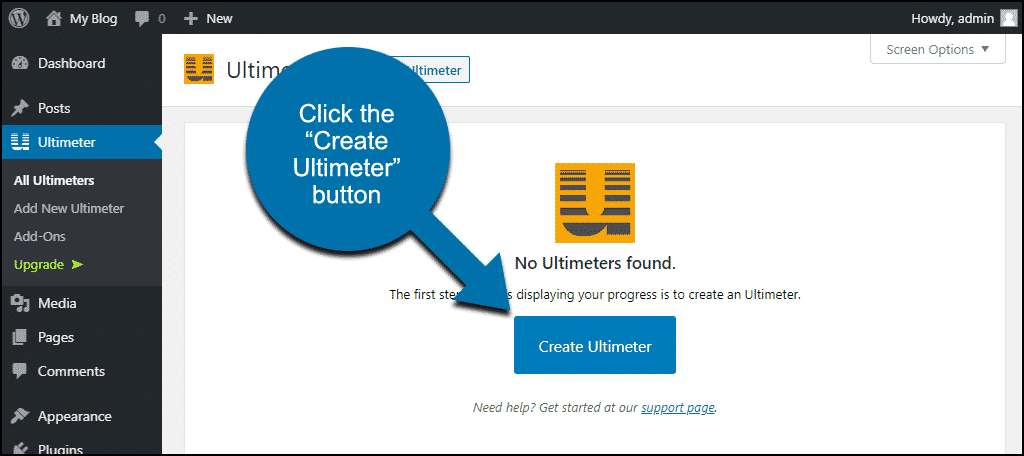
When the plugin installation is complete, you’ll be taken to an intro page for the plugin. Click the “Create Ultimeter” button to get started.
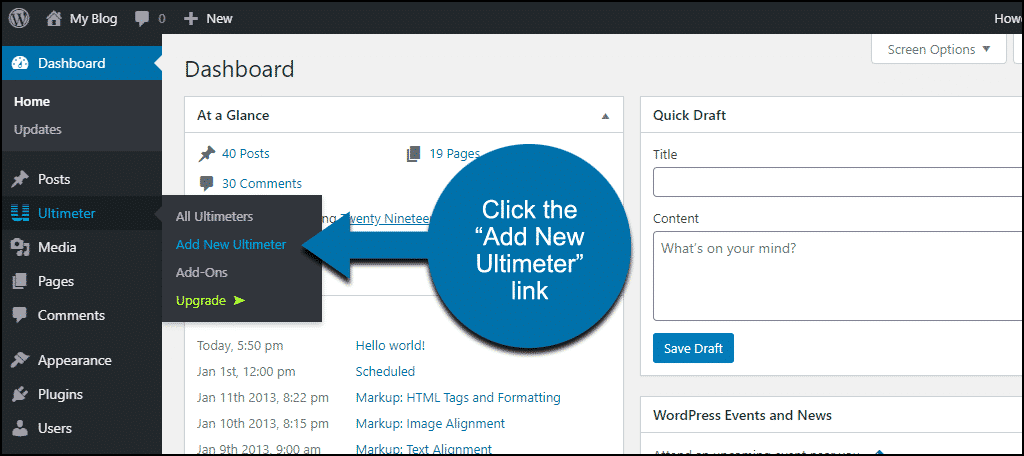
If you left that intro page after installation, mouse over the “Ultimeter” link and click the “Add New Ultimeter” link.
The plugin opens on the “Meter Type” tab.
First, give the meter a title (the title entry field is visible on all of the tabs).
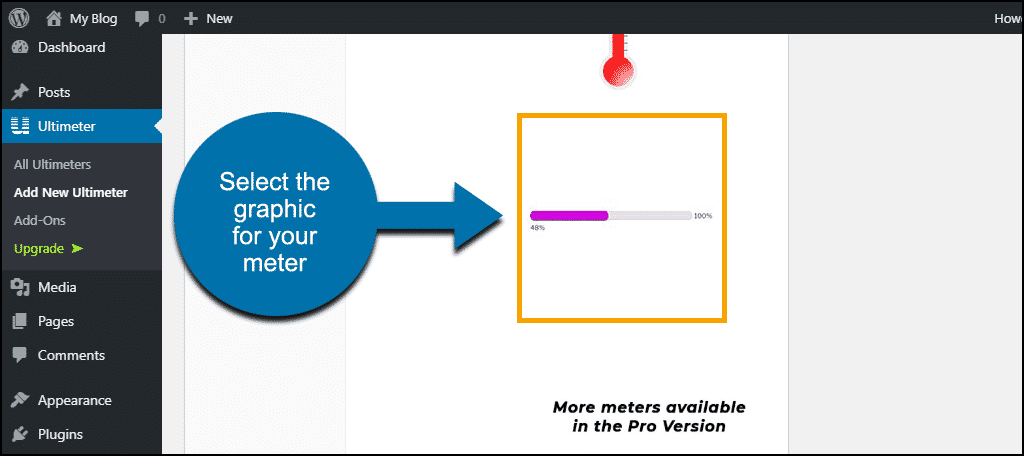
The free version of the plugin lets you choose between a horizontal goal progress bar or a vertical thermometer-type meter. For Jim’s boat campaign, I’ll select the horizontal indicator by clicking the image.
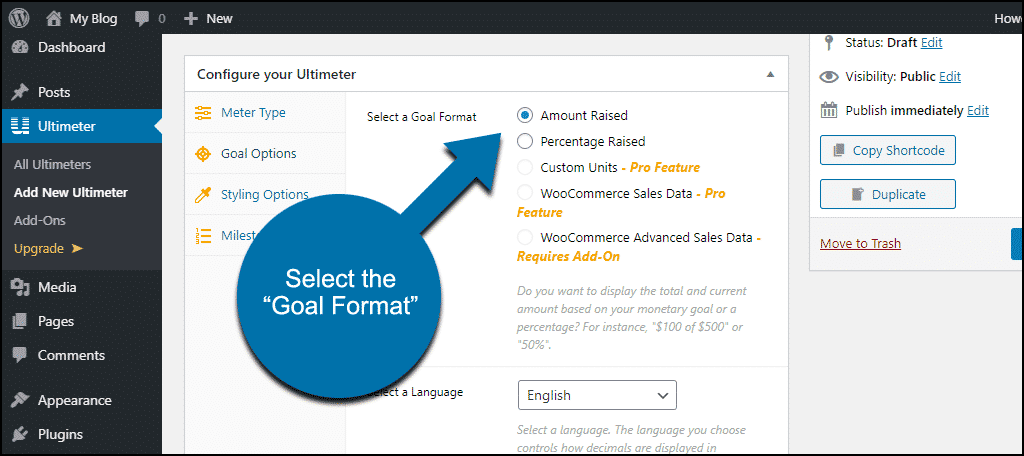
Now click the “Goal Options” tab.
The “Select a Goal Format” options are “Amount Raised” or “Percentage Raised.”
Choose the language and currency for your meter from the “Select a Language” and “Select a Currency” drop-downs.
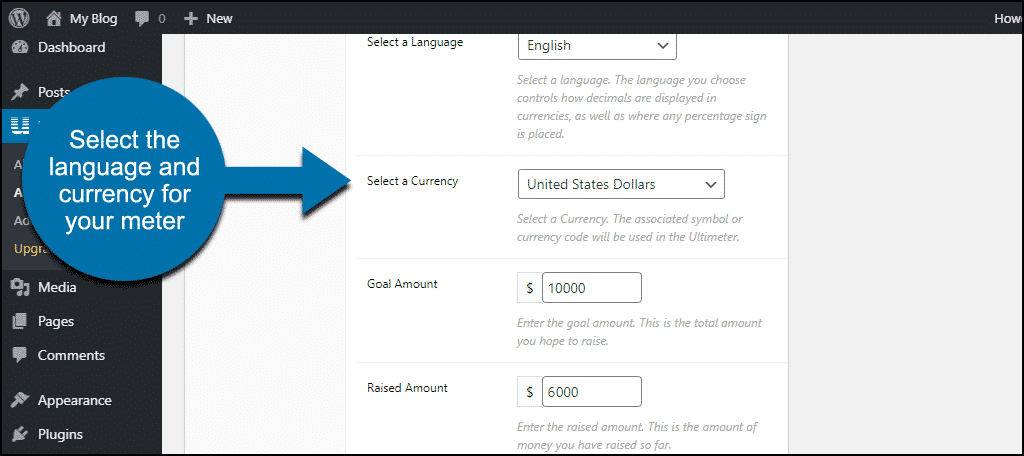
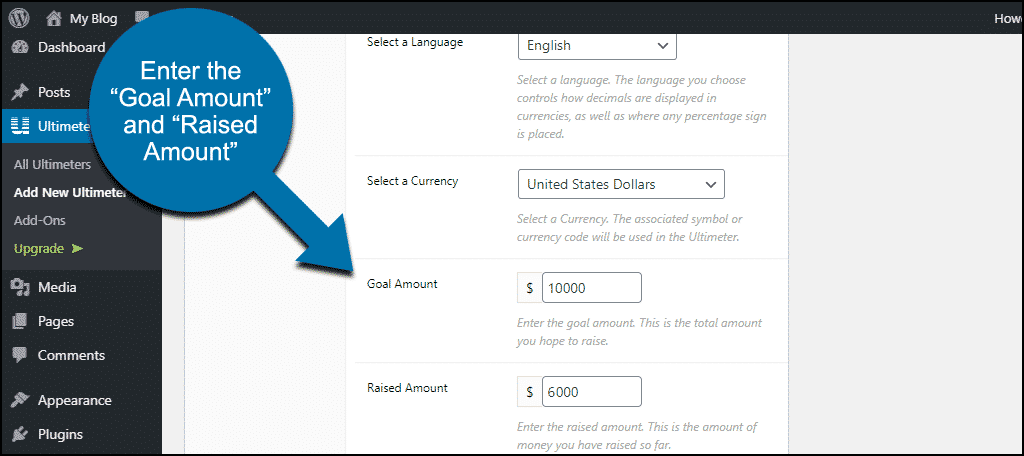
The “Goal Amount” is the amount we’re trying to raise for Jim’s boat. The “Raised Amount” is how much we have so far.
Note: If you are not using this plugin for a fundraiser, consider entering an amount of 100. This allows you to easily influence the percentage of the meter. For instance, if you are 16% done, that means you have received 16 dollars. It makes the math simple.
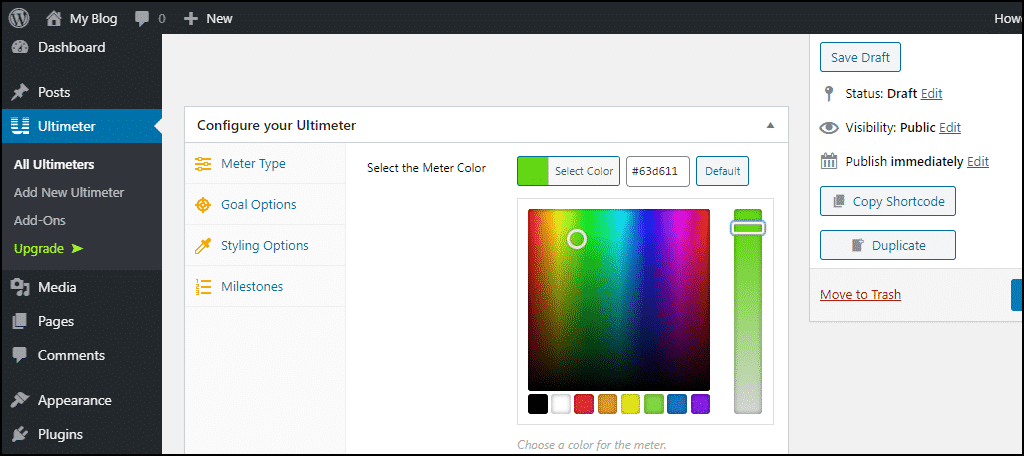
You can change the meter color using the color picker on the Styling Options tab. Make sure to consider what background color you are using when selecting the color. If the progress bar is hard to read, it will be less effective.
We won’t go into the “Milestones” tab since that feature isn’t available in the free version of the plugin.
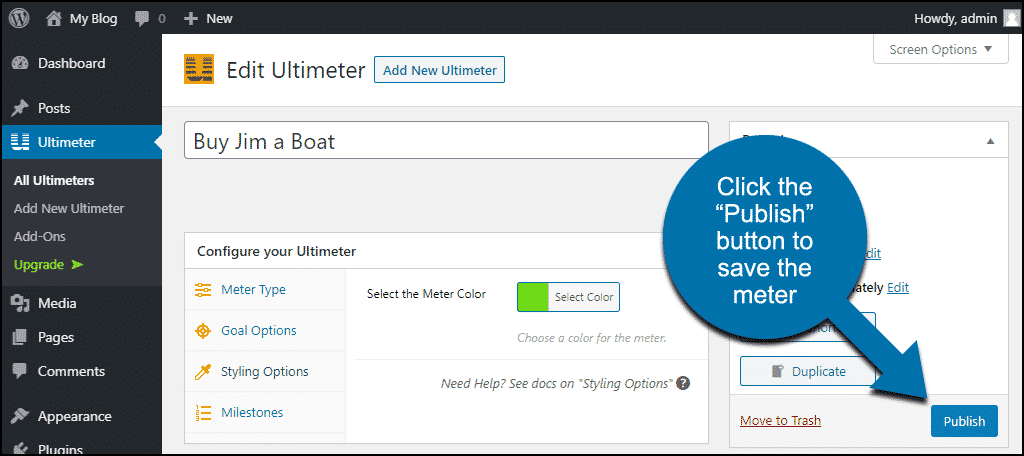
Click the “Publish” button to save the meter.
Step 3: Display the Meter in a Page or Post
Now that our meter is ready to go, we have to add it to a post or page. You can edit an existing post or page, or create a new one.
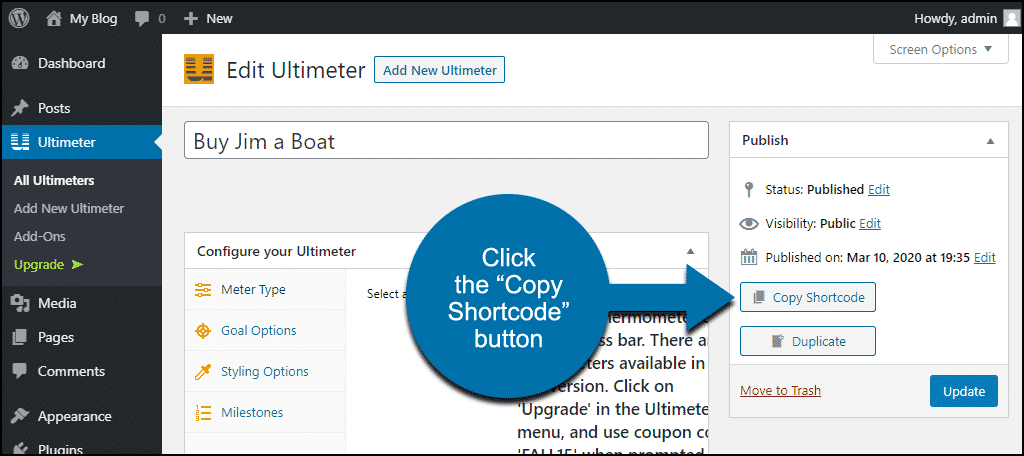
I’m going to create a new page for this tutorial. But before we create the page, we have to copy the meter shortcode.
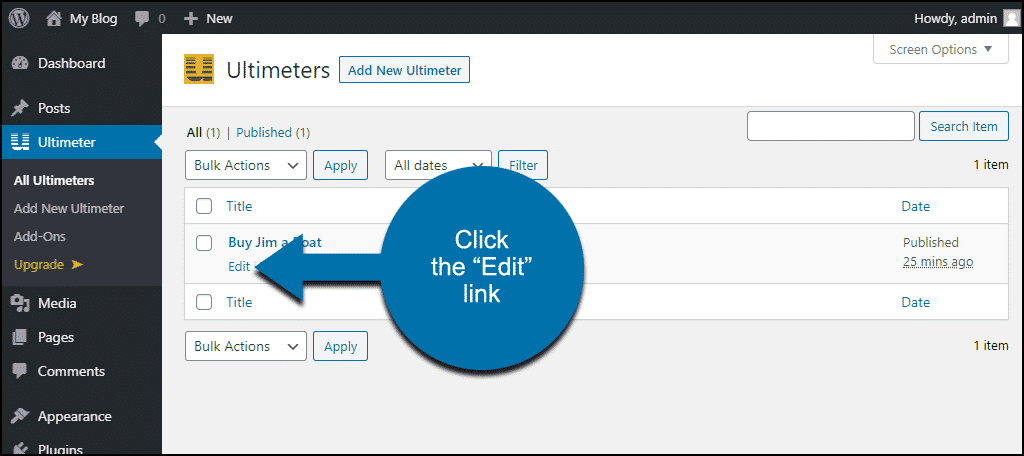
In the left column navigation, mouse over the “Ultimeter” link and click the “All Ultimeters” link.
Click the “Edit” link for your meter.
Click the “Copy Shortcode” button.
Note: There is also a Duplicate option. This allows you to make a copy of the progress meter. This is useful if you plan on utilizing multiple progress bars on a website.
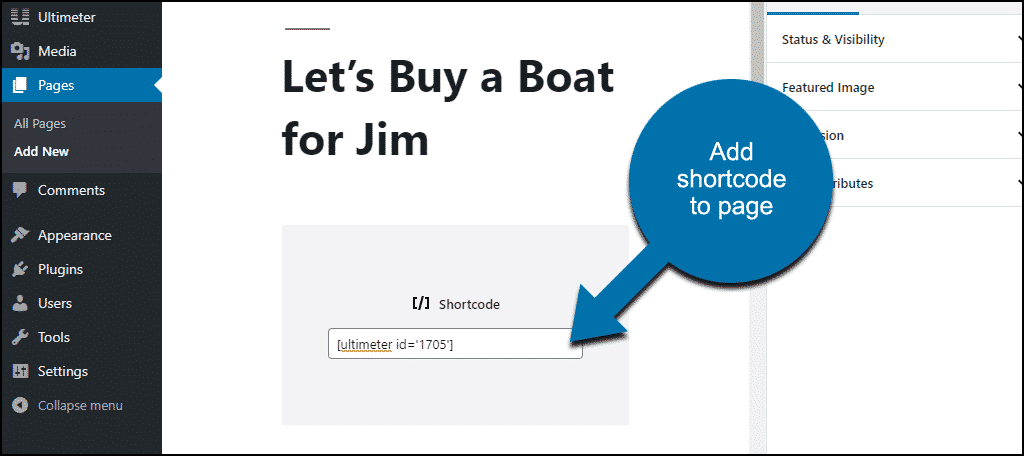
Now we can create a new page and add the shortcode to the page where we want the meter to appear. If using the Gutenberg editor, you will need to add a Shortcode block and if in the Classic editor, you can add the shortcode anywhere in the visual editor.
Now when we save the page, our meter is there.

It looks good, but you are not quite done yet, you will now need to learn how to update the progress bar. Luckily, updating the progress bar takes less than a minute.
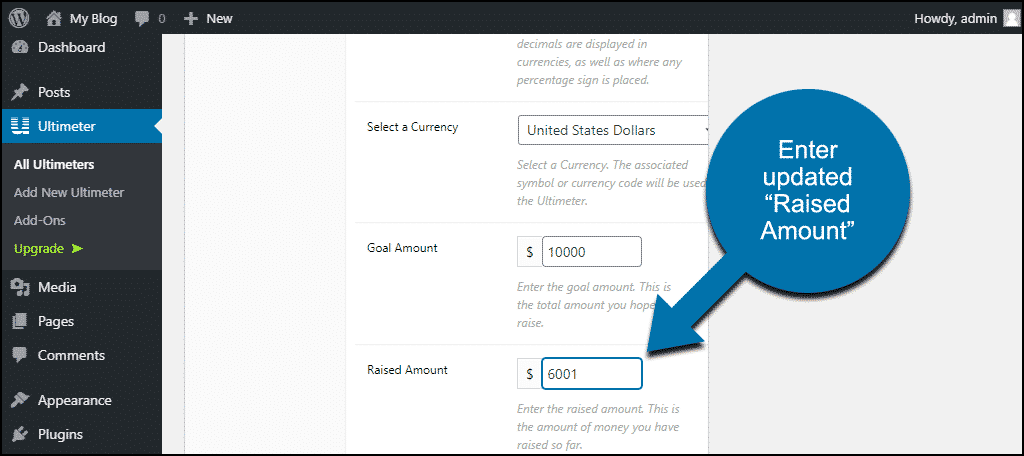
Step 4: Updating the Progress Toward Your Goal
The entire point of a progress meter is to show how close you are to reaching a goal, thus, you are going to need to regularly update the value. Whenever you have an updated value for your meter, enter it in the “Raised Amount” field.
To do this, go back to “All Ultimeters” in the WordPress admin navigation and click the “Edit” link for your meter.
Click the “Goal Options” tab, and in the “Raised Amount” section, enter the new value.
Note: If you were following my advice of adding 100 as the goal amount for non-fundraiser progress meters, you would enter the percentage increase. So if you wanted it to increase by 5%, you would enter 5.
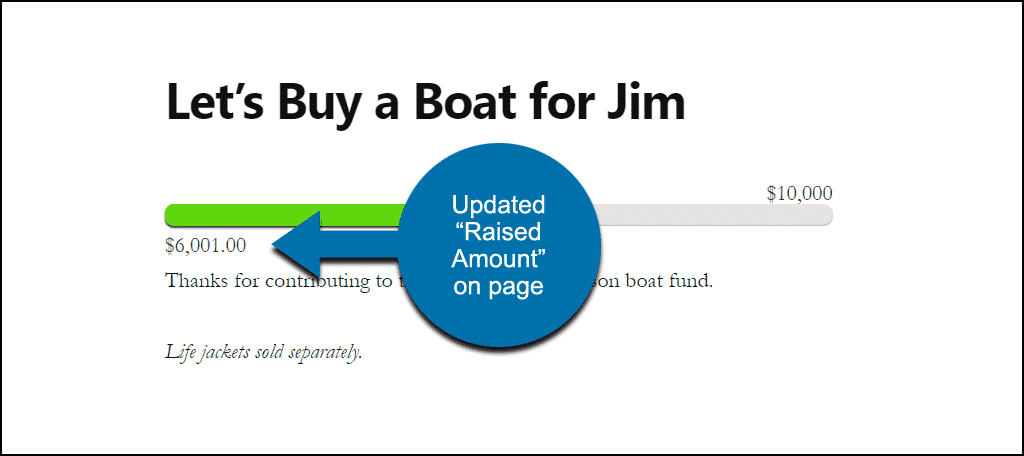
Click the “Update” button for the meter, and the new value will show up in the meter. It will update the progress meter automatically, as shown below:
You can also edit the other meter settings, even changing from the horizontal bar to the goal thermometer image.
If you uninstall the plugin, pages and posts that used the plugin will be affected:
- Meters created by the plugin will be deleted.
- The plugin shortcodes will stop working, so the shortcodes themselves will be displayed anywhere they were used.
Congratulations on learning how to set up a progress meter in WordPress by using the Ultimeter plugin. Remember to update the progress bar regularly.
Using Visuals May Stimulate Contributions
We learn and process a lot of information visually, so it only stands to reason that a fundraiser progress meter could spark people to contribute. By doing so, they can actually “move the meter” themselves.
If you’re using a meter to show the progress of something other than contributions, the visual element will increase interest and keep people coming back to check for changes. Now that you’ve seen how easy it is to add a progress meter to any WordPress site, hopefully, you’ll find a good reason to use one.
Have you ever tracked the progress of a project on your website? Are there methods you like to use other than what we’ve shown here? Let me know in the comments!