Do you need to add a new admin account to your WordPress website? Admin accounts are very important in WordPress and are the first targets of hackers. They have privileges to change and see everything on your website. Only trusted individuals should have access to an admin account and the login information should never be shared.
Sadly, if you are hacked, it is likely that the hacker will remove your admin account when they are done. This will slow down your recovery speed but can be fixed. This means that you will have to manually add another admin account. The easiest way is to edit your MySQL database in phpMyAdmin. Today, I will demonstrate how to add an admin user to your WordPress database using phpMyAdmin.
When Do You Need to Make Admin Accounts
Admin accounts have free access to every aspect of your website and are extremely powerful accounts. Only trusted individual should have these accounts and even then there should not be many of them. If the wrong person gets access to one of these accounts it can be catastrophic, which is why these accounts are the targets of hackers.
Regardless of your reason for needing to make a new admin account, it is important to always have one. Administrator accounts are one of many user accounts and can be added to WordPress, but sometimes you can get locked out of your website and that’s where phpMyAdmin comes in. It gives you access to your MySQL databases. You can then write directly to the databases and add a new administrator or any other type of account.
How to Use phpMyAdmin to Add an Admin User to the WordPress Database
Today, I will demonstrate how to add an admin user to your WordPress database using phpMyAdmin. This method is best used when you have lost access to your WordPress website. PhpMyAdmin is also commonly used to change passwords when an account is locked out of the website. You will need access to your website’s cPanel, which is provided to you by your web hosting provider.
Accessing phpMyAdmin
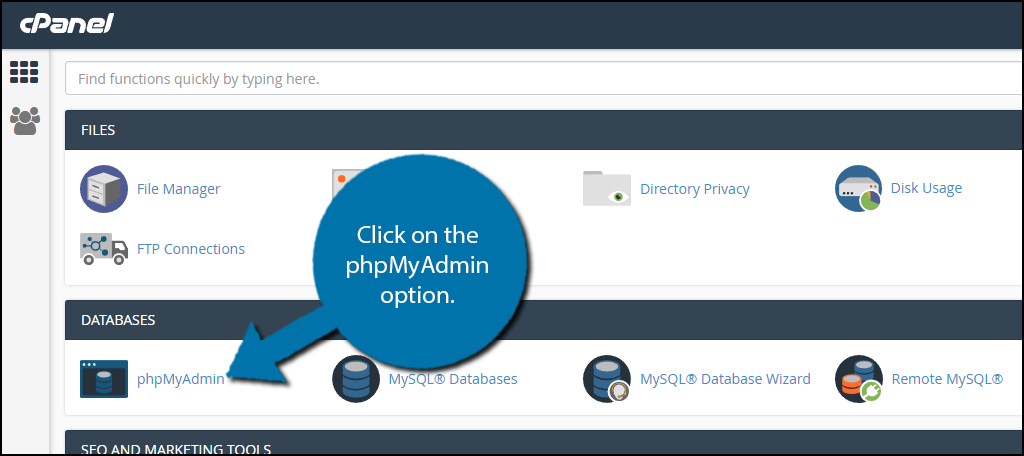
Log into your cPanel and click on the phpMyAdmin option under the Databases section.
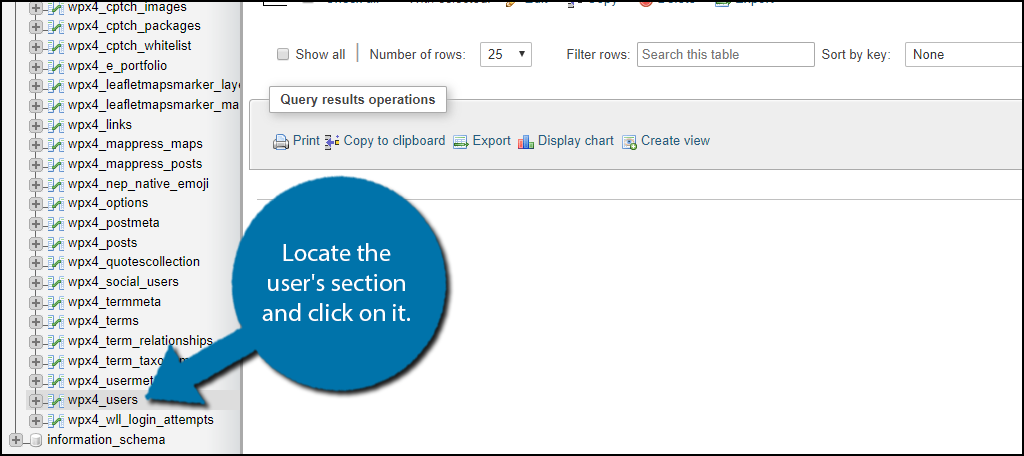
On the left-hand side of the page, you will see various databases among other options. Expand the database for your website. Locate the user’s section and click on it. It is likely named wp_users, but in my case it is wpx4_users.
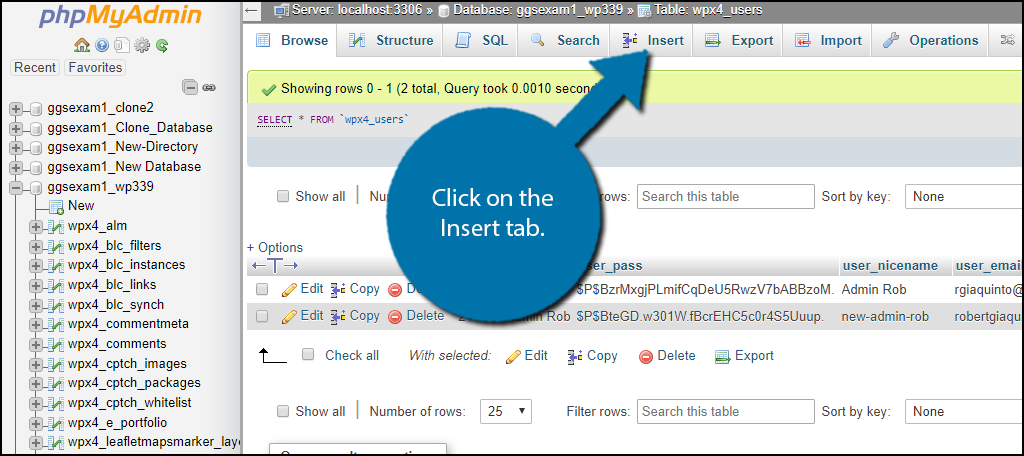
You will know you are on the right page if you can see all of your website’s users. Click on the Insert tab to begin adding a new administrator account.
It is now time to create your new account.
Creating an Admin Account
Creating an admin account or any other account is extremely easy. You need to fill out all of the necessary entry fields. There is an option to enter a Function and a Value. The only option that will have the function changed is the user_pass option. I will outline what each entry field does.
- ID: Pick any number you would like. You will need this number later so write it down.
- user_login: This is the User Name you will log in with. Create one and write it down so you do not forget it. You will need it everytime you log in.
- user_pass: Unlike the rest of your entries, you will need to select the MD5 Function. Create a password that you will use to log into your website with. Write it down in case you forget it.
- user_nicename: Enter the nickname you would like WordPress to recognize you as. If you are not sure, use the same as your username.
- user_email: Enter your email address. Make sure you have access to this email address.
- user_url: Enter your websites URL.
- user_registered: Enter the current date and time.
- user_activation_key: Leave this blank.
- user_status: Leave it at the default value of 0.
- display_name: This is the name you will see on the account. It will most likely be the same as your nickname entry.
Once you have entered all of the information, click on the “Go” button.

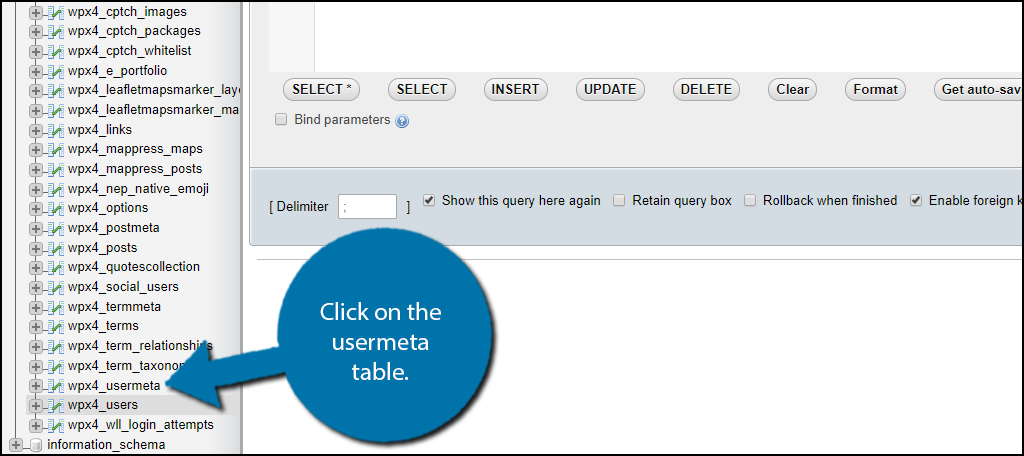
The first step of your user creation is now complete. Now that all of this information is entered, you must now enter information into the wp_usermeta table. In my case, the table is called “wpx4_usermeta”, but it should be above your user’s table.
Click on the Insert tab, the same as before. You will now need to enter more information. Luckily, there are only 4 entries.
- unmeta_id: This field will auto-generate when you click on the “Go” button, so leave it blank.
- user_id: Previously you entered a number into the ID field, enter the same number now.
- meta_key: Enter wp_capabilities.
- meta_value: Enter a:1:{s:13:”administrator”;s:1:”1″;}.
Click on the “Go” button. Click on the Insert tab again.
- unmeta_id: This field will auto-generate when you click on the “Go” button, so leave it blank.
- user_id: Previously you entered a number into the ID field, enter the same number now.
- meta_key: Enter wp_user_level.
- meta_value: Enter 10
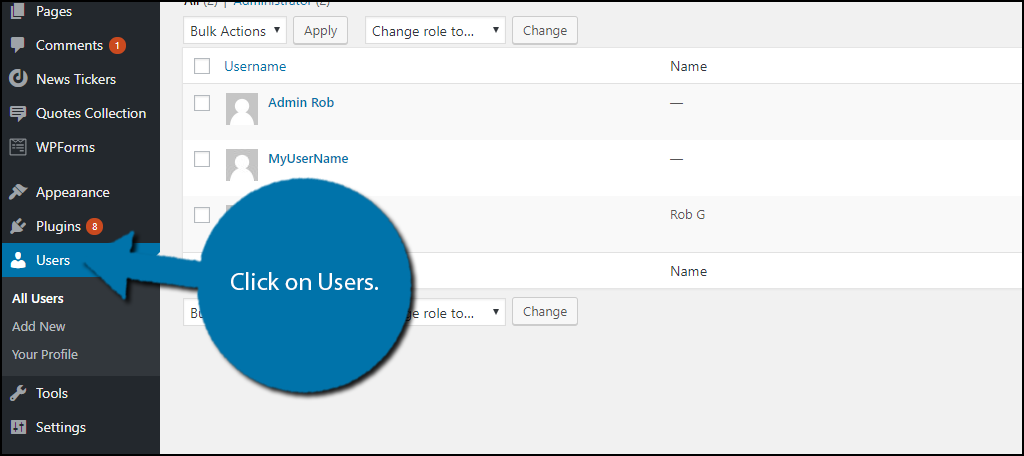
Click on the “Go” button. Your account creation is now complete. You should now be able to log into WordPress with your new account. If it does not work, then you may have entered the information wrong somewhere along the way. Once, you have logged in, click on Users.
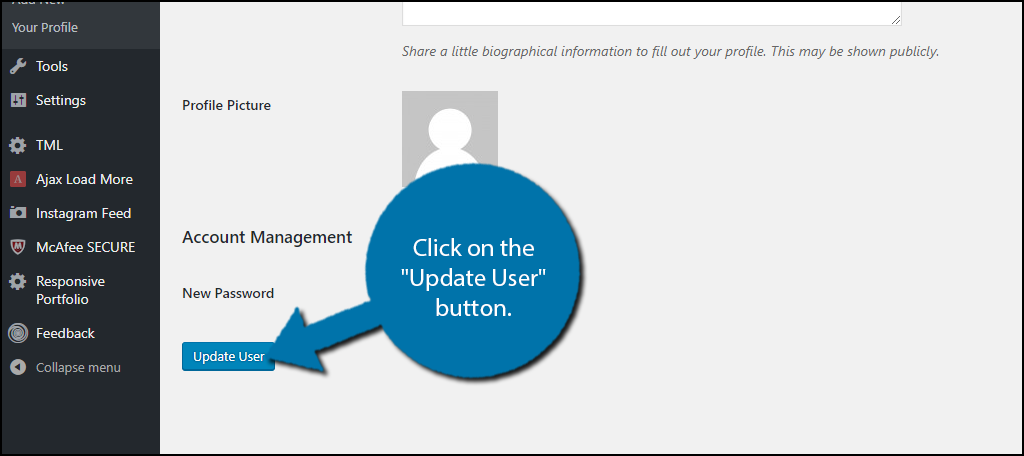
Select the new username you just created. Scroll to the bottom and click on the “Update User” button. This will update some settings that were left out. You can use this time to enter any other information you may have forgotten.
Congratulations, you have successfully created a new administrator account. You can repeat these steps to make more accounts if necessary.
Always Have a Backup Plan
Getting locked out of your website sucks and can seriously impact your website. This is especially true when there is a problem happening and guess what, more than likely you will be locked out during a crisis. Whatever can go wrong will go wrong, but what’s important is how you react to it.
Response time is what matters most when a crisis occurs. Being able to swiftly create an account or alter account credentials is a very important skill. You may even want to create a backup account in case something goes wrong with the first.
How long did it take you to create a new admin account? Why did you need to make a new admin account?
I followed these instructions and also adjusted the wp_ prefix to my current installation.
The new admin user cannot login, however I see the session tokens. Any ideas what could be wrong?